Back Of Fist Drawing
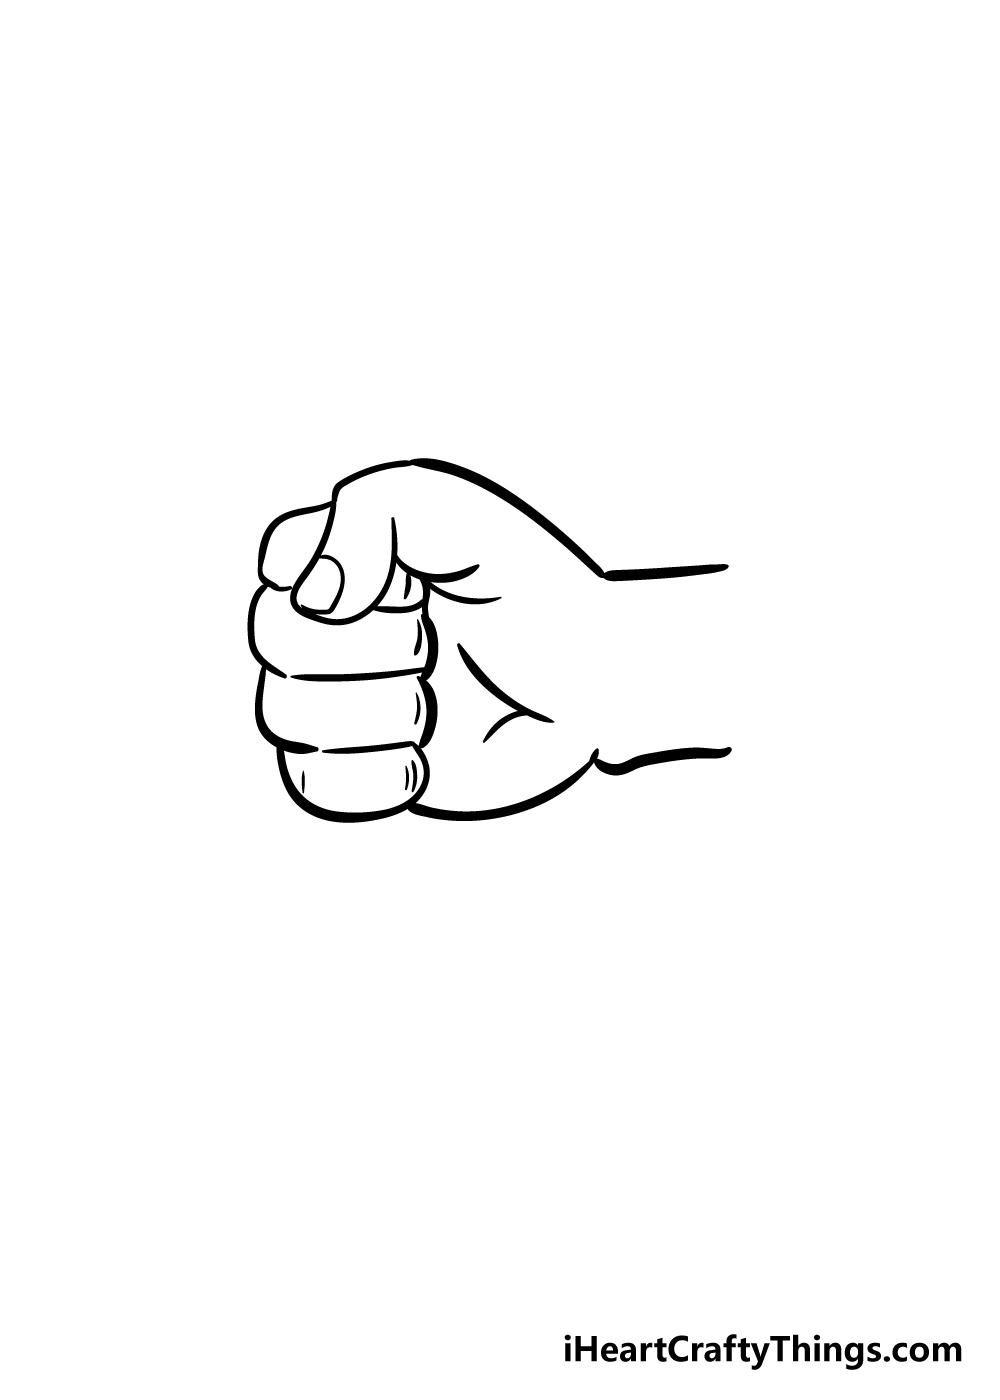
Back Of Fist Drawing - Start by drawing the basic shape of the fist. This makes the fist look like it’s coming forward toward the viewer, and can be very dynamic and exciting! Mikiko (fumino kimura), the kind florist, helps akito express his love through flowers. Web learning how to draw a fist is very simple! Through a little repetition, you'll have the perfect fist drawing. And even better, you don't have to do every st. From the starting point, draw a u shape down. Web learn how to draw a clenched fist easy. Next, extend a set of parallel lines from the top of the first set. The knuckles on the back of the hand also get more pronounced as the fingers tighten into the fist, making the.
Think about the hand’s anatomy and the way the tendons and muscles flow into the wrist. First, start by drawing a line for the thumb. And even better, you don't have to do every st. Web one of the most dynamic and powerful hand positions is the clenched fist. Pay attention to the shading and perspective to create a realistic look. The best part of this is: Let us begin by making a circle on the page with our pencils, to demarcate the area in which we will draw the fist. Next, add a line for the ring finger and another for the little finger. Web the trailer introduces audiences to new characters who add depth to the story, brought to life by seasoned and emerging actors. Price as of may 10, 2024, 4:00 p.m.
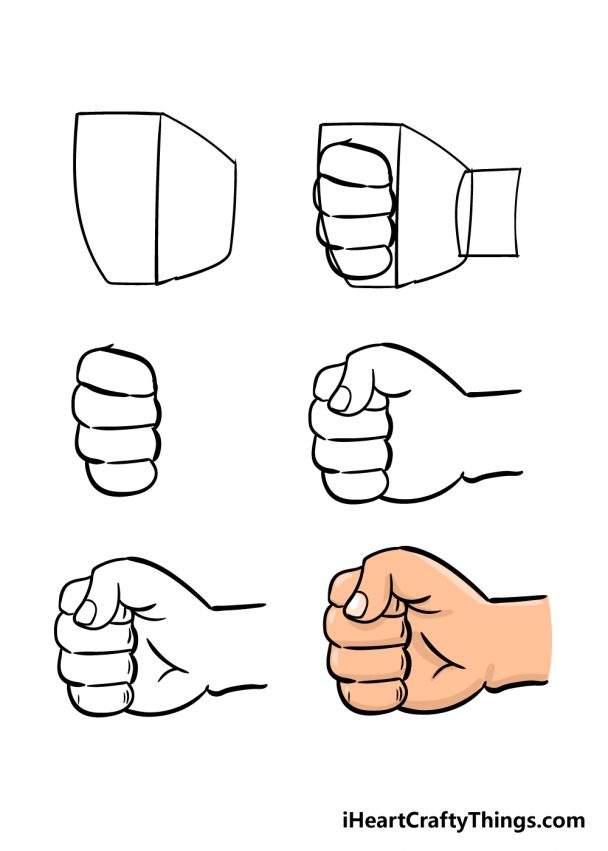
Then continue drawing the other two parts of a thumb, repeating the method that was applied to the first part of a finger. This will make your drawing look more realistic overall. Next, draw a rectangle shape at the bottom of the oval. To begin, we will sketch the basic shapes that make up a fist. Mikiko (fumino kimura), the kind florist, helps akito express his love through flowers. Start by drawing the basic shape of the fist. Step by step how to draw a fist. The best part of this is: Then, add two lines for the index and middle finger. Then, add a smaller oval at the top of the first oval for the knuckles.
Fist Drawing How To Draw A Fist Step By Step!
The thumb should be shorter than the other fingers and have a more rounded appearance. This oval shape represents the main part of the hand. To give your fist more depth and dimension, start shading. Web art by greg smallwood/oni press. Make sure that the ovals are connected and form the shape of a closed fist.

Fist Drawing Reference and Sketches for Artists
Remember that the thumb’s position will depend on the angle and perspective of the fist in your drawing. Then, add a smaller oval at the top of the first oval for the knuckles. Make sure that these lines are slightly curved so that they look natural. This rectangle will be the base of the fist and helps to define the..
How to draw a Fist Step by Step, Holding something, Bump
Think about the hand’s anatomy and the way the tendons and muscles flow into the wrist. In other words, they have to be perpendicular to the border line. Remember, the fingers are clenched in a fist, so they should be drawn in a way that shows. Web in this easy hand drawing tutorial i explain, step by step how to.

back of fist drawing Google Search in 2019 Drawings, Cartoon
Remember, the fingers are clenched in a fist, so they should be drawn in a way that shows. The best part of this is: In other words, they have to be perpendicular to the border line. Web in this tutorial, we'll show you how to draw the fist and palm using straight lines. Start with the fingers, thumb, and knuckles.

How to draw a fist step by step Artofit
Next, draw a rectangle shape at the bottom of the oval. Repeat this process for the middle finger, ring finger, and pinky finger. Then, add two lines for the index and middle finger. While anolini are closely associated with parma — where they’re. Remember that the thumb’s position will depend on the angle and perspective of the fist in your.

fist drawing down back Google Search Drawing fist, How to draw
Once we have established the circle on the page, we will then. First, start by drawing a line for the thumb. Web one of the most dynamic and powerful hand positions is the clenched fist. Step by step how to draw a fist. Draw a line over, down and up.

Fist Drawing How To Draw A Fist Step By Step!
Draw the main part of your fist. Pay attention to the shading and perspective to create a realistic look. Then continue drawing the other two parts of a thumb, repeating the method that was applied to the first part of a finger. Web in this tutorial, we'll show you how to draw the fist and palm using straight lines. Connect.
Fist Drawing How To Draw A Fist Step By Step!
Web one of the most dynamic and powerful hand positions is the clenched fist. To give your fist more depth and dimension, start shading. The first step in drawing a fist is to sketch the basic outline. It would still be recommended to use a pencil for this step, as you will have lines going over the fingers in later.

How to Draw a Fist Step by Step Easy Drawing Guides Drawing Howtos
Next, use simple lines to outline the fingers. To begin, we will sketch the basic shapes that make up a fist. Web draw attention to the wrist and easily connect it to the fist. We shall use the pencil guide that you drew in the previous step of your fist drawing to start adding some fingers to your picture. The.

Fist back Drawing fist, How to draw hands, Hand art
Make sure that the ovals are connected and form the shape of a closed fist. Draw a large oval for the palm of the hand. Web draw attention to the wrist and easily connect it to the fist. Draw a rectangle as a bite on the back of the. Now, draw the thumb on the side of the hand, partially.
To Begin, We Will Sketch The Basic Shapes That Make Up A Fist.
The best part of this is: Right underneath that draw another knuckle. Web this feature is more pronounced when the fist is viewed from the front. Web in this easy hand drawing tutorial i explain, step by step how to draw a clenched fist by analysing the simple shapes of the hand and the cylinders the finge.
Their Ends Are Limited By The Border Of The First Part Of A Finger.
This makes the fist look like it’s coming forward toward the viewer, and can be very dynamic and exciting! Back, top, and side views. Web divide the thumb into 3 parts by drawing light lines, then start drawing 2 parallel lines. Web learning how to draw a fist is very simple!
Draw The First Knuckle Coming Out Of The Hand.
Remember that the thumb’s position will depend on the angle and perspective of the fist in your drawing. Ayaka miura (mayuu yokota) is haruna’s high school friend, who shows her clumsy yet heartfelt support in endearing ways. Make sure that these lines are slightly curved so that they look natural. Remember to leave spaces between each finger and maintain a gradual.
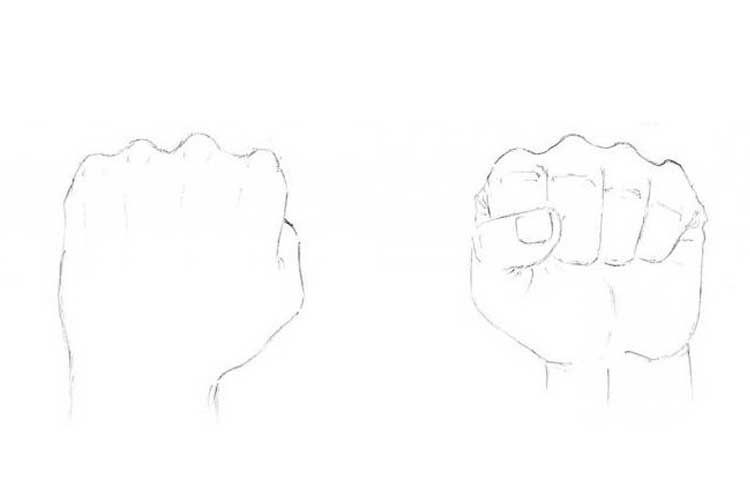
Making A Light Sketch Of The Fist.
It would still be recommended to use a pencil for this step, as you will have lines going over the fingers in later steps. Next, use simple lines to outline the fingers. Next, draw a rectangle shape at the bottom of the oval. Then, draw the middle and index fingers, which are located a little higher.