Detailed Pumpkin Drawing
Detailed Pumpkin Drawing - Then, draw a matching curved line on the right side of the pumpkin to make it round. Let’s complete our halloween pumpkin drawing by adding some color! These lines should not extend all the way down to the bottom,. First, draw a small curving stalk that extends from the center of the top of your pumpkin. Next, from each of the bumps on the top outline, create curving lines down the front of your pumpkin. Capturing the charm of autumn, the humble pumpkin emerges as a canvas begging for expression. Go over the contour and lines of the pumpkin sections with this color. Start coloring from the edge of the sketch and fill in. Web add a tail to your pumpkin by drawing a curved shape. Imagine breathing life onto paper, the lines curving and embracing to encapsulate the very essence of this iconic harvest symbol.
Web complete the halloween pumpkin drawing. With smooth lines, mark the ribs. Using two curved lines, enclose a vertical rounded shape. Capturing the charm of autumn, the humble pumpkin emerges as a canvas begging for expression. Draw the stalk and the ribs. Next, draw the pumpkin stem. Draw a curved line on the left side of the pumpkin shape. Repeat this process until the pumpkin is nearly circular in form. Web add a tail to your pumpkin by drawing a curved shape. Web in today’s tutorial, we will discover how to draw a pumpkin on paper.
Finally, let’s light our halloween. Start with some small thumbnails, and then, just as before, add a gesture line and shapes. We will go through this drawing in full detail and full instruction. Web how to draw pumpkin in easy steps for beginners lesson.tutorial of drawing technique.drawing tutorial,art tutorial youtube videoyou can watch the video at. This shape drawing can be fairly rough and can omit the smaller bends and curves in the shape. Use three short lines to enclose the rectangular stem on top of the pumpkin. We'll also give you some interesting. We are going to do two things in this step. Any areas of the pumpkin that you want to keep dark that aren't the absolute darkest spots can also be left uncarved, but don't use the marker. Go over the contour and lines of the pumpkin sections with this color.

Graphite Pencil Pumpkin Patch Fall Drawings, Halloween Drawings, Art
Draw the stem right over top of the rest of the pumpkin and then erase the lines of the ribs that are now overlapped by it. The media could not be loaded, either because the server or network failed or because the format is not supported. Protestor don hindman was supportive of the 2020 school board’s decision to change the.
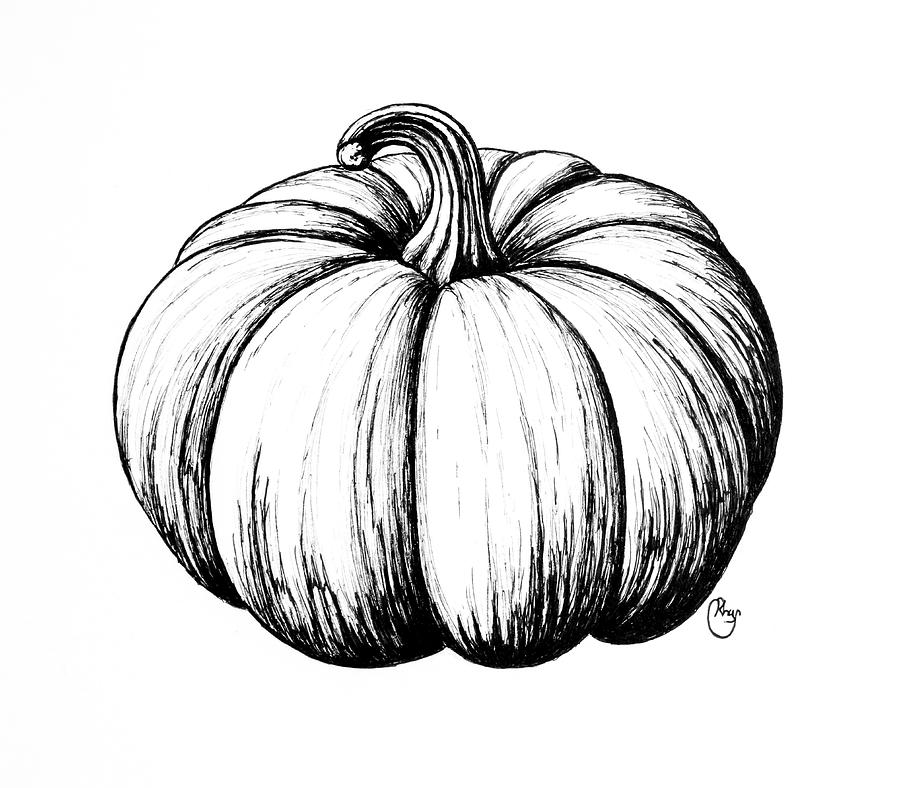
Pumpkin Drawing by Bari Rhys Fine Art America
Web for clarification, i’ve included some sketches as an illustration of the difference between primary forms and detail forms. These lines will create sections on your pumpkin. This shape drawing can be fairly rough and can omit the smaller bends and curves in the shape. Web nba lottery odds 2024: Using orange a003, color over the inner areas of the.

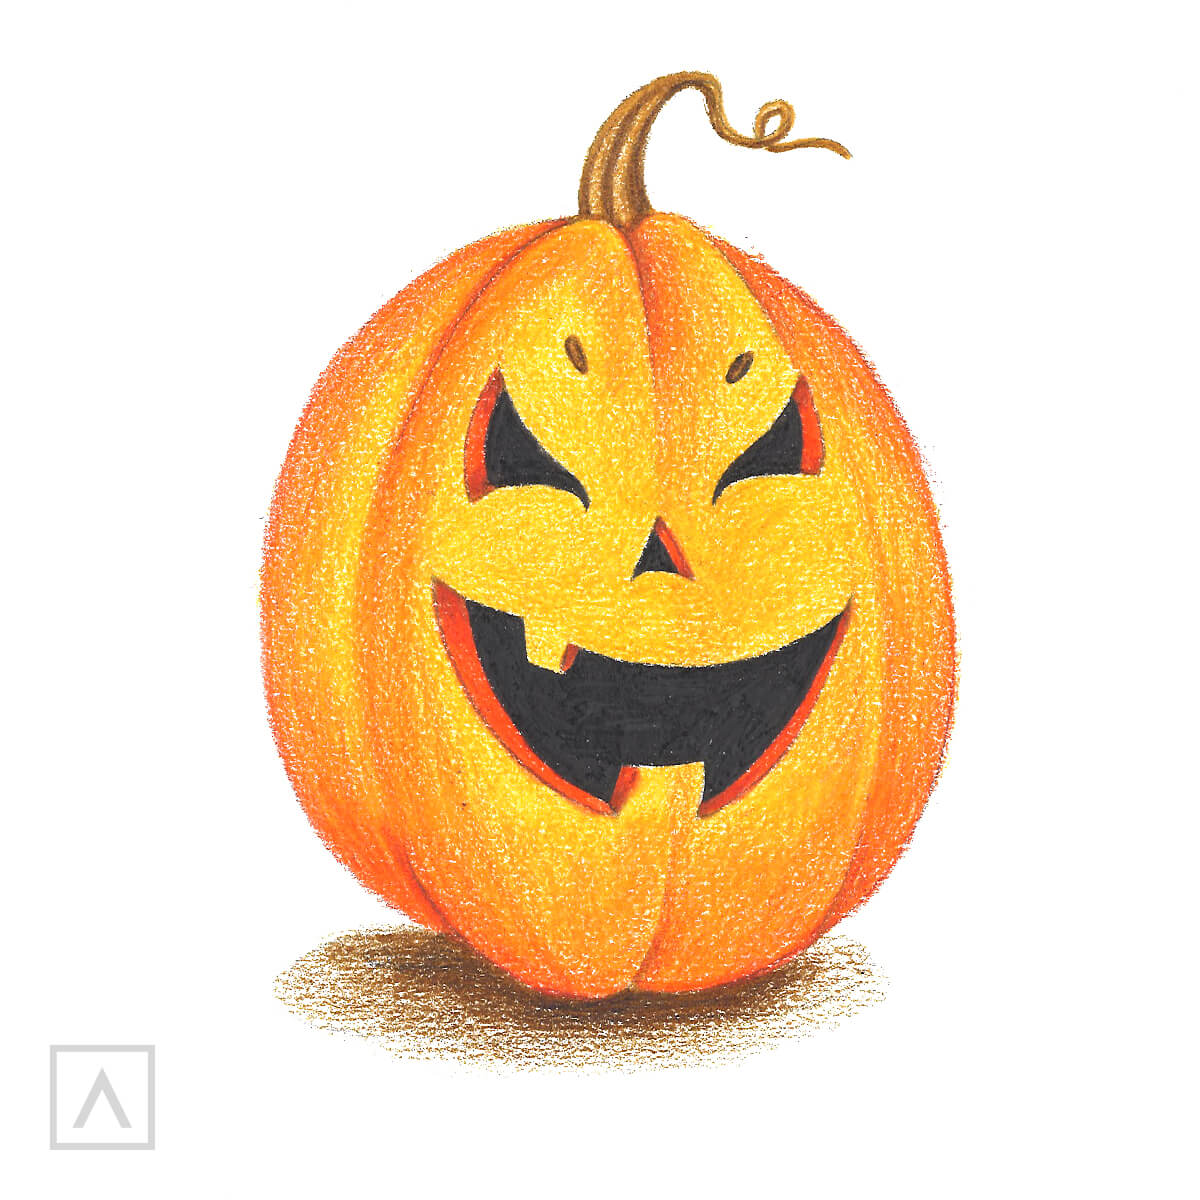
Playful Pumpkin Original Halloween Ink Drawing
Draw a guideline for the leaf. Start by using an orange crayon to color the pumpkin’s skin. Let’s complete our halloween pumpkin drawing by adding some color! Using two curved lines, enclose a vertical rounded shape. Web be it a fall or halloween drawing lesson, this how to draw a pumpkin step by step drawing tutorial will make the task.
How to Draw a Realistic Pumpkin Step by Step — Arteza.co.uk
Web for clarification, i’ve included some sketches as an illustration of the difference between primary forms and detail forms. At this stage of your drawing you can make your stem just a rough sketch. We'll also give you some interesting. Begin the pumpkin drawing by first getting it’s major shapes. Web nba lottery odds 2024:

Fresh ripe pumpkin drawing illustration premium image by
Repeat this process until the pumpkin is nearly circular in form. Show, with light lines, the main proportions of the pumpkin, its leaf and its stem. Use raw umber a132 to represent the shadowed areas on the pumpkin stem and add the shadow created by the pumpkin. Here’s where we’ll start drawing in our ribbed section of the pumpkin skin..

pumpkin drawing easy realistic Dong Hallman
Begin the pumpkin drawing by first getting it’s major shapes. Web slowly, my drawings started to improve. Now, color the stem with a green crayon. Web nba lottery odds 2024: Start by drawing the overall shape of your pumpkin with a two curved lines.
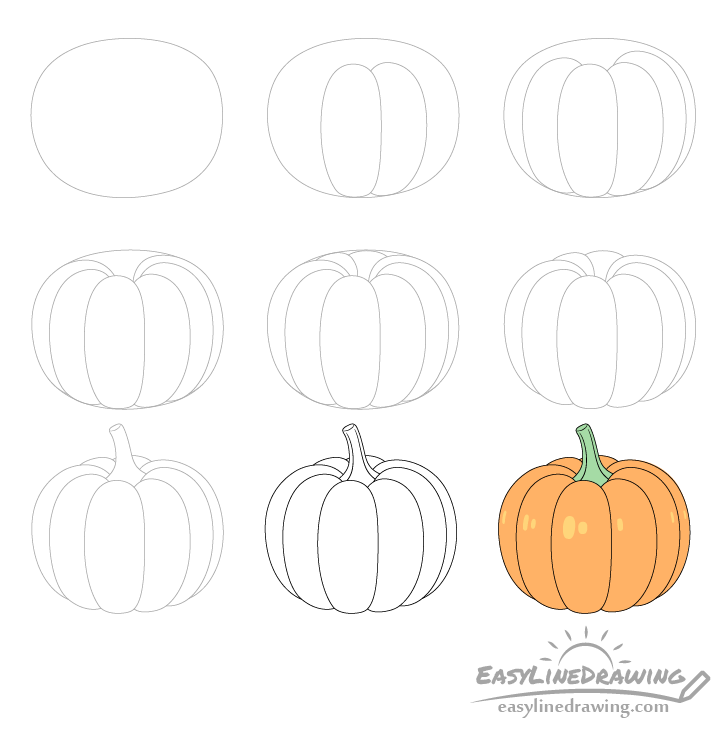
How to Draw a Pumpkin Step by Step EasyLineDrawing
Using orange a003, color over the inner areas of the eye, nose and mouth. Draw the stem right over top of the rest of the pumpkin and then erase the lines of the ribs that are now overlapped by it. The draw for this year's fifa futsal world cup will be held in samarkand’s historic registan square on 26 may..

How to Draw a Pumpkin Realistically with Easy Steps Let's Draw Today
Start with some small thumbnails, and then, just as before, add a gesture line and shapes. Using orange a003, color over the inner areas of the eye, nose and mouth. Next, draw the pumpkin stem. Now, color the stem with a green crayon. The draw for this year's fifa futsal world cup will be held in samarkand’s historic registan square.

10+ Ideas For Drawing On Pumpkins
Capturing the charm of autumn, the humble pumpkin emerges as a canvas begging for expression. Web in this video we'll show you how to draw a pumpkin. The full list ahead of the draw on sunday. Web in today’s tutorial, we will discover how to draw a pumpkin on paper. Web inclusive names matter,” the protestors said.

Cool Pumpkin Drawings Free download on ClipArtMag
To do this, begin by drawing a curved line towards the top of your pumpkin. Watch more of our videos on shots! Here’s where we’ll start drawing in our ribbed section of the pumpkin skin. Make the it wider towards it’s base and narrower towards the top with a light curve in it’s shape. Web how to draw a pumpkin:
Draw The Stalk And The Ribs.
We'll also give you some interesting. Here’s where we’ll start drawing in our ribbed section of the pumpkin skin. Start coloring from the edge of the sketch and fill in. Any areas of the pumpkin that you want to keep dark that aren't the absolute darkest spots can also be left uncarved, but don't use the marker.
First, Draw A Small Curving Stalk That Extends From The Center Of The Top Of Your Pumpkin.
Make the it wider towards it’s base and narrower towards the top with a light curve in it’s shape. Create the pumpkin’s eyes by drawing two triangles and a mouth. Start coloring from the edge of the sketch and fill in. Next, draw the pumpkin stem.
Show, With Light Lines, The Main Proportions Of The Pumpkin, Its Leaf And Its Stem.
In this case the pumpkin itself and the stem. Draw the general shape of the pumpkin. Use three short lines to enclose the rectangular stem on top of the pumpkin. To do this, begin by drawing a curved line towards the top of your pumpkin.
Albion Took The Game To The Saints And Were Denied.
Next, use a brown crayon to fill in the visible edges of the pumpkin’s skin on the carvings. La galaxy forward miguel berry, bottom left, kicks the ball for the equalizing goal against real salt lake during. Web complete the halloween pumpkin drawing. Let’s start by drawing the four lines down the face starting at the top and down to the bottom point of the pumpkin as shown in the reference image above.