Different Angles Of Face Drawing
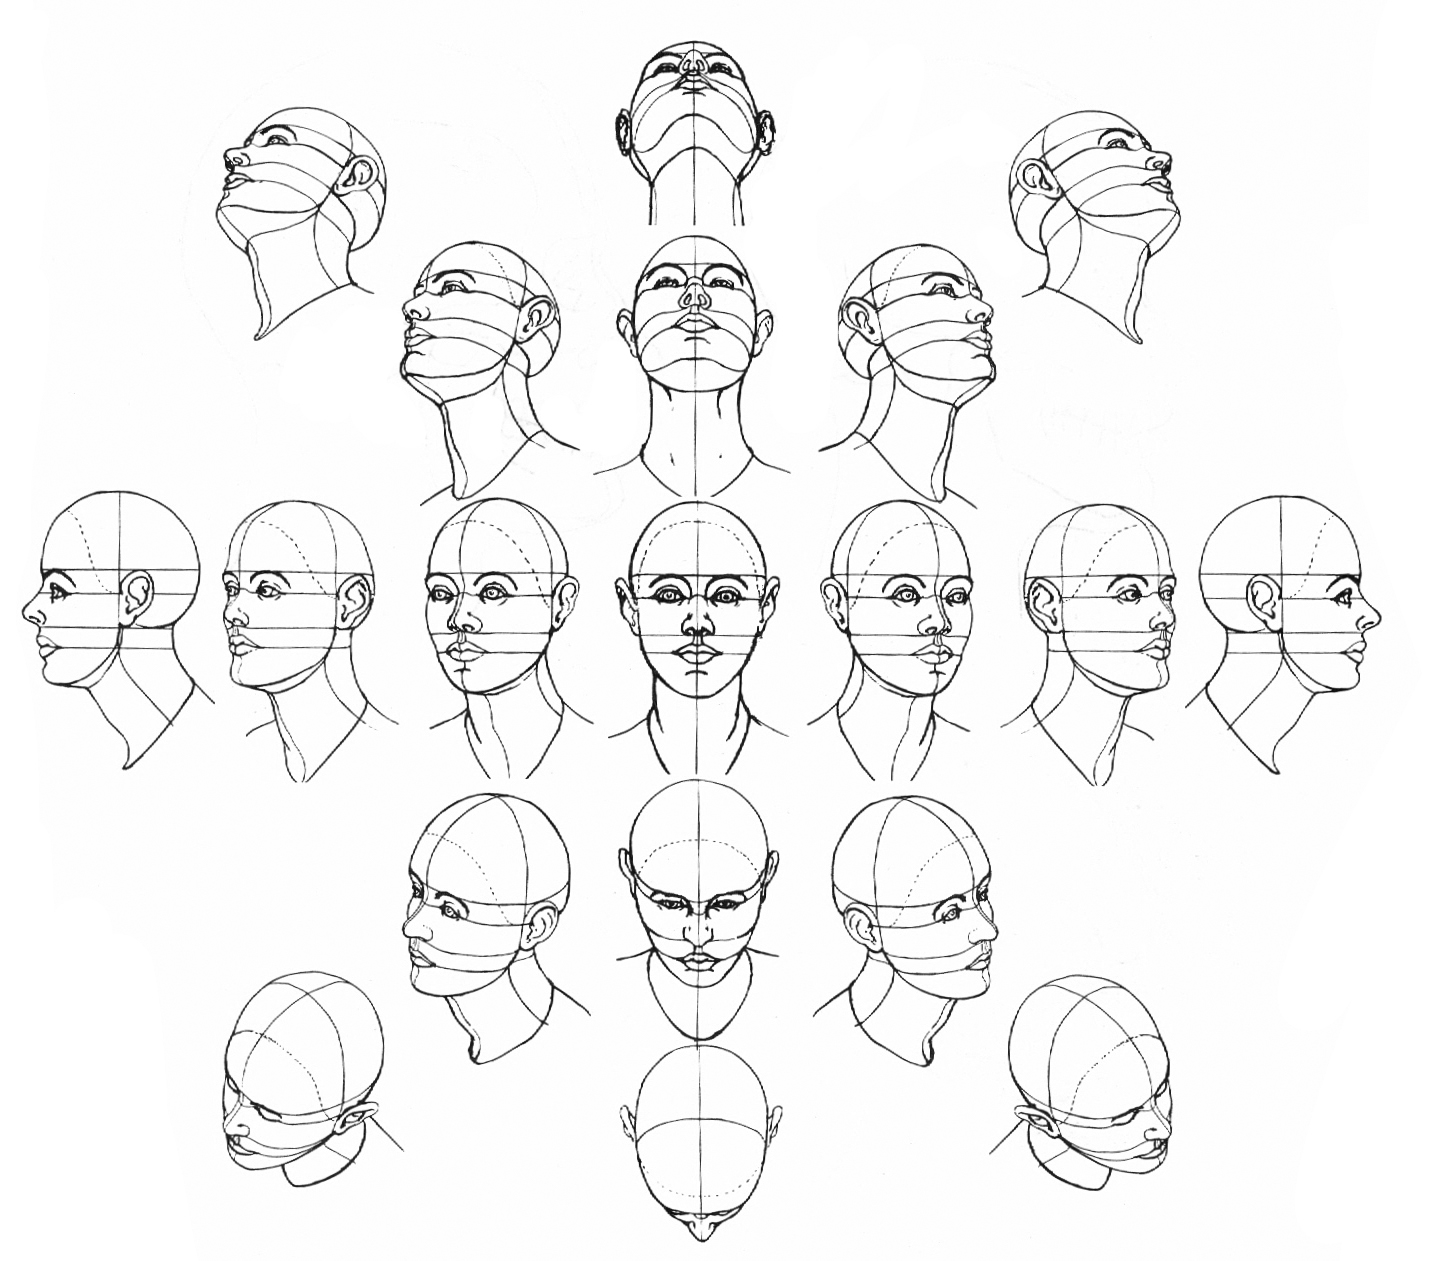
Different Angles Of Face Drawing - This article shows you why it is important to understand the basic techniques that compose the structure of the head. When drawing a head from profile, start by arranging your two basic shapes so that they roughly resemble the angle you’re looking for. Learn how to draw the front and side view of the human head and face, step by step using the loomis method, plus i ad. Web drawing eyes, noses and lips on heads at different angles is a lot harder than drawing them on a head that is facing straight forward. Web the loomis method is a powerful tool for creating realistic portraits of people from different perspectives. The first point that i consider to be important is the vertical line in the middle of the circle that represents the symmetry of the face. The principles are similar for each, starting with a circle, an inner ellipse and marking the brow line with a cross. As with the cranium, practice drawing the face block from every conceivable angle. Think of the head as a sphere. Web a tutorial video about how to draw faces from any angle (below, above and 3/4)theres also a little step by step part :)all of my art supplies:
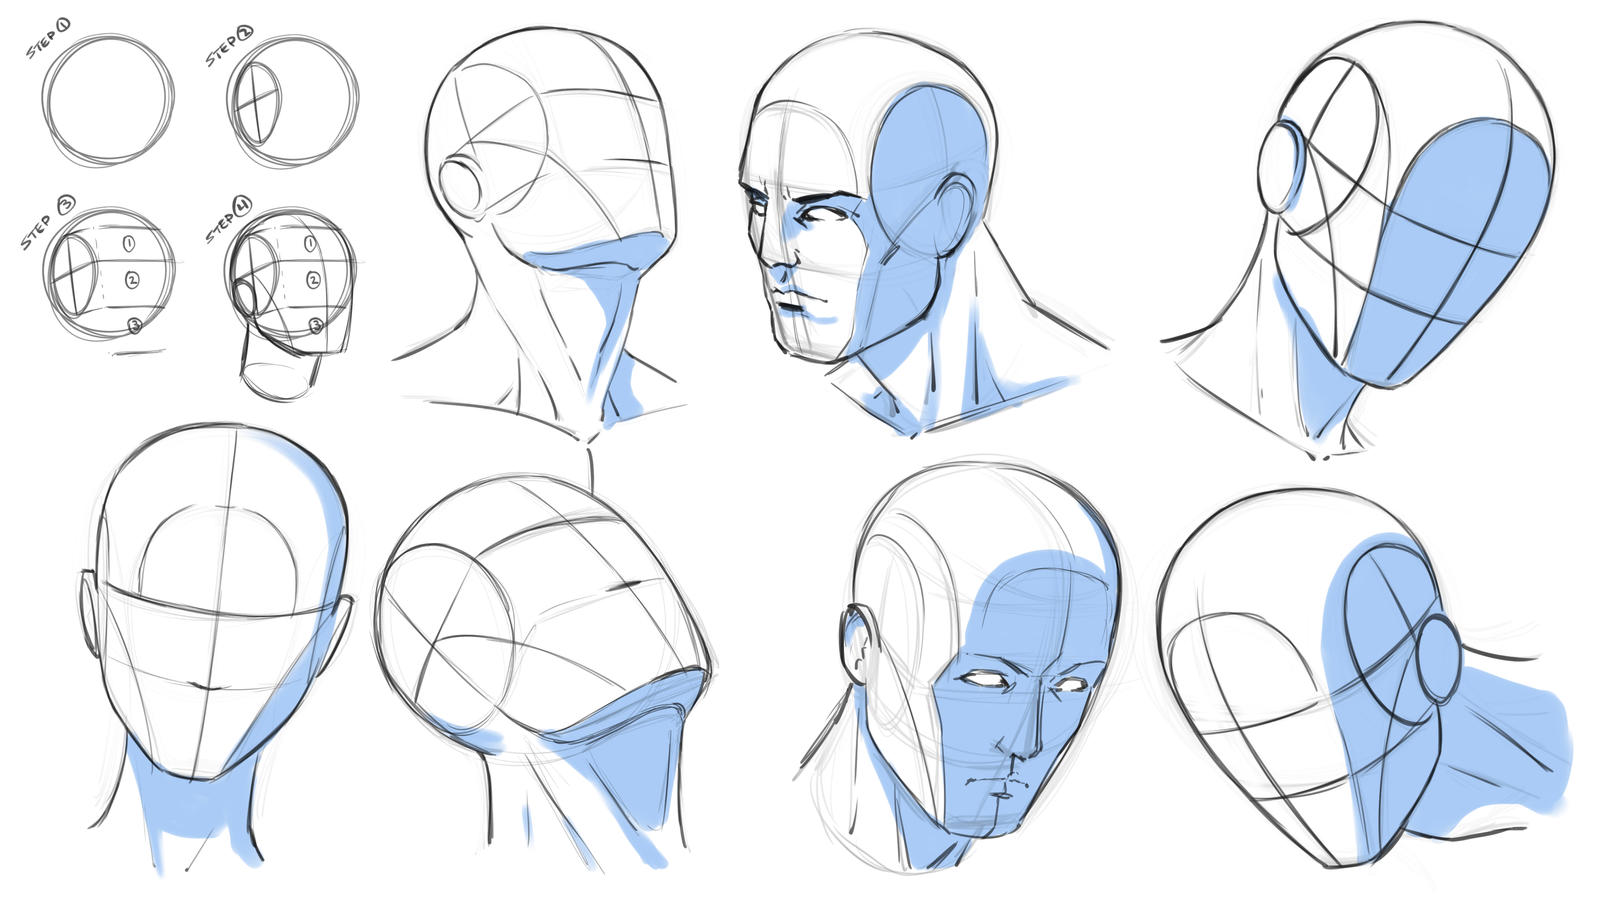
With a general outline now created for the face and features, you can begin drawing in the eyes and brows with more detail: This tool is used to draw both horizontally and vertically. I’ll be drawing the front pose (left) and the side pose (right) side by side. The first point that i consider to be important is the vertical line in the middle of the circle that represents the symmetry of the face. While the concept is easy enough to grasp, this might be a little difficult to draw. Next, draw two lines connecting from the top of the dorsal (long part of the nose) to the base of it to represent the side of the nose. Using the loomis method that we covered in my first tutori. You can try to use different sizes to make the overall look of the composition more interesting. Web start by drawing four circles. So we're gonna draw the 3/4 view, side view, looking up view, looking down vi.
Web how to draw faces at different angles: Web the loomis method is a powerful tool for creating realistic portraits of people from different perspectives. With a general outline now created for the face and features, you can begin drawing in the eyes and brows with more detail: Web compare the length vs the width of the face with your pencil or ruler in your reference image to get a general idea of the sizing dimensions. Drawing a circle is a good way to start your portraits because you can build up your drawings from this simple shape for any face angle. Then draw an elongated trapezoid that rounds out at the base as shown below. With the loomis method, artists can learn to draw the head from the front, draw the side profile and turned at an angle. (important to take into account.) 3. So we're gonna draw the 3/4 view, side view, looking up view, looking down vi. Different from before, we’re going to construct the whole face before drawing the eyes, nose and mouth.
Jeff Searle Drawing the head from different angles
Dive into this comprehensive head drawing course to level up your figure drawing and portraiture skills! Different from before, we’re going to construct the whole face before drawing the eyes, nose and mouth. Web drawing the nose involves four steps. Web a tutorial video about how to draw faces from any angle (below, above and 3/4)theres also a little step.

Jeff Searle Drawing the head from different angles
Web a paper stump or any tool for blending. Start with a circle, split in four. Web in this anime tutorial, imma show yall how to draw different anime head angles. Once you have a good approximation of the relationships between the shapes, you can start building the rest of your drawing from that foundation. Think of the head as.

discipleneil777 Professional, Digital Artist DeviantArt Face
Once you have a good approximation of the relationships between the shapes, you can start building the rest of your drawing from that foundation. This is a tutorial designed for beginners, in which i'll be addressing five essential angles: With this tool selected, simply drag the ruler to draw it on the canvas. Web how to draw faces at a.

How to draw a female portrait from different angles Learn To Draw And
Once you have a good approximation of the relationships between the shapes, you can start building the rest of your drawing from that foundation. To have a ruler at a 90° angle i suggest holding down the [shift] key while drawing the ruler. Learn how to draw the front and side view of the human head and face, step by.

How To Draw Face Angles DRAW BHJ
Web now, let’s put it intro practice and draw different angles. Web last in the list in the [sub tool [ruler]] is the symmetrical ruler. With this tool selected, simply drag the ruler to draw it on the canvas. Start with a circle, split in four. (important to take into account.) 3.
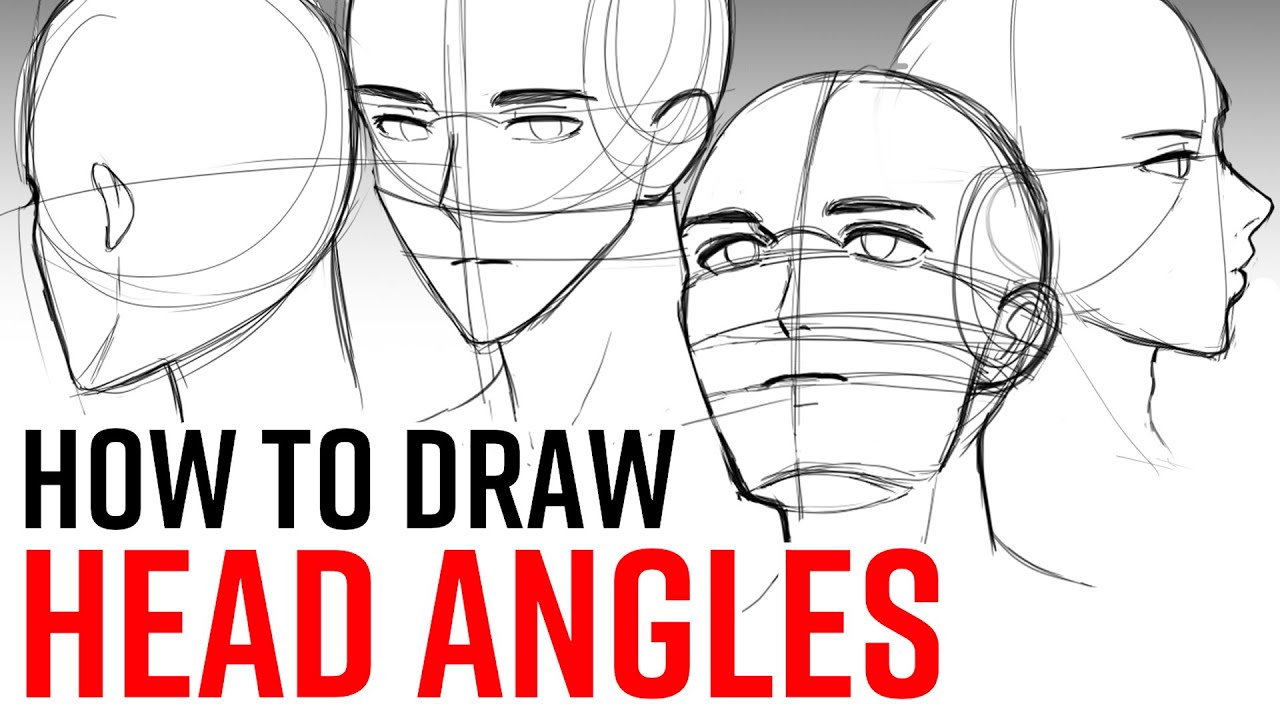
How to Draw Different HEAD ANGLES YouTube
So we're gonna draw the 3/4 view, side view, looking up view, looking down vi. Web now, let’s put it intro practice and draw different angles. Images from the head pose image database were also used. This is why practicing individual face elements is so important! Learn how to draw the front and side view of the human head and.
How to Draw Heads at Various Angles Reference by robertmarzullo on
Drawing human heads and faces Images from the head pose image database were also used. In this class, you'll be introduced to facial proportions and structure drawing step by step, learning how to draw 11 different head angles!! This is a tutorial designed for beginners, in which i'll be addressing five essential angles: After that, it jumps to explain how.

How To Draw Heads From Different Angles Warehouse of Ideas
Web loomis method explained in full detail! Web find reference images of faces in different orientations. Web last in the list in the [sub tool [ruler]] is the symmetrical ruler. Web how to draw faces at different angles: Different from before, we’re going to construct the whole face before drawing the eyes, nose and mouth.
Head Angles Drawing at GetDrawings Free download
To have a ruler at a 90° angle i suggest holding down the [shift] key while drawing the ruler. The first point that i consider to be important is the vertical line in the middle of the circle that represents the symmetry of the face. As previously stated, the elements on one side of the face are going to look.
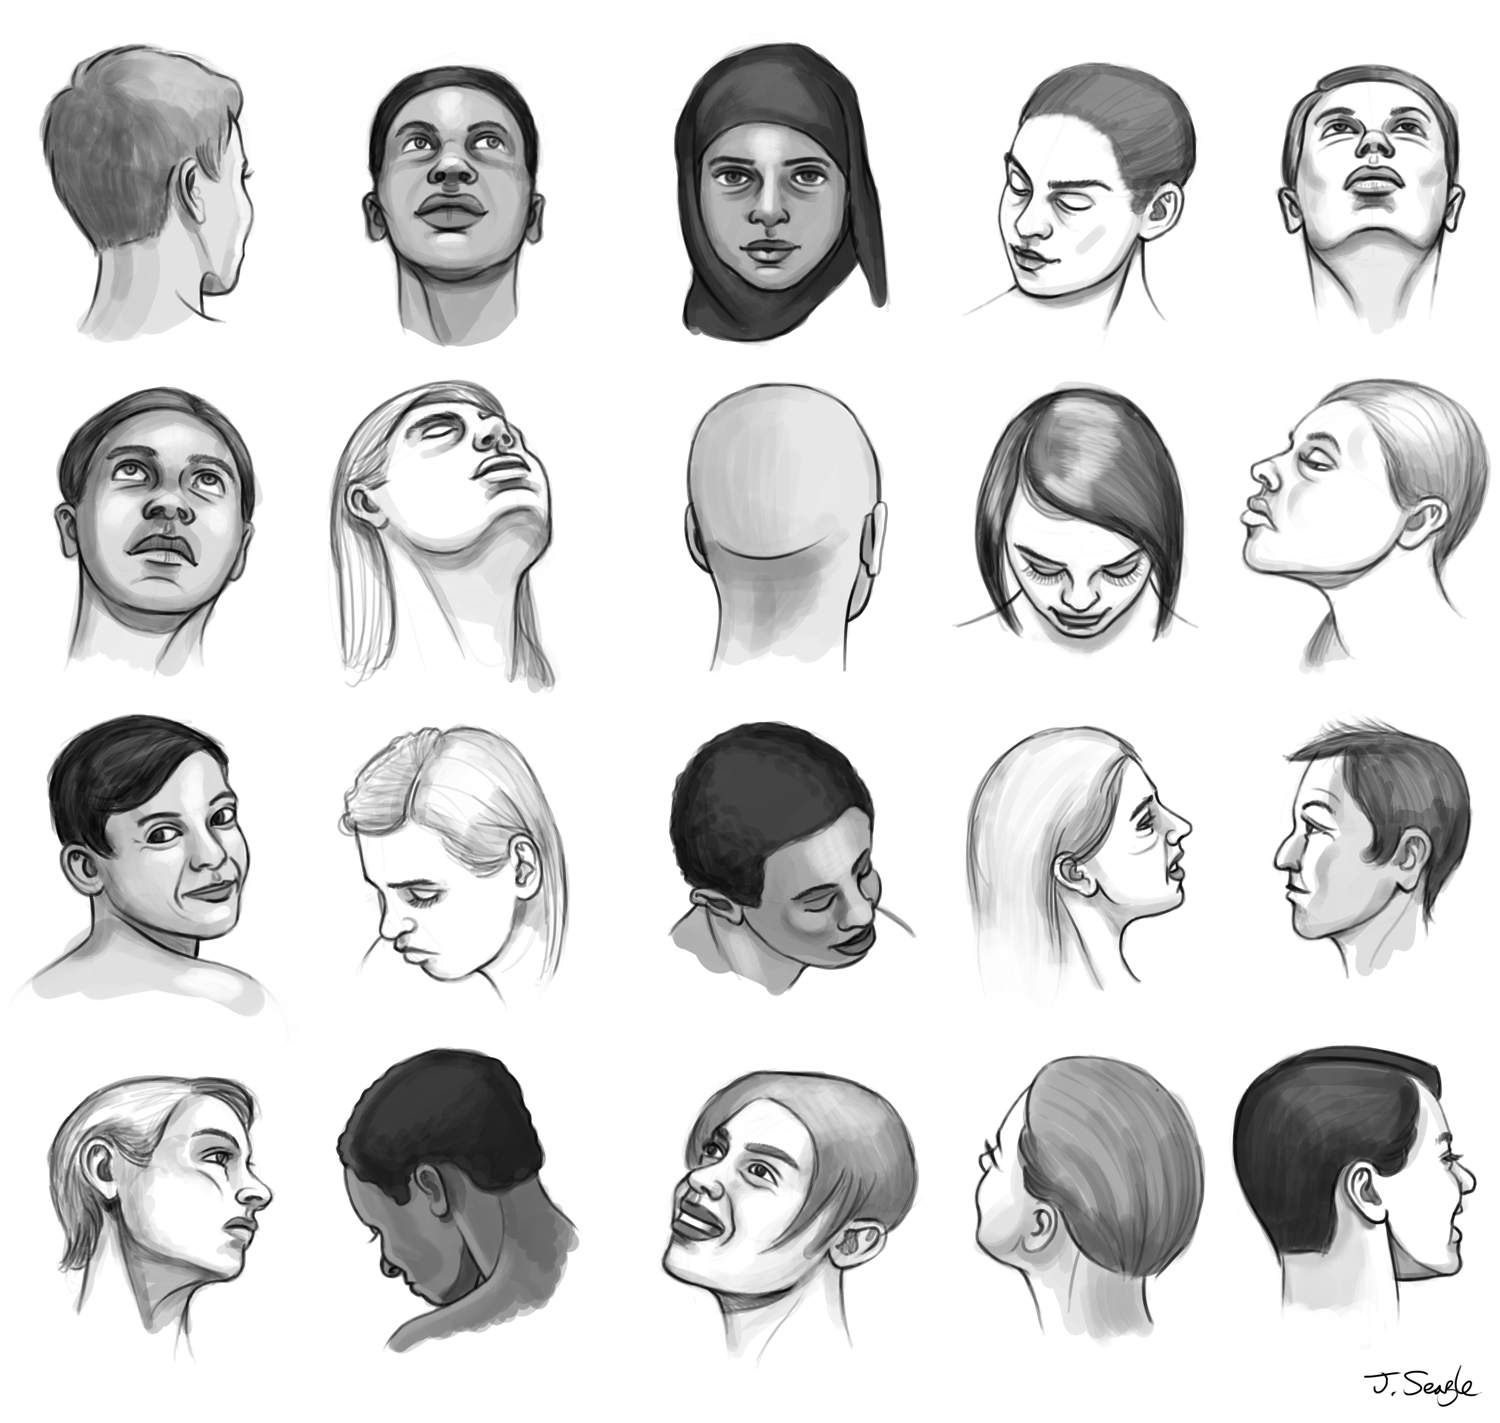
Jeff Searle Drawing the head from different angles
With the loomis method, artists can learn to draw the head from the front, draw the side profile and turned at an angle. Today i'll be teaching you a thing or two about drawing faces from various angles. Dive into this comprehensive head drawing course to level up your figure drawing and portraiture skills! Customers can order the new ipad.
Customers Can Order The New Ipad Air Today, With Availability Beginning Wednesday, May 15.
Using the loomis method that we covered in my first tutori. With a general outline now created for the face and features, you can begin drawing in the eyes and brows with more detail: As with the cranium, practice drawing the face block from every conceivable angle. Web last in the list in the [sub tool [ruler]] is the symmetrical ruler.
Think Of The Head As A Sphere.
Start with a circle, split in four. While the second circle requires the addition of a curved line, the first circle depicts the overall shape. Dive into this comprehensive head drawing course to level up your figure drawing and portraiture skills! Next we'll make the width of the cube narrower at the base.
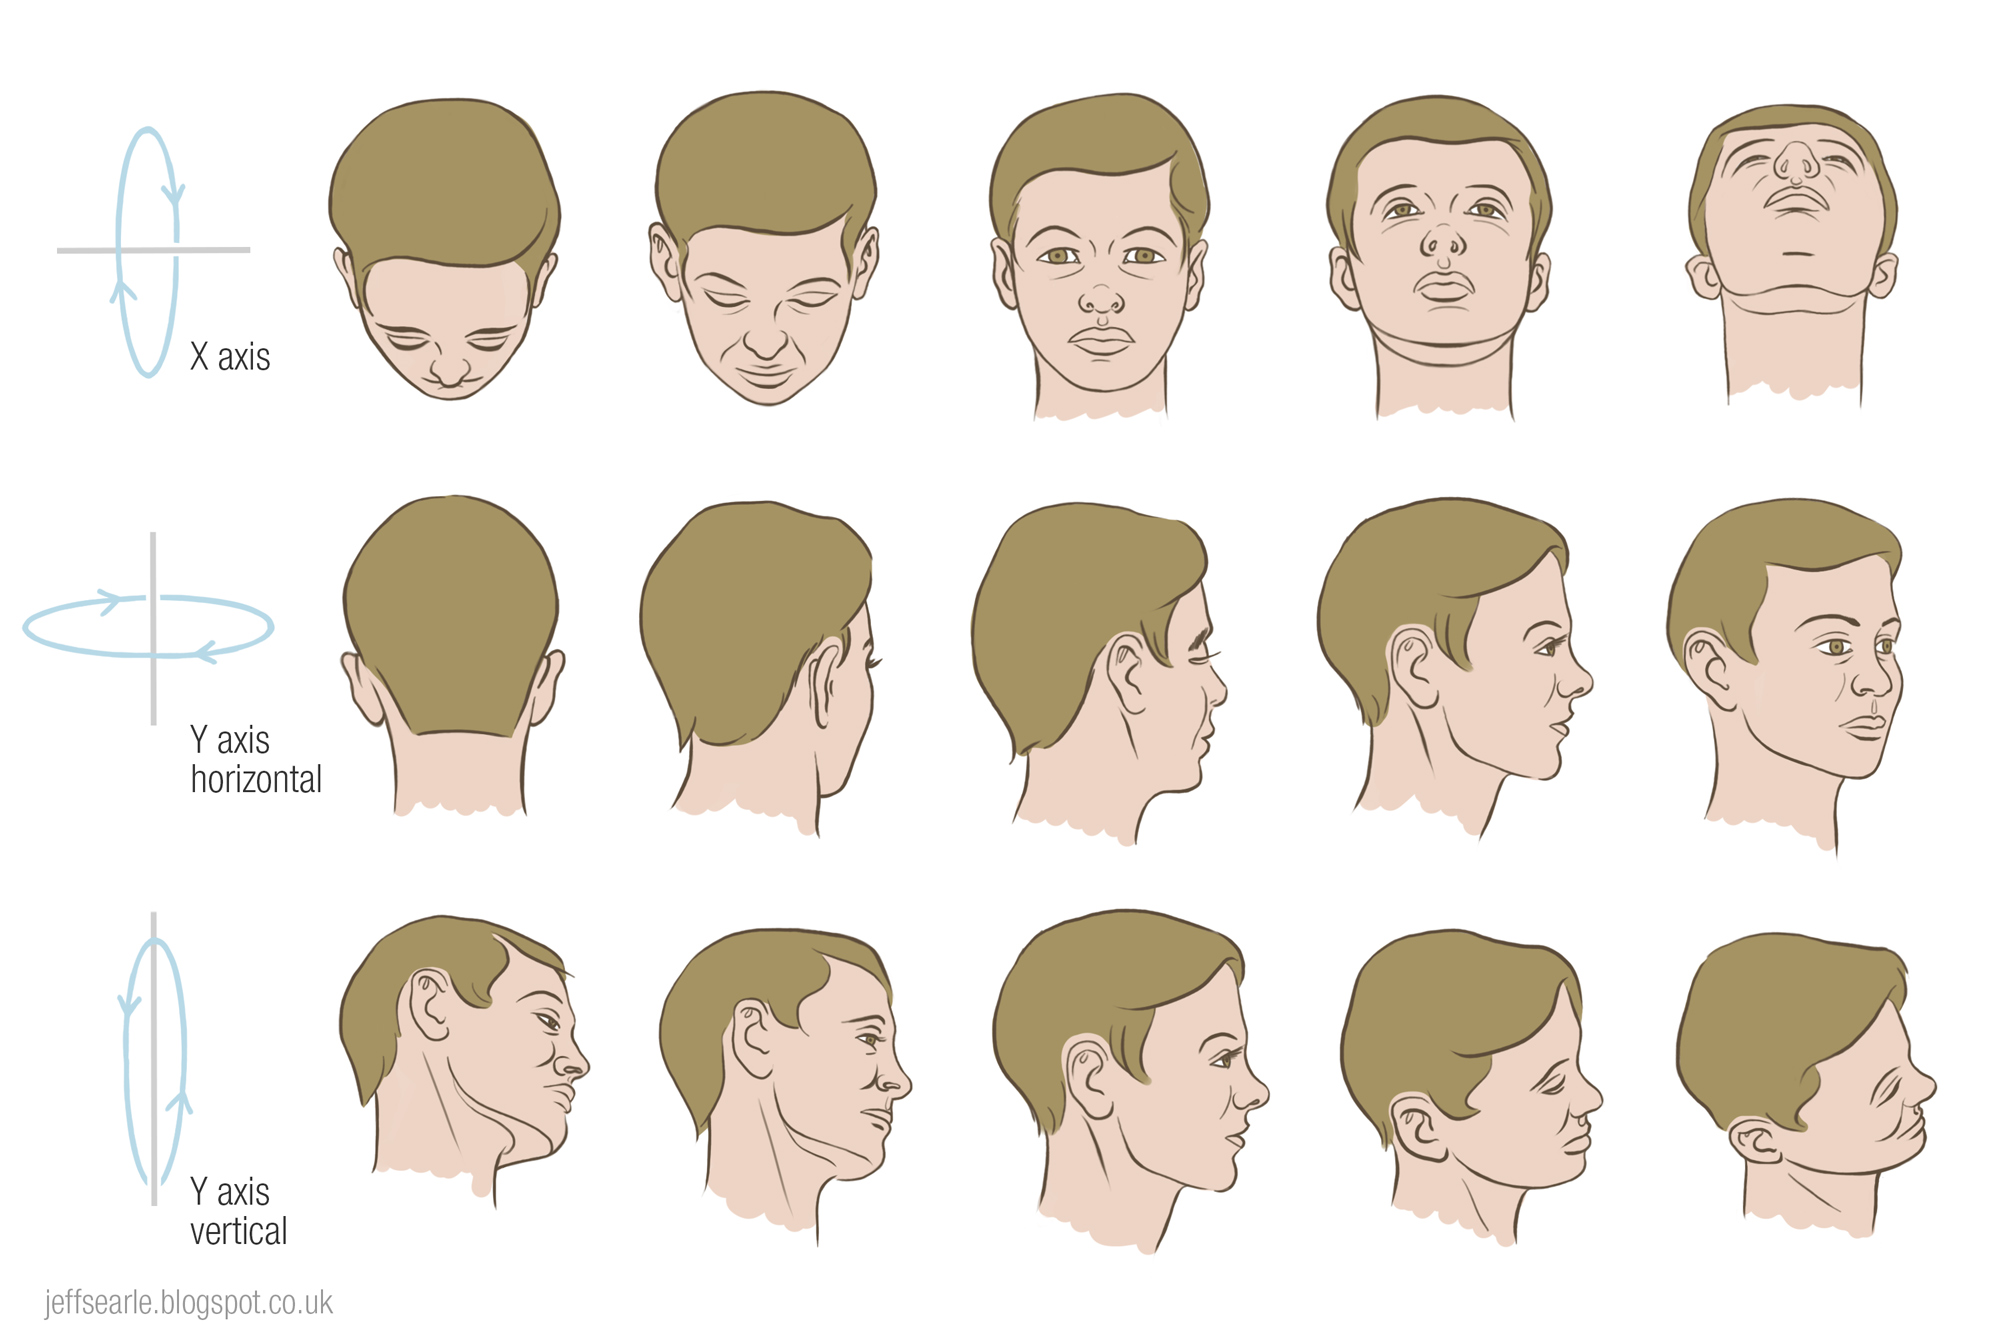
Then Locate The Y And X Axis.
Web find reference images of faces in different orientations. Select the direction you want your head to go forth, and choose one of the explained angles by drawing the guide that will help you to recognize each of them. Web a tutorial video about how to draw faces from any angle (below, above and 3/4)theres also a little step by step part :)all of my art supplies: Web how to draw faces at different angles:
Web Drawing The Nose Involves Four Steps.
Search button taken from katherine kato's codepen. Web to draw it, lets keep things simple and start off with a regular ol' cube. Web start by drawing four circles. Then draw an elongated trapezoid that rounds out at the base as shown below.