Draw A Reindeer Step By Step
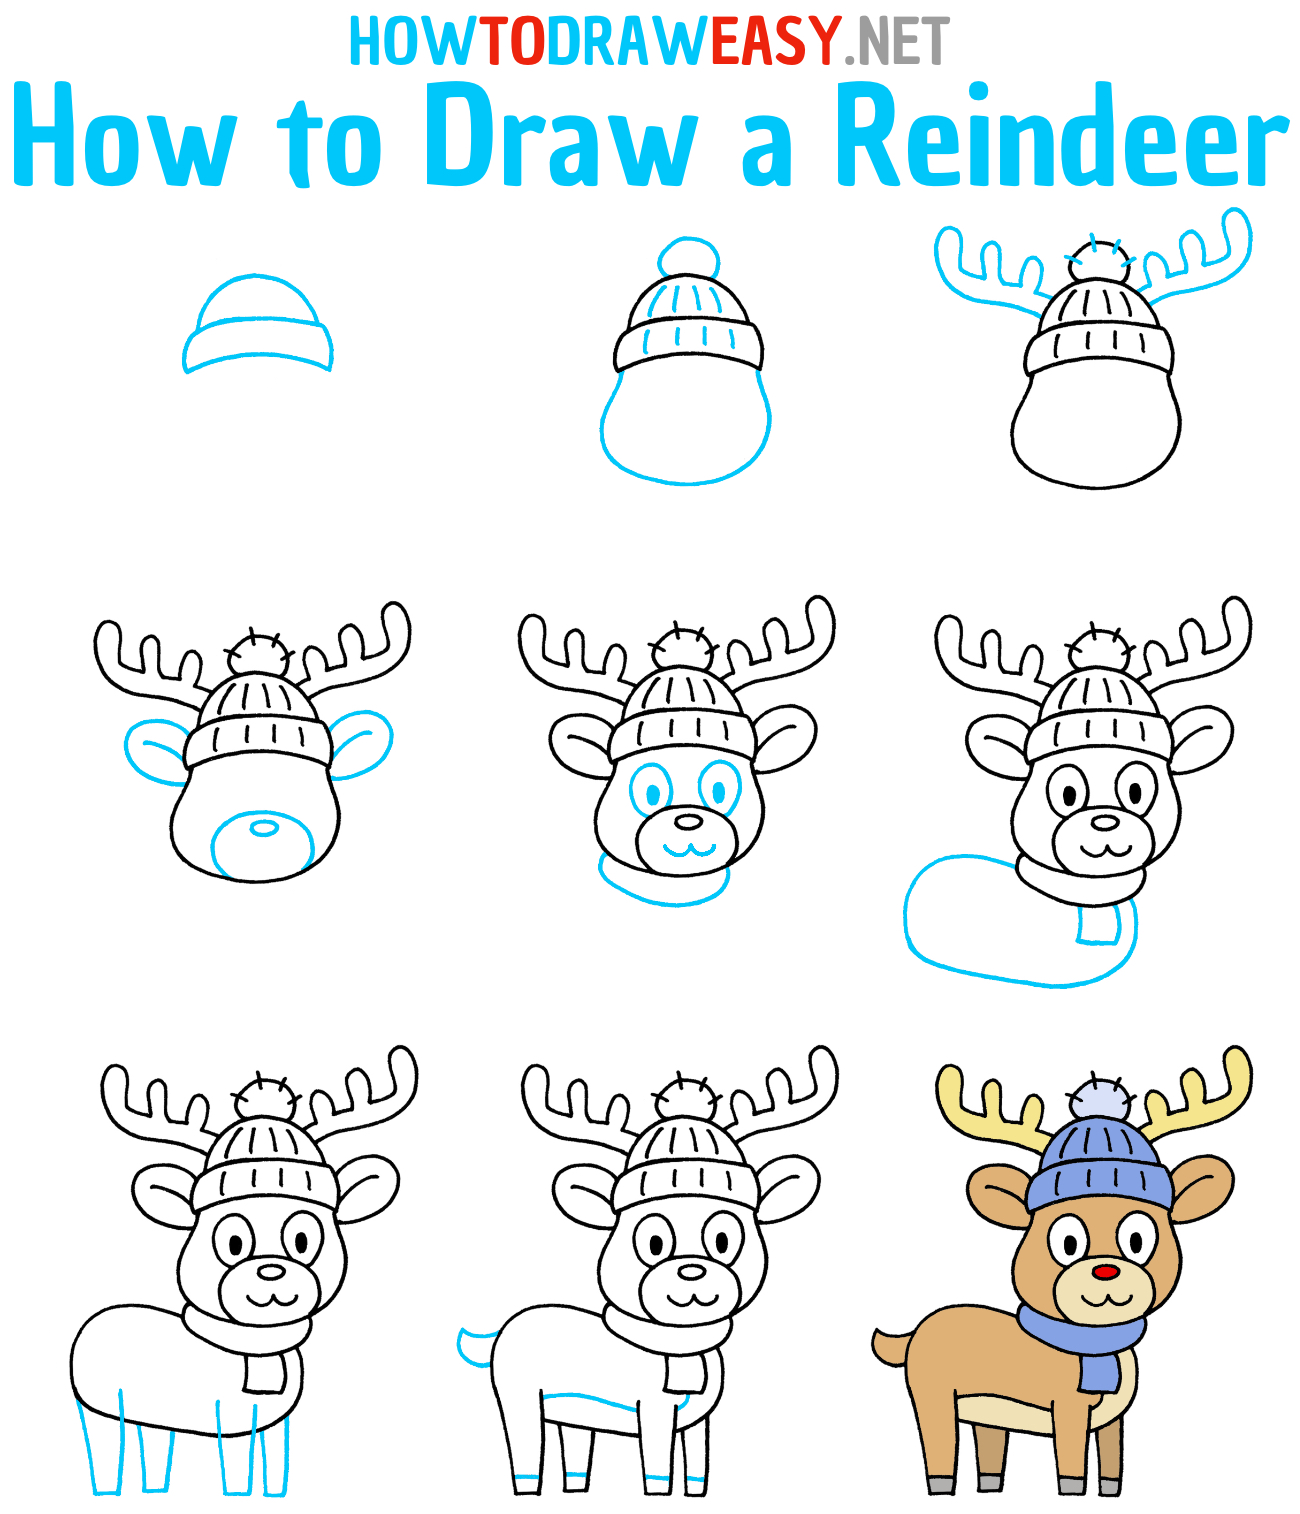
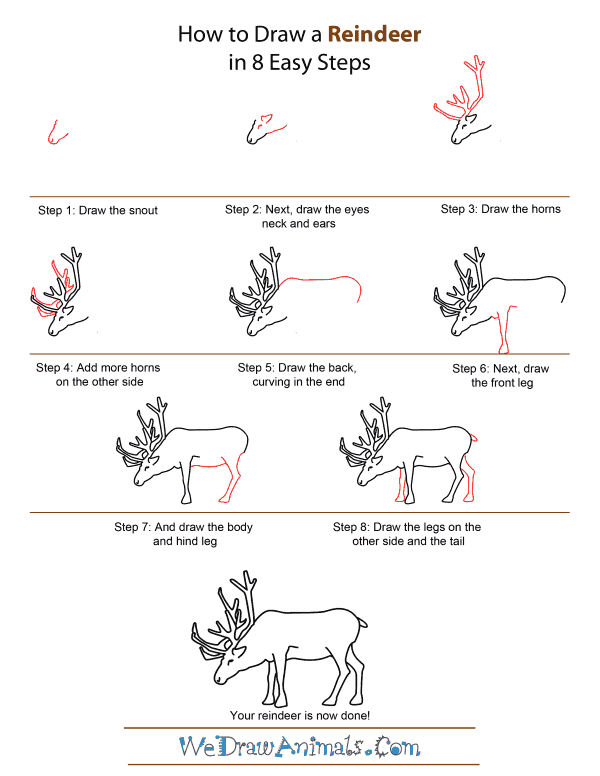
Draw A Reindeer Step By Step - And draw a neck to connect the head to the body. Our printable drawing guide (optional) paper; Draw the eyes, tail and partially draw the antlers of the reindeer. Help children develop their fine motor skills and hand eye coordination, and perceptual motor skills by learning how simple shapes can be used to draw a reindeer. Web step by step tutorial on how to draw an easy reindeer!☆please leave a like! #howtodraw #artforkidshub🎨 art supplies we love (amazon affiliate links): Also, check out all of our other fun christmas drawing lessons! Then, directly beneath the tail you can use some rounded lines for the hip of the reindeer. Web haw to draw a village scenery ##very easly step by stap##2024####welcome to our drawing vedio and enjoy Web add the chin and legs.
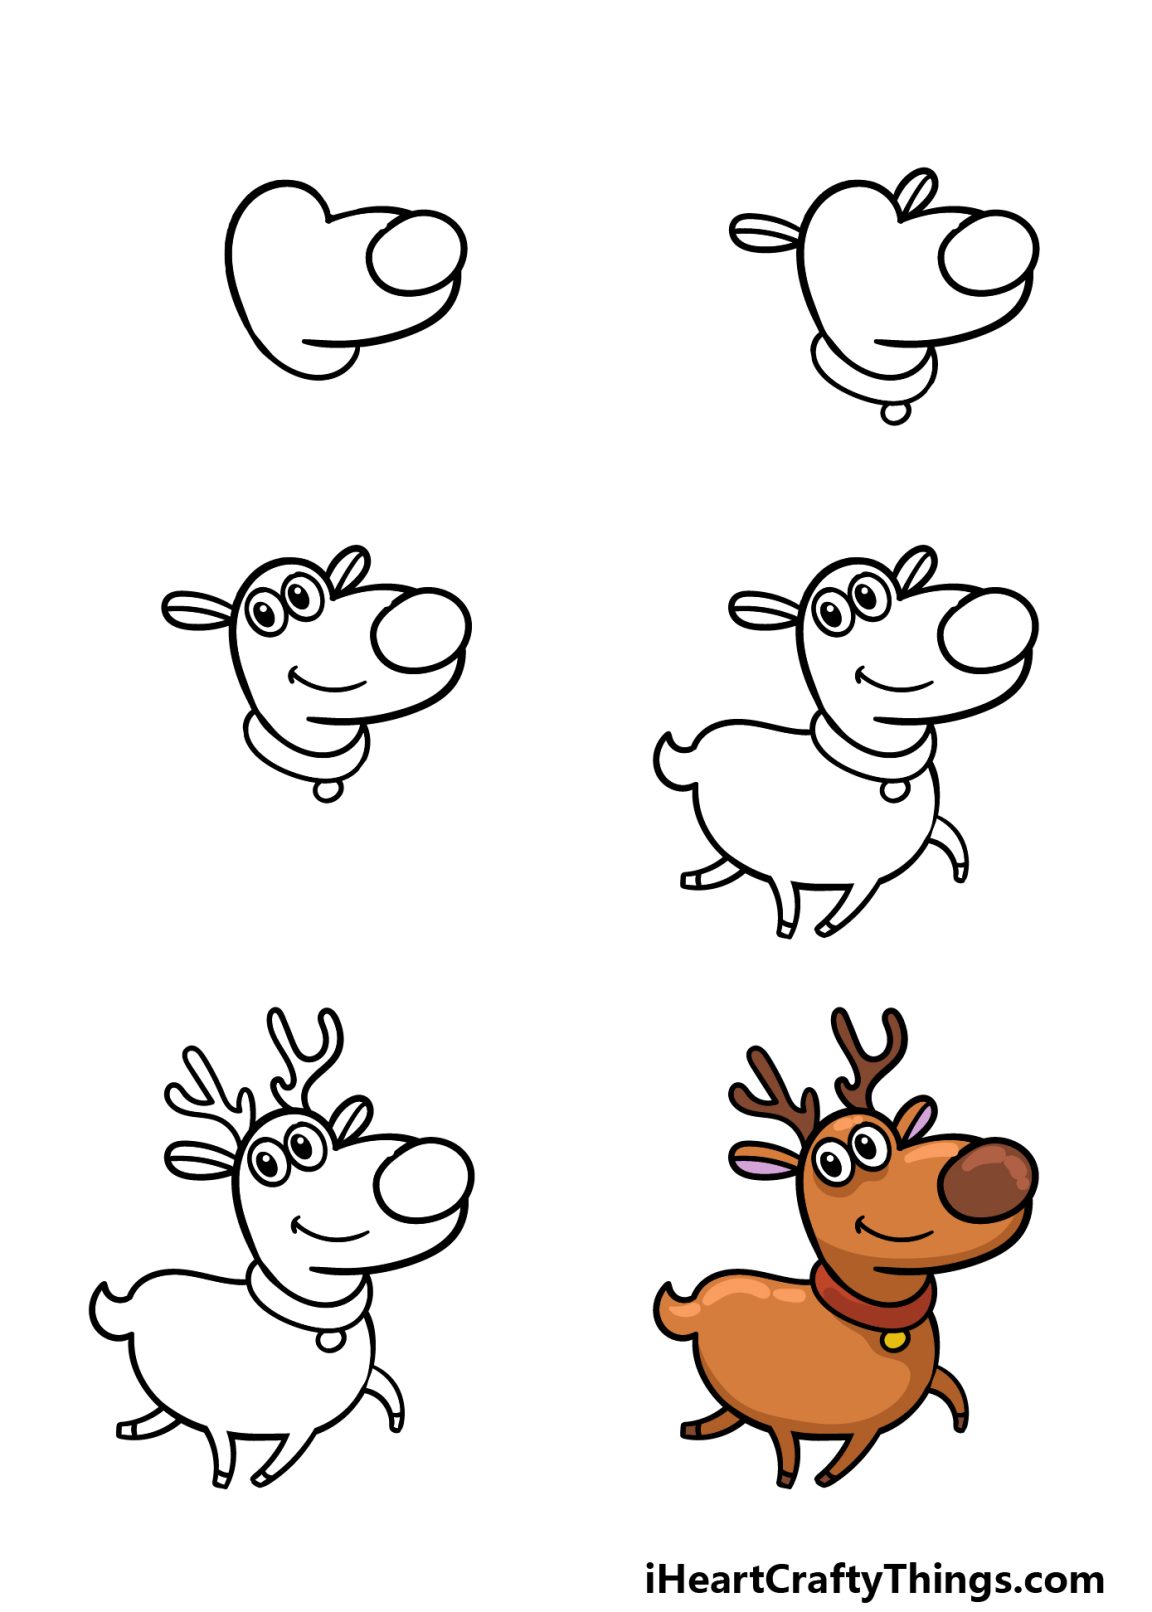
Draw a sideways u from the short line of the neck around to the bottom of the belly. Also, check out all of our other fun christmas drawing lessons! The oval should be horizontal and placed slightly lower than the circle to allow room for the neck. Let’s complete the reindeer drawing by first coloring the antlers with orange. Follow along with us and learn how to draw a reindeer! Don’t forget to add the tail! Reindeers, deers, animals, wild, rangifer tarandus, caribou, Draw the reindeer body and legs. These can be rough shapes as we will refine them later. Web learn how to draw a reindeer for kids easy and step by step.
Next draw a large oval shape for its head and then an oval shape under the nose for its mouth area. For the chin and the legs, draw these shapes lightly, as you will be adjusting them later. Web materials needed to draw the cute reindeer: Add the front of the head, the neck, and the tail. These steps are super simple, perfect for any age. And draw a neck to connect the head to the body. Then, draw small branches coming out from each side of these lines, curving upwards and outwards. Then start the reindeer’s antlers by drawing two curved lines going up from the top of the head. We will draw the back and first legs in this part of our guide on how to draw a reindeer. To sketch the outline of the penguin before adding the face and body details.;

How to draw a cute reindeer in 6 steps Easy christmas drawings
Web add the chin and legs. Web how to draw a reindeer. Draw this cute reindeer by following this drawing lesson. These steps are super simple, perfect for any age. Web let's learn how to draw a reindeer easy | step by step drawing tutorial for kids | cute reindeer drawing | easy reindeer drawing and coloring | kawaii drawin.

How to Draw a Reindeer HelloArtsy
Web learn how to draw a reindeer for kids easy and step by step. Draw more reindeer in the background, you could even draw one with a red nose. Draw a sideways u from the short line of the neck around to the bottom of the belly. These steps are super simple, perfect for any age. Reindeer are of the.
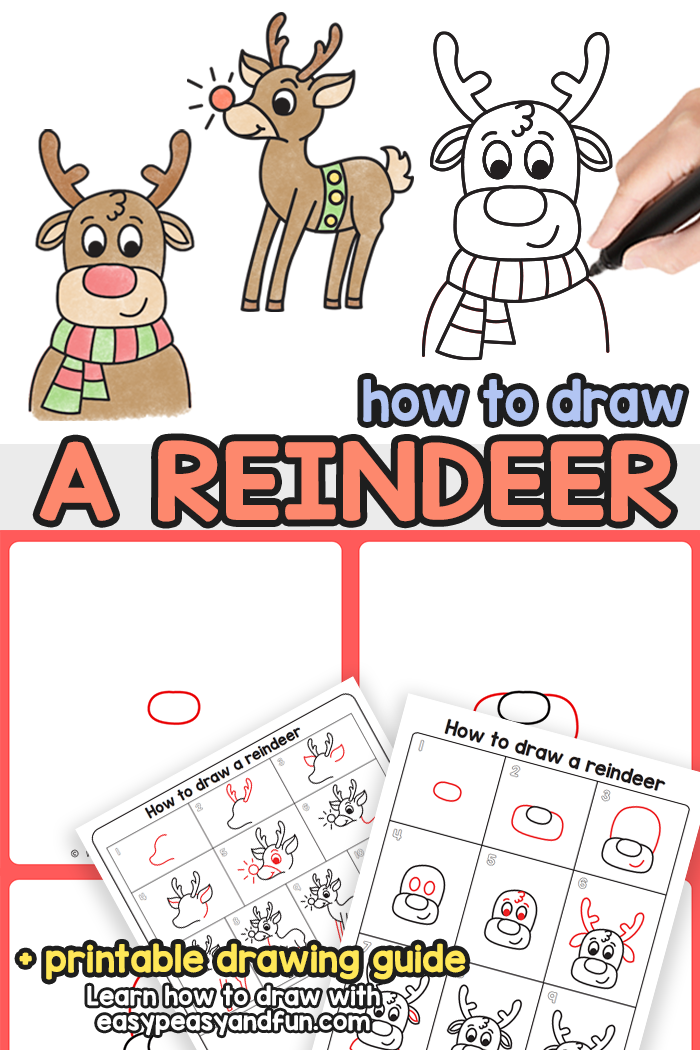
How to Draw a Reindeer Step by Step Drawing Tutorial Easy Peasy and Fun
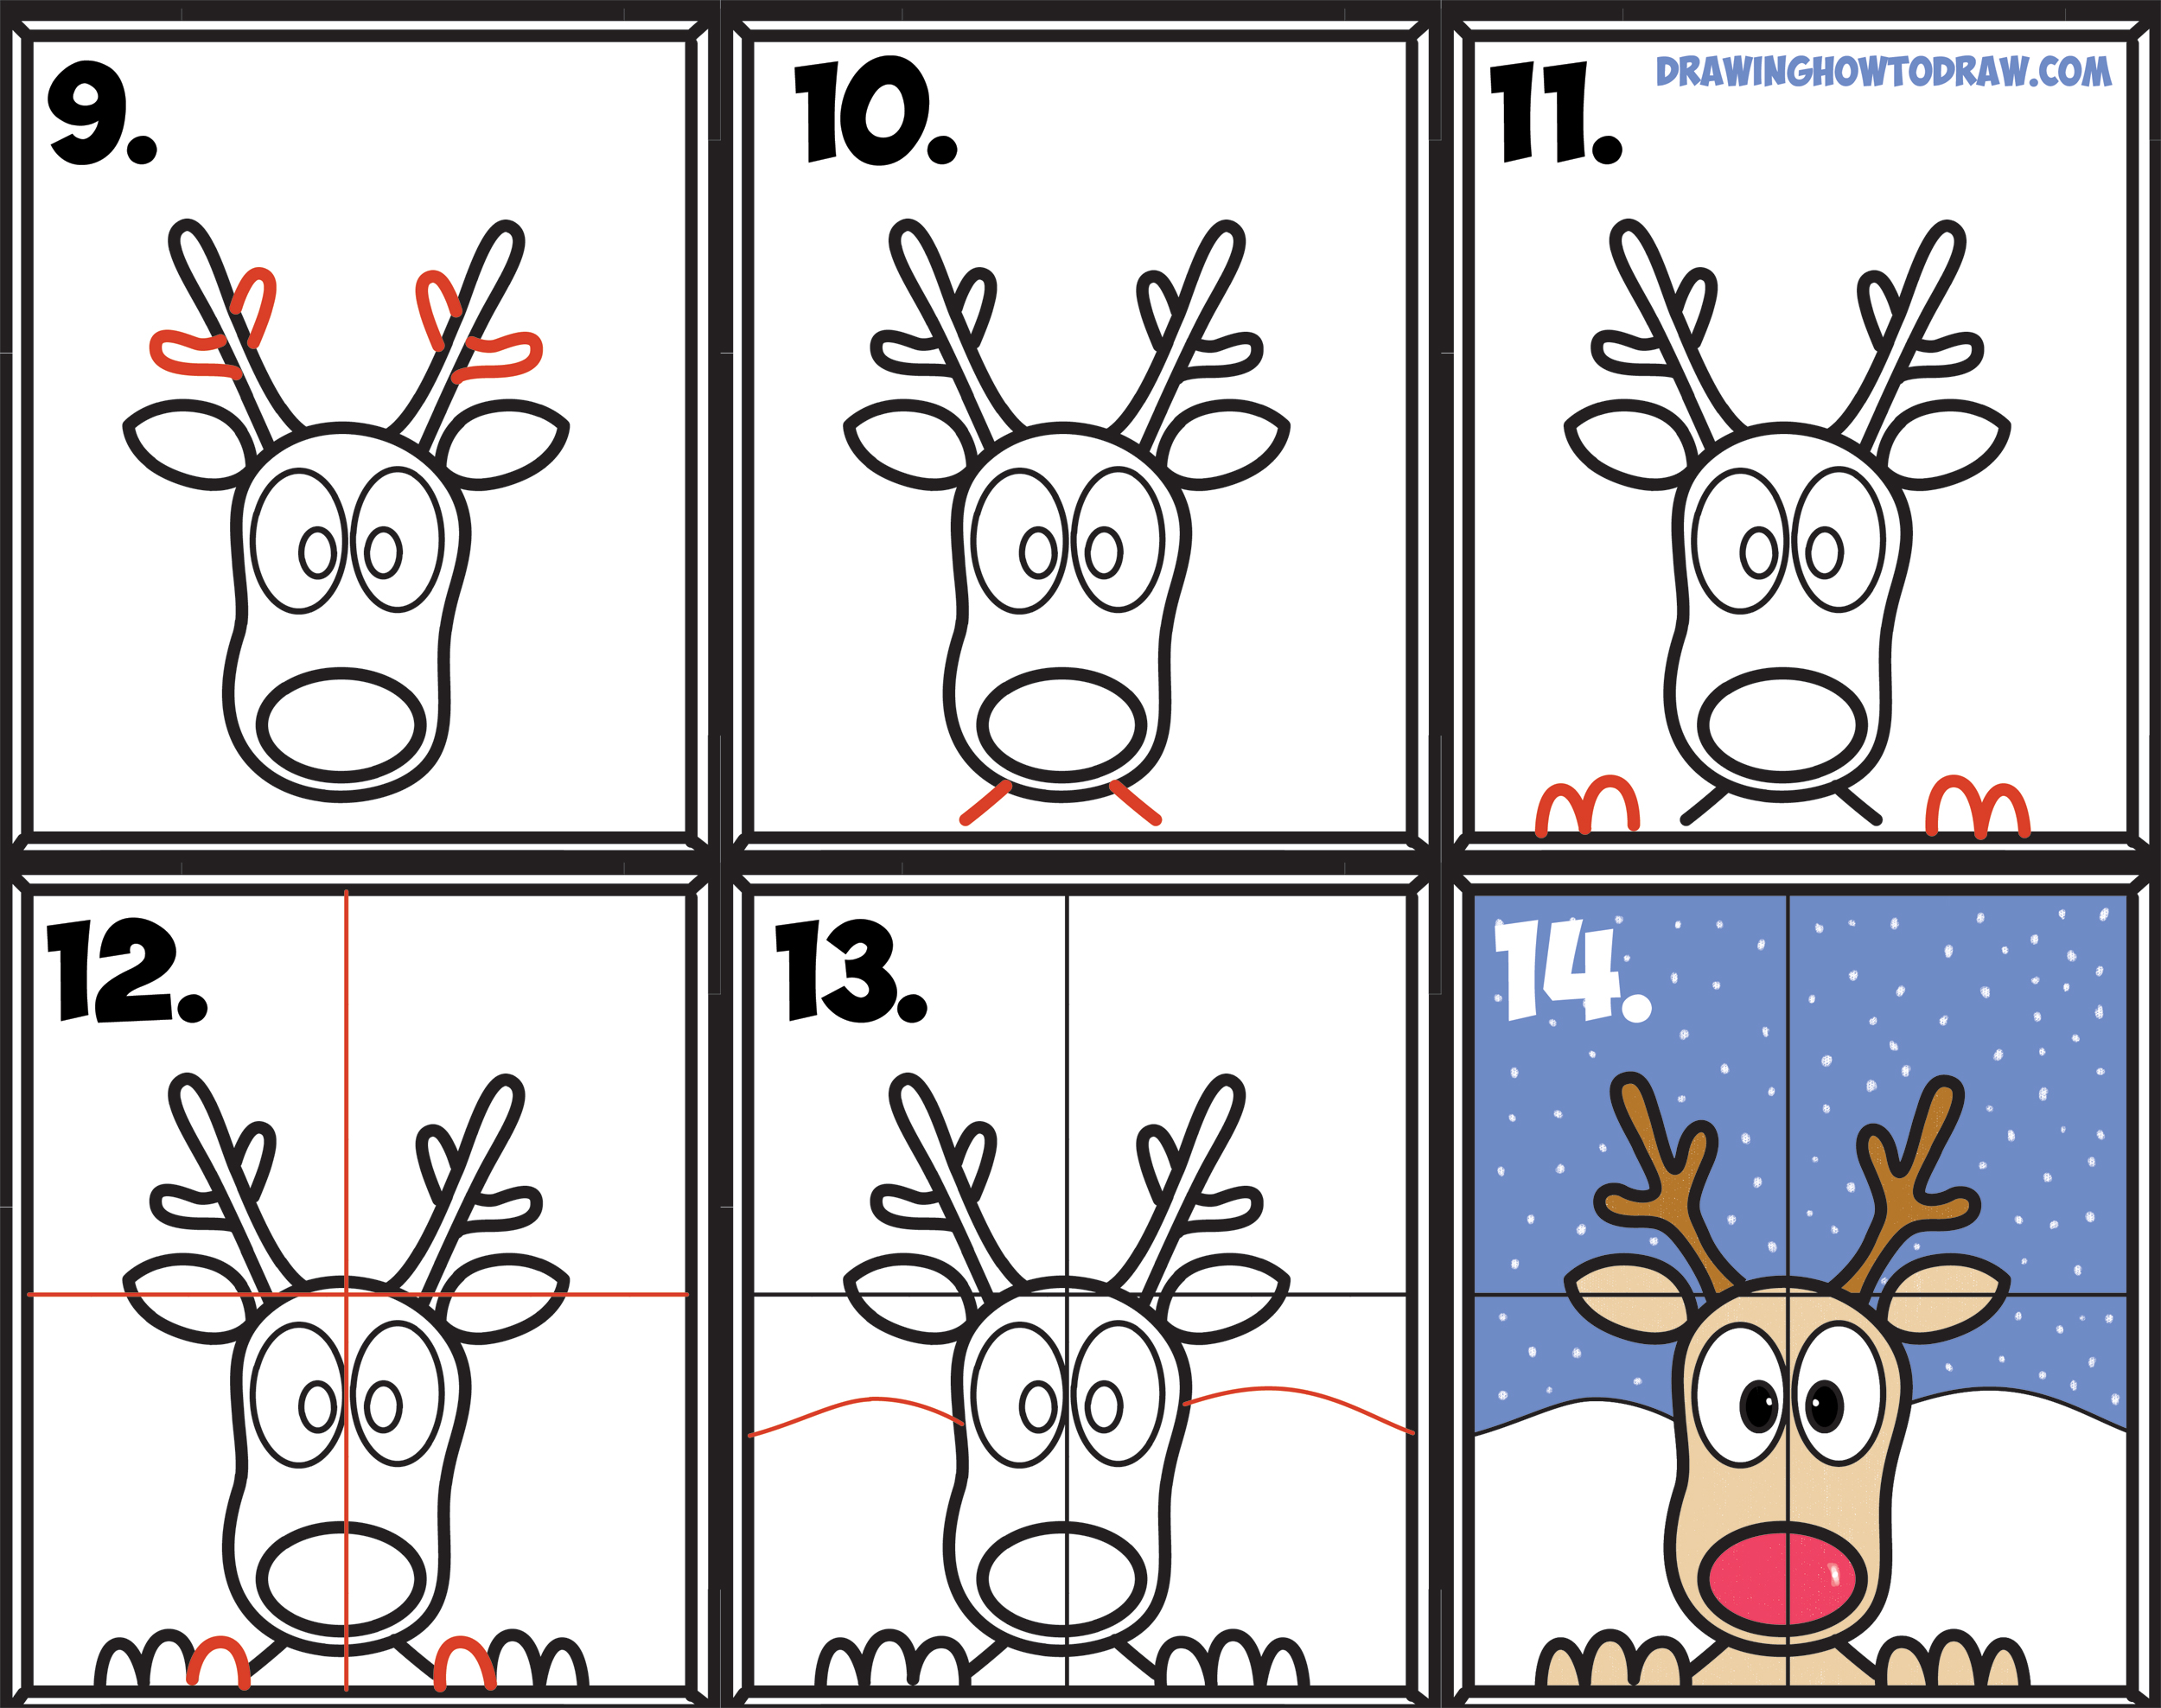
Draw the head and antlers. You can use markers, colored pencils, or any other coloring tools you prefer to add color to. Draw the ear by extending two curved lines from each side of the head. Web complete the reindeer drawing. The oval should be horizontal and placed slightly lower than the circle to allow room for the neck.
How to Draw a Reindeer Draw for Kids
Start your reindeer with two simple shapes: Web complete the reindeer drawing. Draw more reindeer in the background, you could even draw one with a red nose. Connect the head and body with a pair of curved. Draw two lines extend up and slightly backward from the top of the head for the main beams of the.

How to draw a Reindeer Reindeer Drawing Ideas
Also, check out all of our other fun christmas drawing lessons! The next step is to draw straight lines from the bottom of the reindeer's head creating a long neck. Next comes a pair of simple horns. Enclose the tail using a series of short, curved lines that meet in jagged points. And subscribe☆share your drawings with me on instagram:

How To Draw A Reindeer For Kids by Dawn Raindeer drawing, Cute easy
You can use markers, colored pencils, or any other coloring tools you prefer to add color to. Now, shade the reindeer’s mane, underbelly, tail and inner ear with a light brown crayon. Next, draw a circle at the top. These steps are super simple, perfect for any age. Web how to draw a reindeer.
Cartoon Reindeer Drawing How To Draw A Cartoon Reindeer Step By Step
Draw the reindeer body and legs. Next comes a pair of simple horns. Add a rounded triangle to the bottom of the oval for the head. Then, directly beneath the tail you can use some rounded lines for the hip of the reindeer. Help children develop their fine motor skills and hand eye coordination, and perceptual motor skills by learning.

How to Draw a Reindeer (Step by Step Pictures) Cool2bKids
Draw an oval shape below the head for the body and hips/hindquarters. These can be rough shapes as we will refine them later. Draw this cute reindeer by following this drawing lesson. First, use a curved line going from the base of the neck for the back of the reindeer. The oval should be horizontal and placed slightly lower than.
How to Draw Rudolph the Red Nosed Reindeer Looking in Window Easy Step
Our printable drawing guide (optional) paper; The next step is to draw straight lines from the bottom of the reindeer's head creating a long neck. Add the front of the head, the neck, and the tail. Draw more reindeer in the background, you could even draw one with a red nose. Draw two lines extend up and slightly backward from.
How To Draw A Reindeer
Meet me back in a bit for more drawing fun. Next draw a large oval shape for its head and then an oval shape under the nose for its mouth area. Begin by drawing two slightly curved lines that will form the base of each antler. Draw a sideways u from the short line of the neck around to the.
Web Add The Chin And Legs.
Draw two lines extend up and slightly backward from the top of the head for the main beams of the. Our printable drawing guide (optional) paper; Draw this cute reindeer by following this drawing lesson. Web fancy some festive sketching!
Begin By Drawing Two Slightly Curved Lines That Will Form The Base Of Each Antler.
Web beautiful flower drawing step by step | how to draw a beautiful flower | easy drawing for beginners #drawing #art #ajaykiart beautiful flower drawing step by. A large oval for the body and a smaller circle for the head. We are drawing the reindeer from a side angle. Web learn how to draw a reindeer for kids easy and step by step.
For The Chin And The Legs, Draw These Shapes Lightly, As You Will Be Adjusting Them Later.
Connect the head and body with a pair of curved. Web hi,want to make your own reindeer drawing?watch my step by step video tutorial about how to draw a reindeer and at the end you are going to be able to make y. This is the reindeer's head. First, use a curved line going from the base of the neck for the back of the reindeer.
Next Draw A Large Oval Shape For Its Head And Then An Oval Shape Under The Nose For Its Mouth Area.
Detail the shape of its hoofs. Meet me back in a bit for more drawing fun. Web draw a tail, ear, and an area for the nose and mouth. The oval should be horizontal and placed slightly lower than the circle to allow room for the neck.