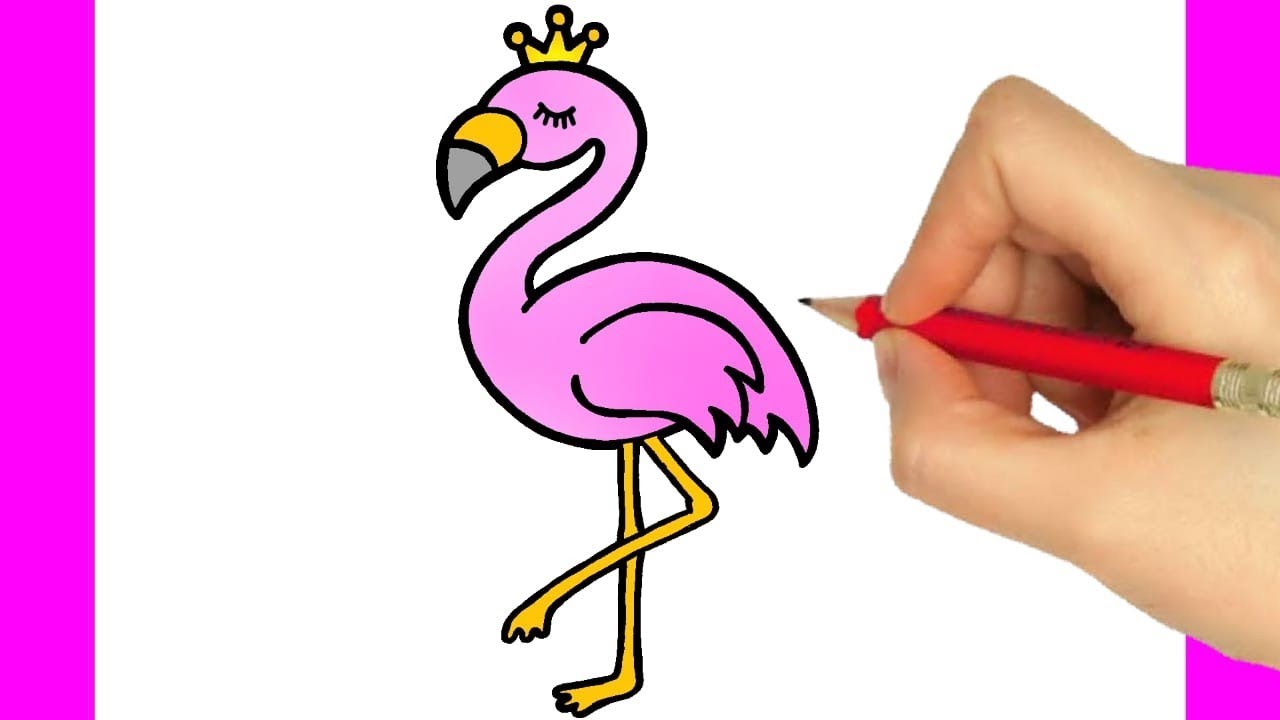
Draw Flamingo Step Step Easy
Draw Flamingo Step Step Easy - Flamingos are the classy breed of birds that are also easy to draw in a few simple steps, here is how to go about it! Notice how different the beak is! Web draw a petal shape like shown above however shade the bottom in with your pencil and draw a line from that shape to top of that shape this is the beak of the flamingo. Draw a smaller oval shape for the head. Draw this below the flamingo’s head, as a larger oval than the oval of the head. Before attempting to draw a flamingo, it’s important to develop an understanding of its anatomy. Ready to take your drawing to the next level!? Let’s draw the flamingo’s belly now. Web draw two ovals for the head and body of the flamingo. Begin this method on guide how to draw a flamingo by drawing an oval shape slightly elongated to form the flamingo’s body.
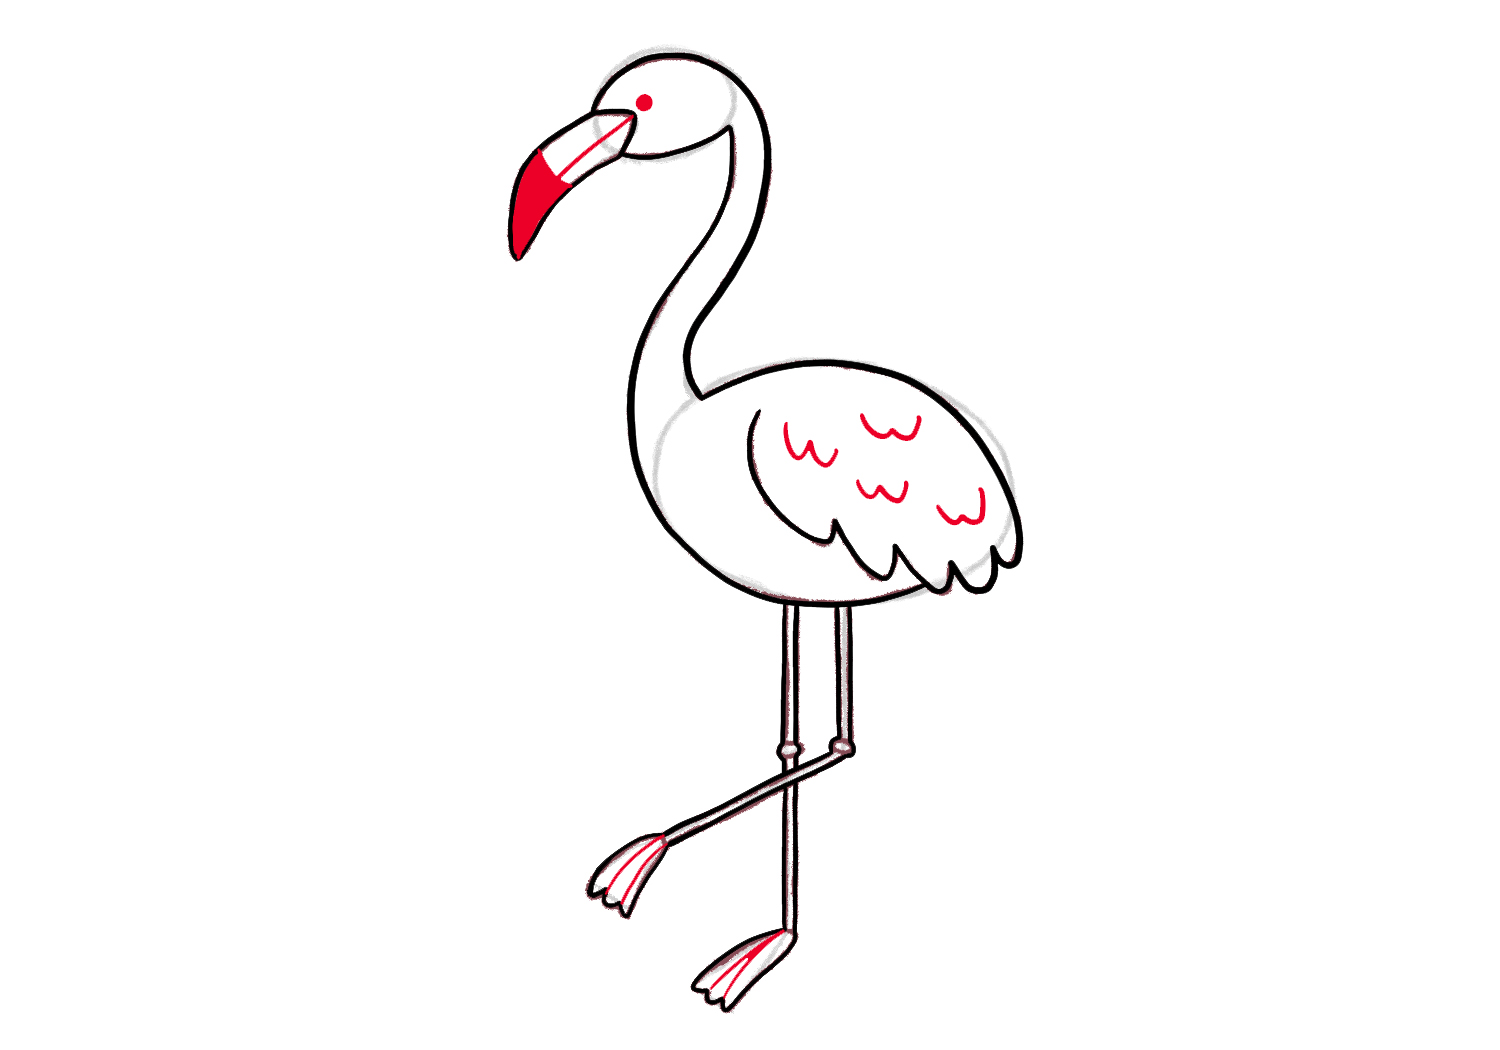
Notice that the flamingo's beak is large and hooked. Start out with some simple shapes. The higher up you place the circle, the longer the neck will be. Draw two curved lines extending diagonally from the head, and allow them to curve steeply downward before meeting in a gentle point. Web reference images are important for capturing the delicate details and proportions of a flamingo. You can match these lines to the middle of the beak for the bottom line but be sure. Close off the hooked line to the circle with a shorted line below it, this will be the beak! You’ll then want to draw a curved shape and then draw two lines to create the head. Add some lines to form the neck and legs. In addition, draw the neck using the middle portion of the 2 and the body using the bottom of the 2.
A couple of circles help to bring the head and body into view. In this drawing lesson, we’ll show how to draw a flamingo step by step total 12 phase here we create a flamingo it will be easy tutorial. Make a medium oval and a small circle for the face. You’ll then want to draw a curved shape and then draw two lines to create the head. Unlock ad free and printable drawing and coloring tutorials. Ready to take your drawing to the next level!? Add the eyes and facial details, complete by drawing some circles to represent the flamingo standing in water. Before attempting to draw a flamingo, it’s important to develop an understanding of its anatomy. The higher up you place the circle, the longer the neck will be. Notice that the flamingo's beak is large and hooked.

Learn to Draw A Flamingo in 6 Steps Learn To Draw
A couple of circles help to bring the head and body into view. Continuing with this cartoon flamingo drawing, we will now be adding some facial details along with the start of the body. Draw a smaller circle on the top right side as a guide for the flamingo's head. Web at the top of the sheet of paper, draw.
HOW TO DRAW A CUTE FLAMINGO EASY STEP BY STEP YouTube
In addition, draw the neck using the middle portion of the 2 and the body using the bottom of the 2. Web first, draw a large 2. Place the second smaller arc under the first to create the bent beak. Web learn how to draw a flamingo with this easy to follow step by step drawing guide video tutorial. Draw.

How to Draw a Flamingo Really Easy Drawing Tutorial
It should look like one end of a boomerang. Draw two curved lines extending diagonally from the head, and allow them to curve steeply downward before meeting in a gentle point. You’ll then want to draw a curved shape and then draw two lines to create the head. Web how to draw a flamingo instructions: You can match these lines.

How To Draw A Flamingo Easy Step By Step Drawing Tutorial Summer
With smooth guidelines, draw a neck. In addition, draw the neck using the middle portion of the 2 and the body using the bottom of the 2. Fourth, color the flamingo pink and add a background to make it look. Continuing with this cartoon flamingo drawing, we will now be adding some facial details along with the start of the.

How To Draw A Flamingo (Easy Tutorial For Beginners) Bujo Babe
Close off the hooked line to the circle with a shorted line below it, this will be the beak! In this drawing lesson, we’ll show how to draw a flamingo step by step total 12 phase here we create a flamingo it will be easy tutorial. Draw two curved lines extending diagonally from the head, and allow them to curve.
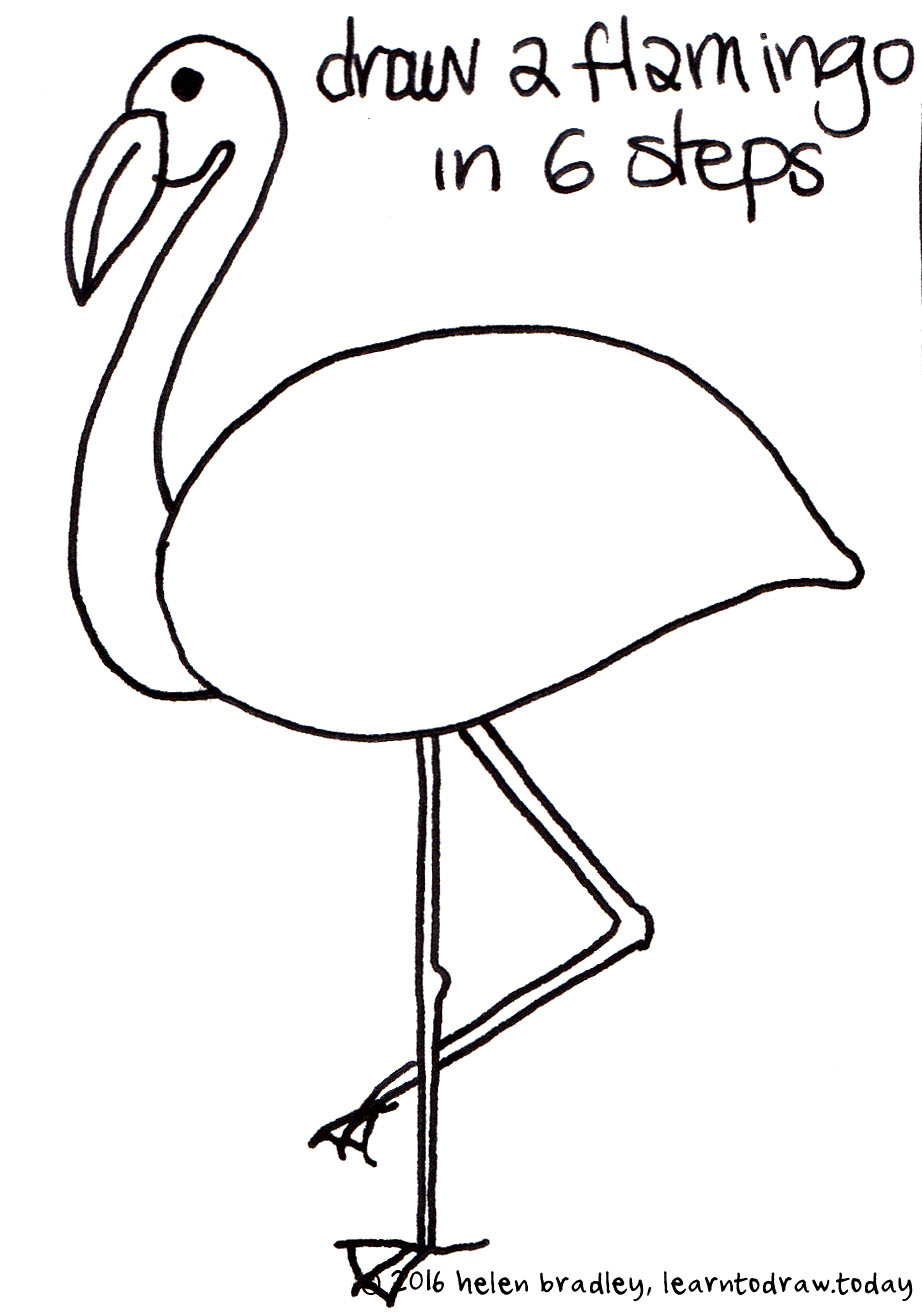
Learn to Draw A Flamingo in 6 Steps Learn To Draw
Web how to draw a flamingo, learn drawing by this tutorial for kids and adults. Place the second smaller arc under the first to create the bent beak. Ready to take your drawing to the next level!? Fourth, color the flamingo pink and add a background to make it look. Draw an eye on the head.
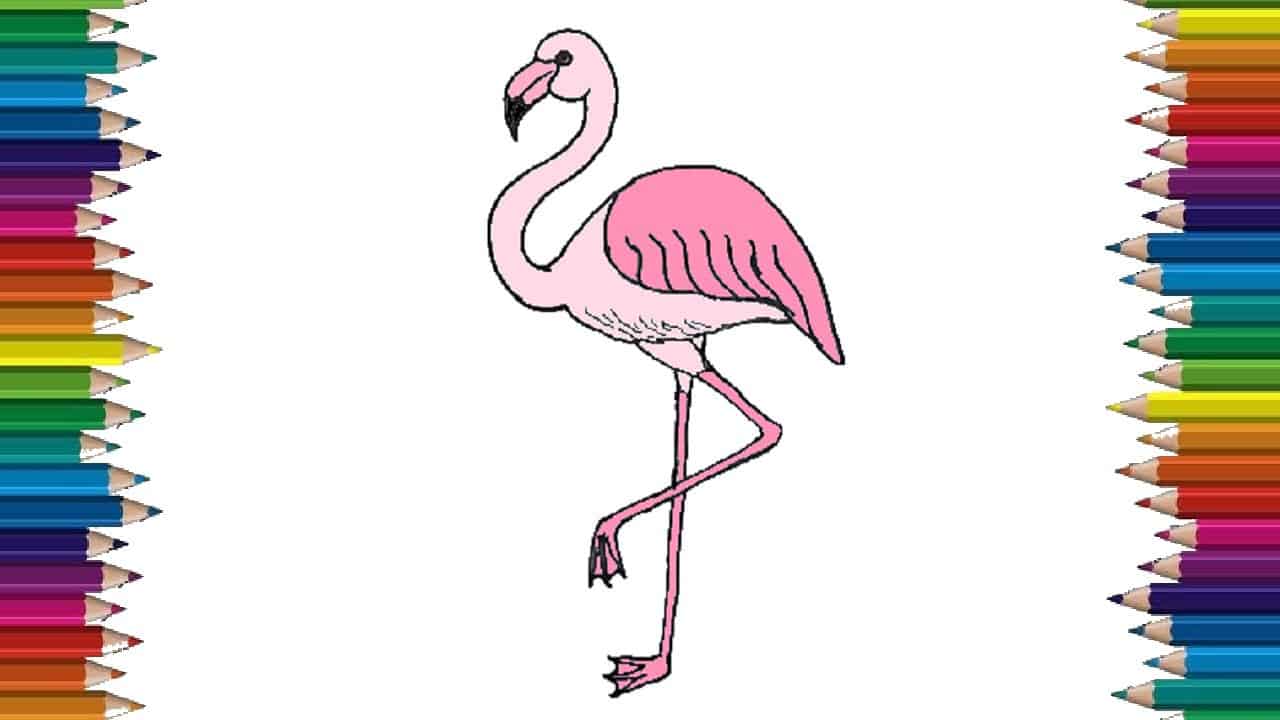
How to Draw a Flamingo step by step Bird drawing easy
Draw a teardrop shape for the side of the flamingo’s body. Add an outline of the body. Before attempting to draw a flamingo, it’s important to develop an understanding of its anatomy. Make a medium oval and a small circle for the face. Then draw a sort of slanted oval for its head.

How To Draw A Pink Flamingo Step By Step at Drawing Tutorials
Close off the hooked line to the circle with a shorted line below it, this will be the beak! Draw a smaller oval shape for the head. Web draw two ovals for the head and body of the flamingo. Web first, draw a large 2. Add some lines to form the neck and legs.

Cool How To Draw A Flamingo For Beginners Ideas
You can match these lines to the middle of the beak for the bottom line but be sure. For the eye, simply draw a circle that has a solid black circle within it. Let’s draw the flamingo’s belly now. Notice that the flamingo's beak is large and hooked. In this drawing lesson, we’ll show how to draw a flamingo step.
How to Draw a Flamingo (in 4 Steps!) Design Bundles
You’ve finished the how to draw a flamingo drawing lesson! Add an outline of the body. We begin this flamingo illustration by creating the basic shape of the flamingo’s body. This is a simple oval shape that is sloped with the left side being slightly higher. Draw two curved lines extending diagonally from the head, and allow them to curve.
Third, Draw The Beak, Legs, And 1 Flamingo Foot.
Notice that the flamingo's beak is large and hooked. Notice how different the beak is! This black circle will have a small white dot inside of it for a glint in the eye. Place the second smaller arc under the first to create the bent beak.
Web How To Draw A Flamingo Instructions:
Web how to draw a flamingo, learn drawing by this tutorial for kids and adults. Ready to take your drawing to the next level!? You can match these lines to the middle of the beak for the bottom line but be sure. Use the two curved lines to connect the outline of the flamingo’s head to its body.
Draw The Second Line For.
Then draw a sort of slanted oval for its head. Draw this below the flamingo’s head, as a larger oval than the oval of the head. Close off the hooked line to the circle with a shorted line below it, this will be the beak! However, leave a gap because that’s.
Flamingos Are The Classy Breed Of Birds That Are Also Easy To Draw In A Few Simple Steps, Here Is How To Go About It!
Make a medium oval and a small circle for the face. With smooth guidelines, draw a neck. Find the central point of your drawing area, and place this oval slightly above the center. Draw two curved lines extending diagonally from the head, and allow them to curve steeply downward before meeting in a gentle point.