Drawer Joints Woodworking
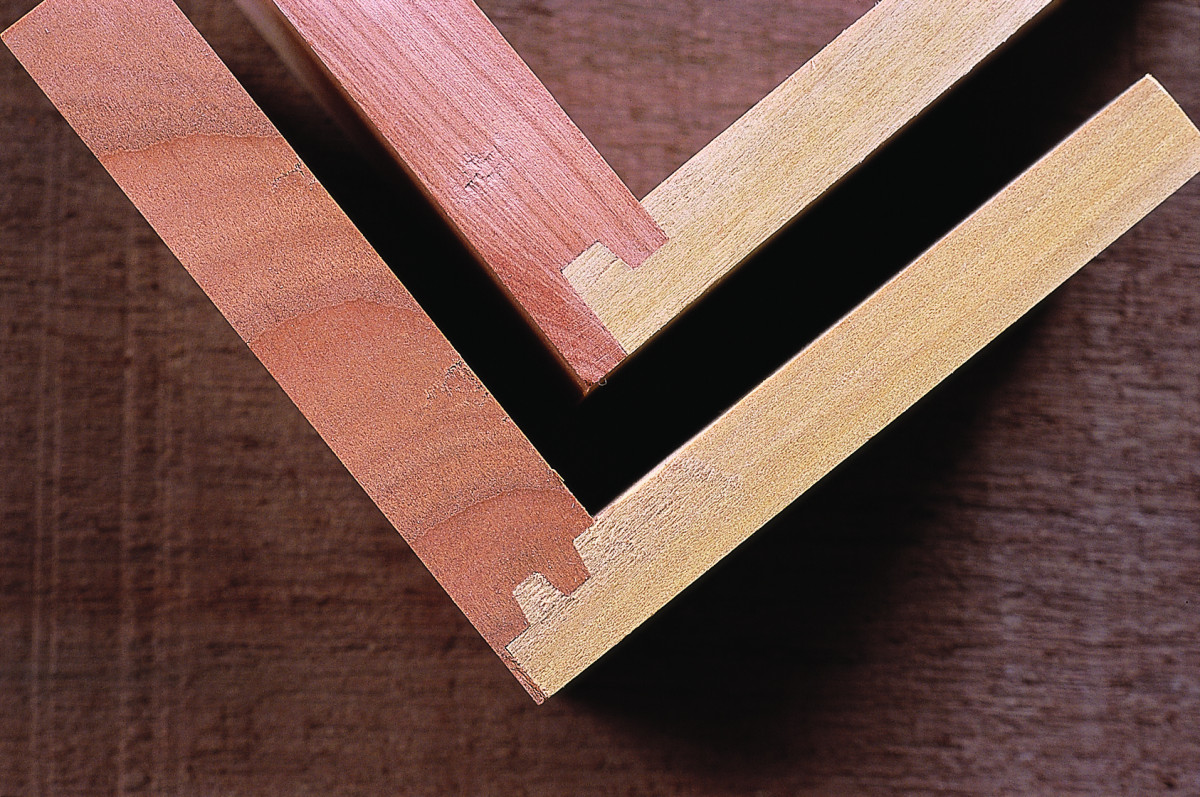
Drawer Joints Woodworking - For a drawer lock joint to fit correctly, the height of the bit and the fence position must both be perfect. Cut with the drawer pieces standing on end. Web measure and cut the side pieces. Web locking rabbet joints are strong, simple joints that work well for drawer construction. This locking corner joint combines the strength of a mechanical connection with good surface area for glue. Wood magazine's jeff mertz shows you this technique i. While this can’t compare to a stout dovetailed drawer, it’s more than adequate for most furniture applications. So, it will cut up to five fingers at a time! This drawer will last as long as your kitchen will. Woodworkers form this joint by forming a recess into the edge of the timber.
Place the plywood inside the drawer box and drill pilot holes around the perimeter. Web to make a mitered butt joint, cut the edge of the wood at a 45 degree angle. Leave the fence and dado set where. Ideal for small drawers, this joint is easy to make on the tablesaw there are Support the piece with a tenoning jig. This locking corner joint combines the strength of a mechanical connection with good surface area for glue. This beauty will cut strong, attractive box joints for small boxes, shallow drawers and trays. Depending on the type of guide system that supports the drawers, we use two different types of locking rabbet joints: It looks like the protruding edge from a tongue and groove joint, except it only has one side cut from it instead of two. Next, cut a dado in the ends of the drawer sides using a dado set ( photo 3 ).
Wood magazine's jeff mertz takes you to the tablesaw and demonstrates how to ma. While the rabbet joinery is a simple wood joint, it is much stronger than the butt joint. A rabbet is another common wood joint used in cabinetry. Web rabbet joints make strong corners. Now s a good time to cut the 1 ⁄ 4 x 1 ⁄ 4 groove in each of your fronts, sides, and backs for holding the drawer bottom. Support the piece with a tenoning jig. Web get new woodworking videos, articles, and projects every week with the free wwgoa newsletter. Cut a 1 ⁄ 4 x 1 ⁄ 4 rabbet in both ends as shown at right. Place the plywood inside the drawer box and drill pilot holes around the perimeter. Rabbets are often used at the back of cabinets and similar assemblies to attach the back to the sides of the box, adding considerable strength to the assembly.
Woodworking Joints For Drawers
A tongue and groove wood joint is often used instead of edge to edge butt joints and it easily allows for one piece of wood to slide into another. This cut begins to form the joint’s tongue and rabbet. Published on january 8, 2020. Position a drawer back on edge with its inside face against the fence. Web a much.
AW Extra 8/9/12 Lock Rabbet Drawer Joinery Popular Woodworking
Web to make a mitered butt joint, cut the edge of the wood at a 45 degree angle. Next, cut a dado in the ends of the drawer sides using a dado set ( photo 3 ). A rabbet is another common wood joint used in cabinetry. Drawer slide jigs & accessories. Be sure to keep the groove you cut.

Locking Rabbet Joints Woodworking Project Woodsmith Plans
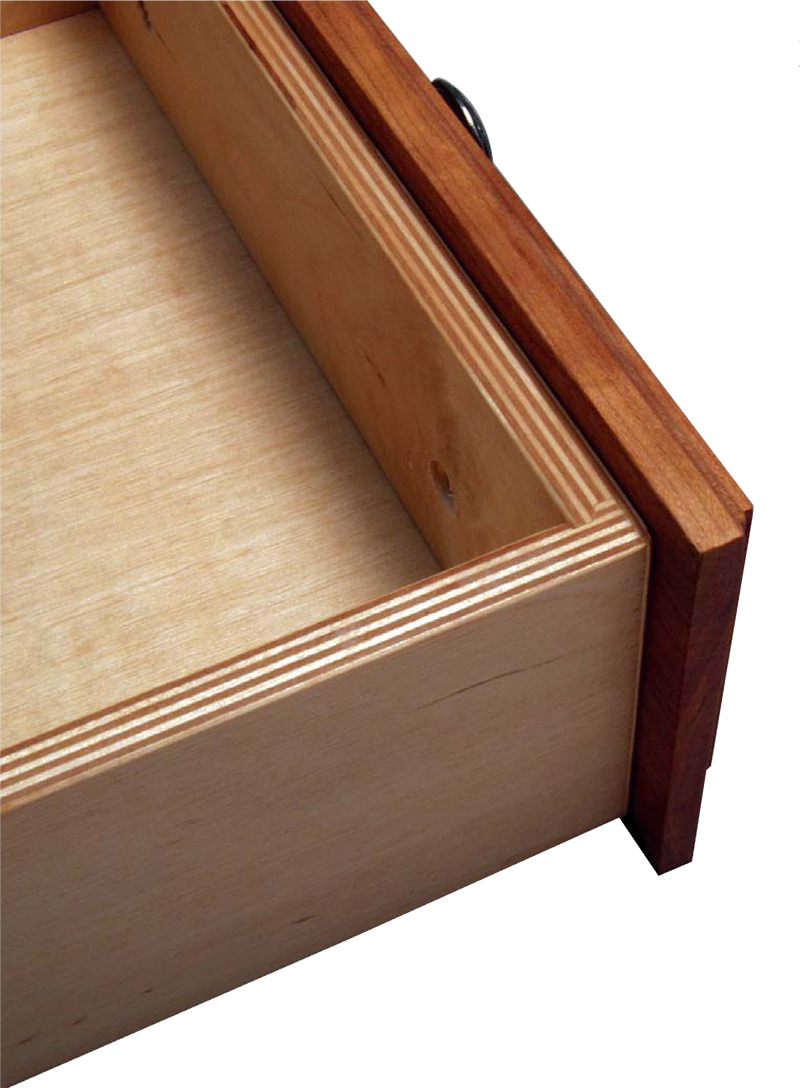
Be sure to keep the groove you cut for the drawer bottom oriented upward, cutting the rabbet on the back of the workpiece. This joint is essentially a dado cut along the edge of a board. A rabbet is another common wood joint used in cabinetry. Three measurements are critical, in this order: Web get new woodworking videos, articles, and.
![19 Types of Wood Joints Their Uses [Names & Pics] PDF](https://www.theengineerspost.com/wp-content/uploads/2022/12/Wood-Joints.jpg)
19 Types of Wood Joints Their Uses [Names & Pics] PDF
Web cut a 3/8″ x 3/8″ dado into the end of the drawer front, using a dado set. It’s definitely very handy to have a router lift in your table for making these fine height adjustments. Woodworkers form this joint by forming a recess into the edge of the timber. Cut a 1 ⁄ 4 x 1 ⁄ 4 rabbet.

Locking Rabbet Joints Woodworking Project Woodsmith Plans Wood
Attach the frame to the case using #8 x 1 1 ⁄ 4 ” wood screws ensuring the frame is centered on the case and flush with the back. Continue to 15 of 15 below. Woodworkers form this joint by forming a recess into the edge of the timber. Web measure and cut the side pieces. All were built using.

How to Make Wood Joints The Home Depot
Best of all, this technique allows you to cut all parts of the joint with just a dado blade and a single. Place the plywood inside the drawer box and drill pilot holes around the perimeter. A tongue and groove wood joint is often used instead of edge to edge butt joints and it easily allows for one piece of.

Wood joints, Types of wood joints, Woodworking joinery
It looks like the protruding edge from a tongue and groove joint, except it only has one side cut from it instead of two. Now s a good time to cut the 1 ⁄ 4 x 1 ⁄ 4 groove in each of your fronts, sides, and backs for holding the drawer bottom. Cut with the drawer pieces standing on.
Lock Joint Holds Drawers Tight Popular Woodworking
Web a much easier and faster method is to use the amana box joint router bit set. To fasten the two pieces together, add glue and clamp until the glue dries. Three measurements are critical, in this order: It’s definitely very handy to have a router lift in your table for making these fine height adjustments. Wood magazine's jeff mertz.
Woodworking Joints Which Wood Joints Should You Use?
Cut with the drawer pieces standing on end. While the rabbet joinery is a simple wood joint, it is much stronger than the butt joint. Attach the frame to the case using #8 x 1 1 ⁄ 4 ” wood screws ensuring the frame is centered on the case and flush with the back. Web seven solid joints comprise this.

Reference The Ultimate Wood Joint Visual Reference Guide Core77
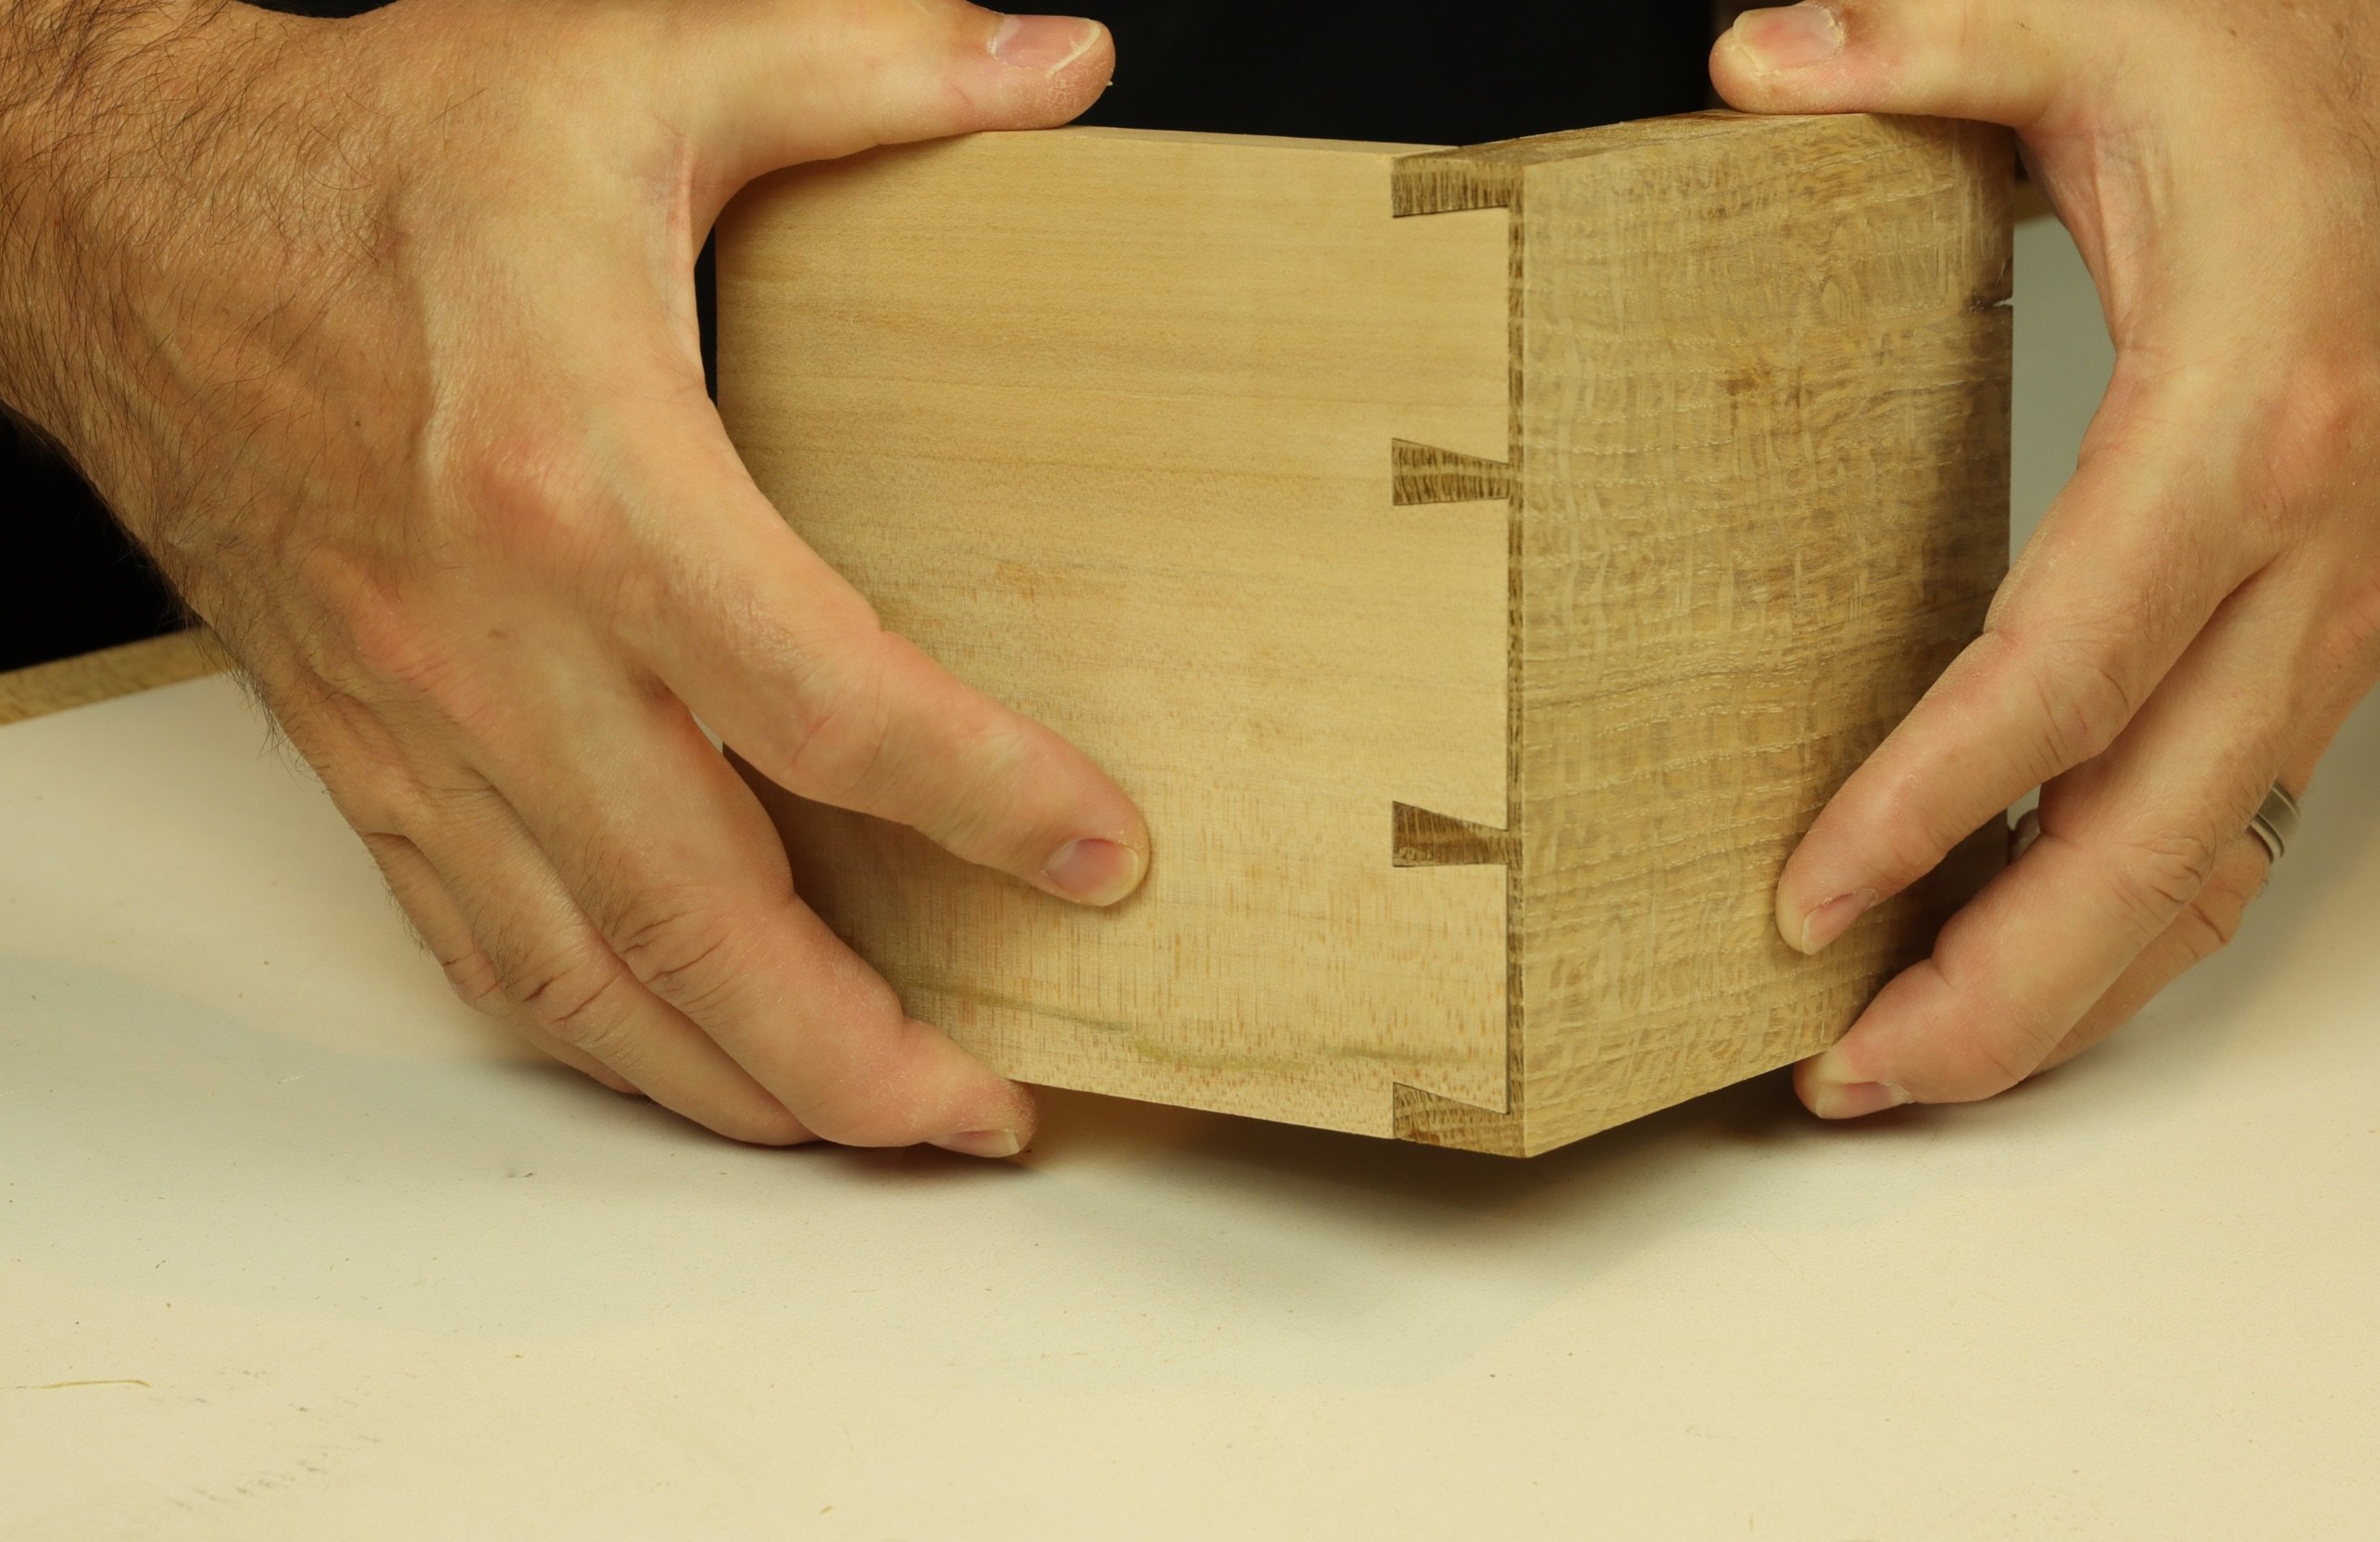
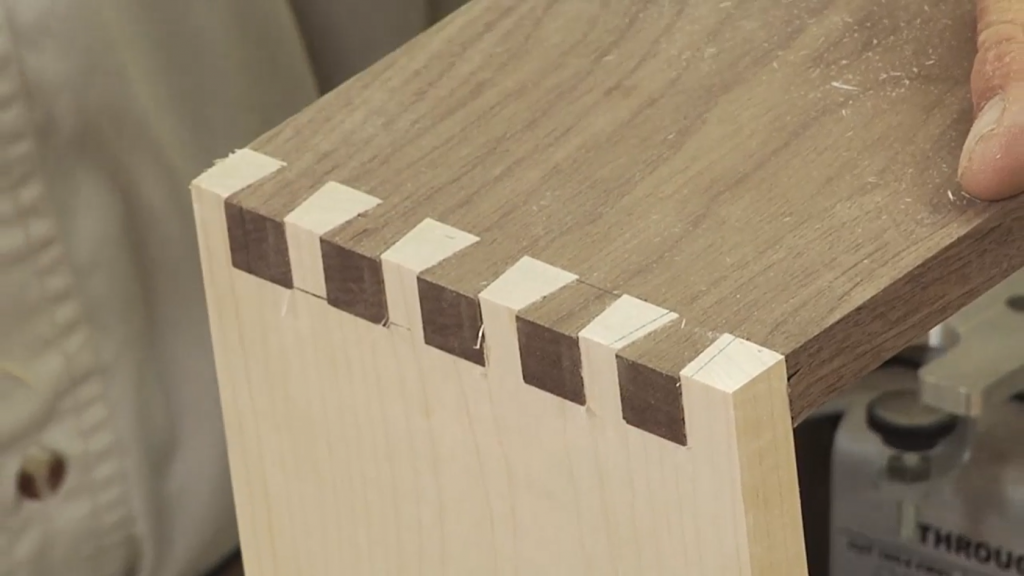
Woodworkers use this common joint, also known as a “rebate joint” in. Web a fine way to cut corners. Cut with the drawer pieces standing on end. This cut begins to form the joint’s tongue and rabbet. All of the above said, today's better kitchen cabinets generally have dovetails.
All Of The Above Said, Today's Better Kitchen Cabinets Generally Have Dovetails.
Attach the frame to the case using #8 x 1 1 ⁄ 4 ” wood screws ensuring the frame is centered on the case and flush with the back. While the rabbet joinery is a simple wood joint, it is much stronger than the butt joint. On the edge of one board is a tongue, on the other, a corresponding groove. Cut with the drawer pieces standing on end.
It's A Strong Joint That's Easy To Set Up And Cut.
It’s safest to build a little jig to hold these pieces securely and keep your hands away from the blades if using this method. Web making this work. Now s a good time to cut the 1 ⁄ 4 x 1 ⁄ 4 groove in each of your fronts, sides, and backs for holding the drawer bottom. Drawer slide jigs & accessories.
Woodworkers Form This Joint By Forming A Recess Into The Edge Of The Timber.
All were built using lumber of similar density and the. Next, cut a dado in the ends of the drawer sides using a dado set ( photo 3 ). This cut begins to form the joint’s tongue and rabbet. Wood magazine's jeff mertz shows you this technique i.
Measure In 1/4″ On Each End Of The Box Sides And Align The Workpiece.
Web line up the box front and back with the outer side of the blade and cut a 1/4″ rabbet on the ends of the workpiece as in photo 4. Support the piece with a tenoning jig. Attach a sacrificial piece of 1/4″ wood to the rip fence, taking up the space that had currently been between the blade and the fence. When placed together, the boards lock tightly to one another.