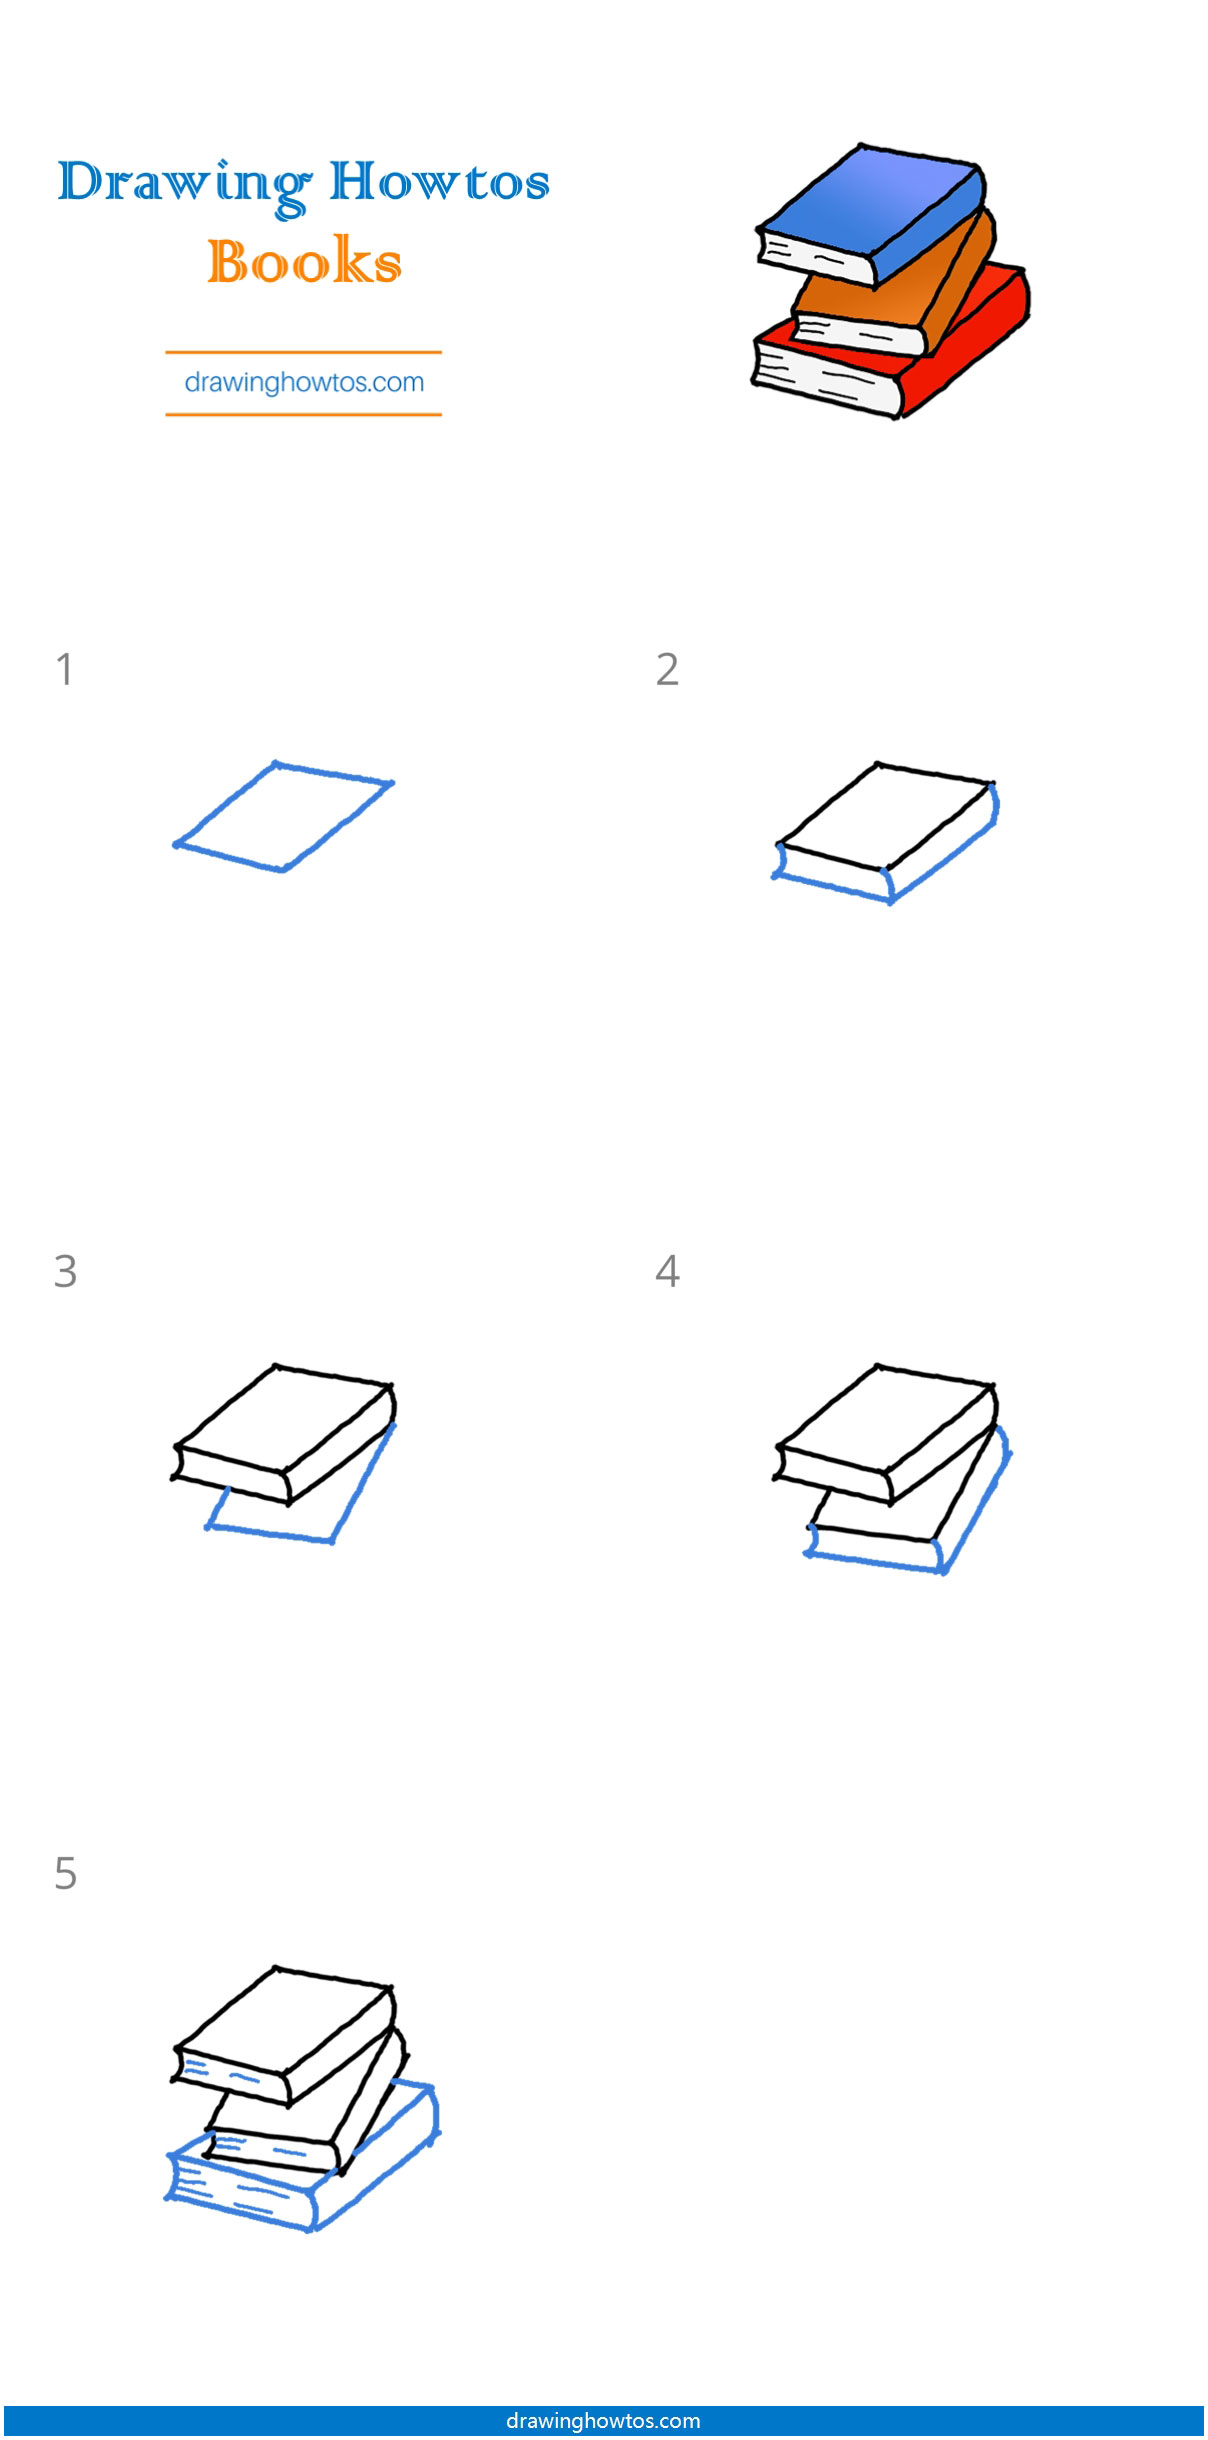
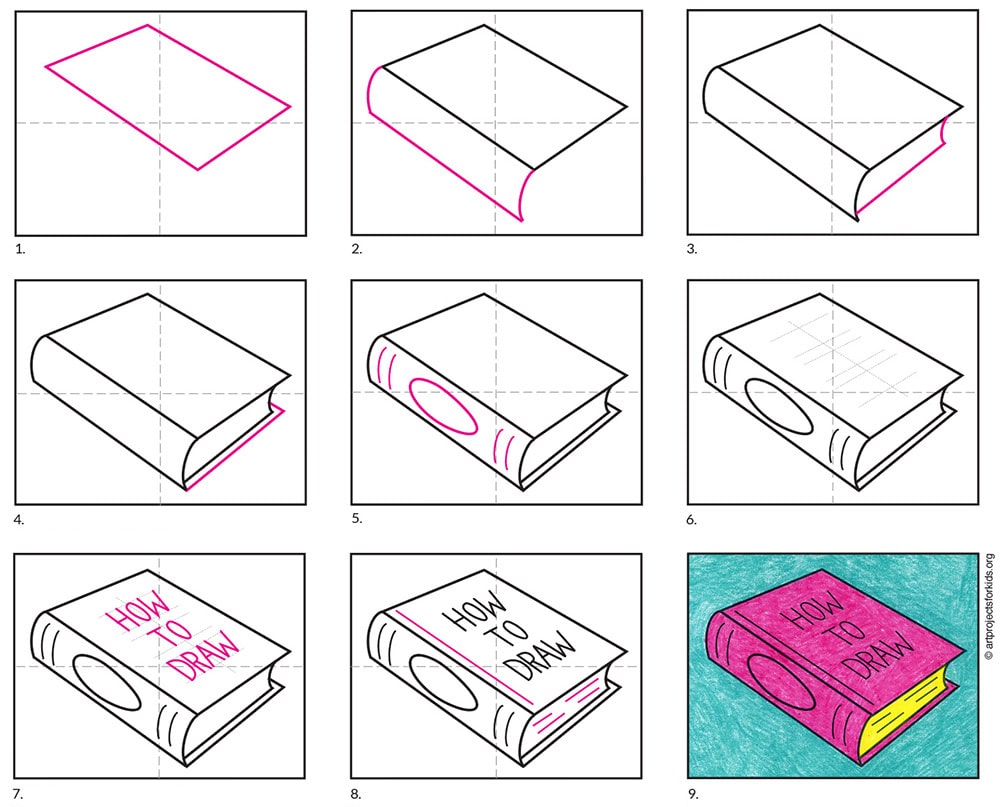
Drawing A Book Step By Step
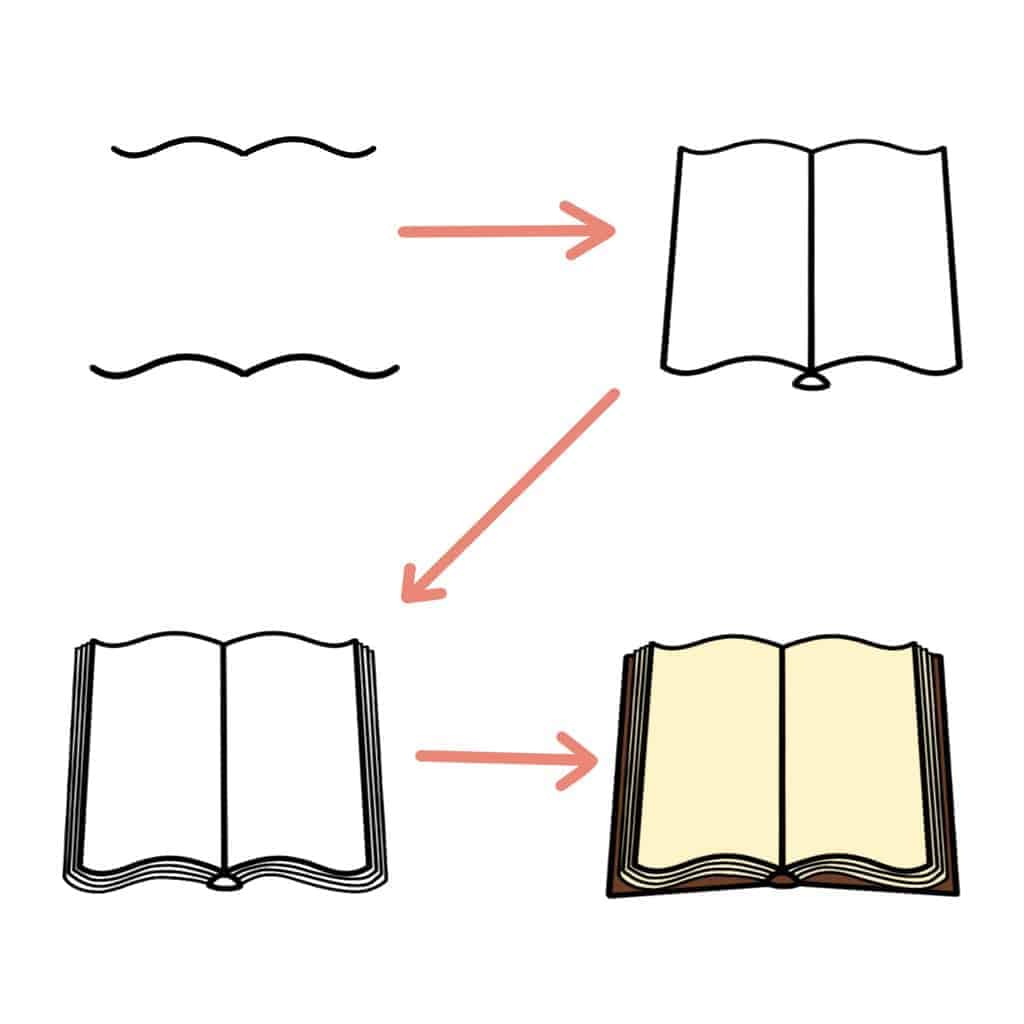
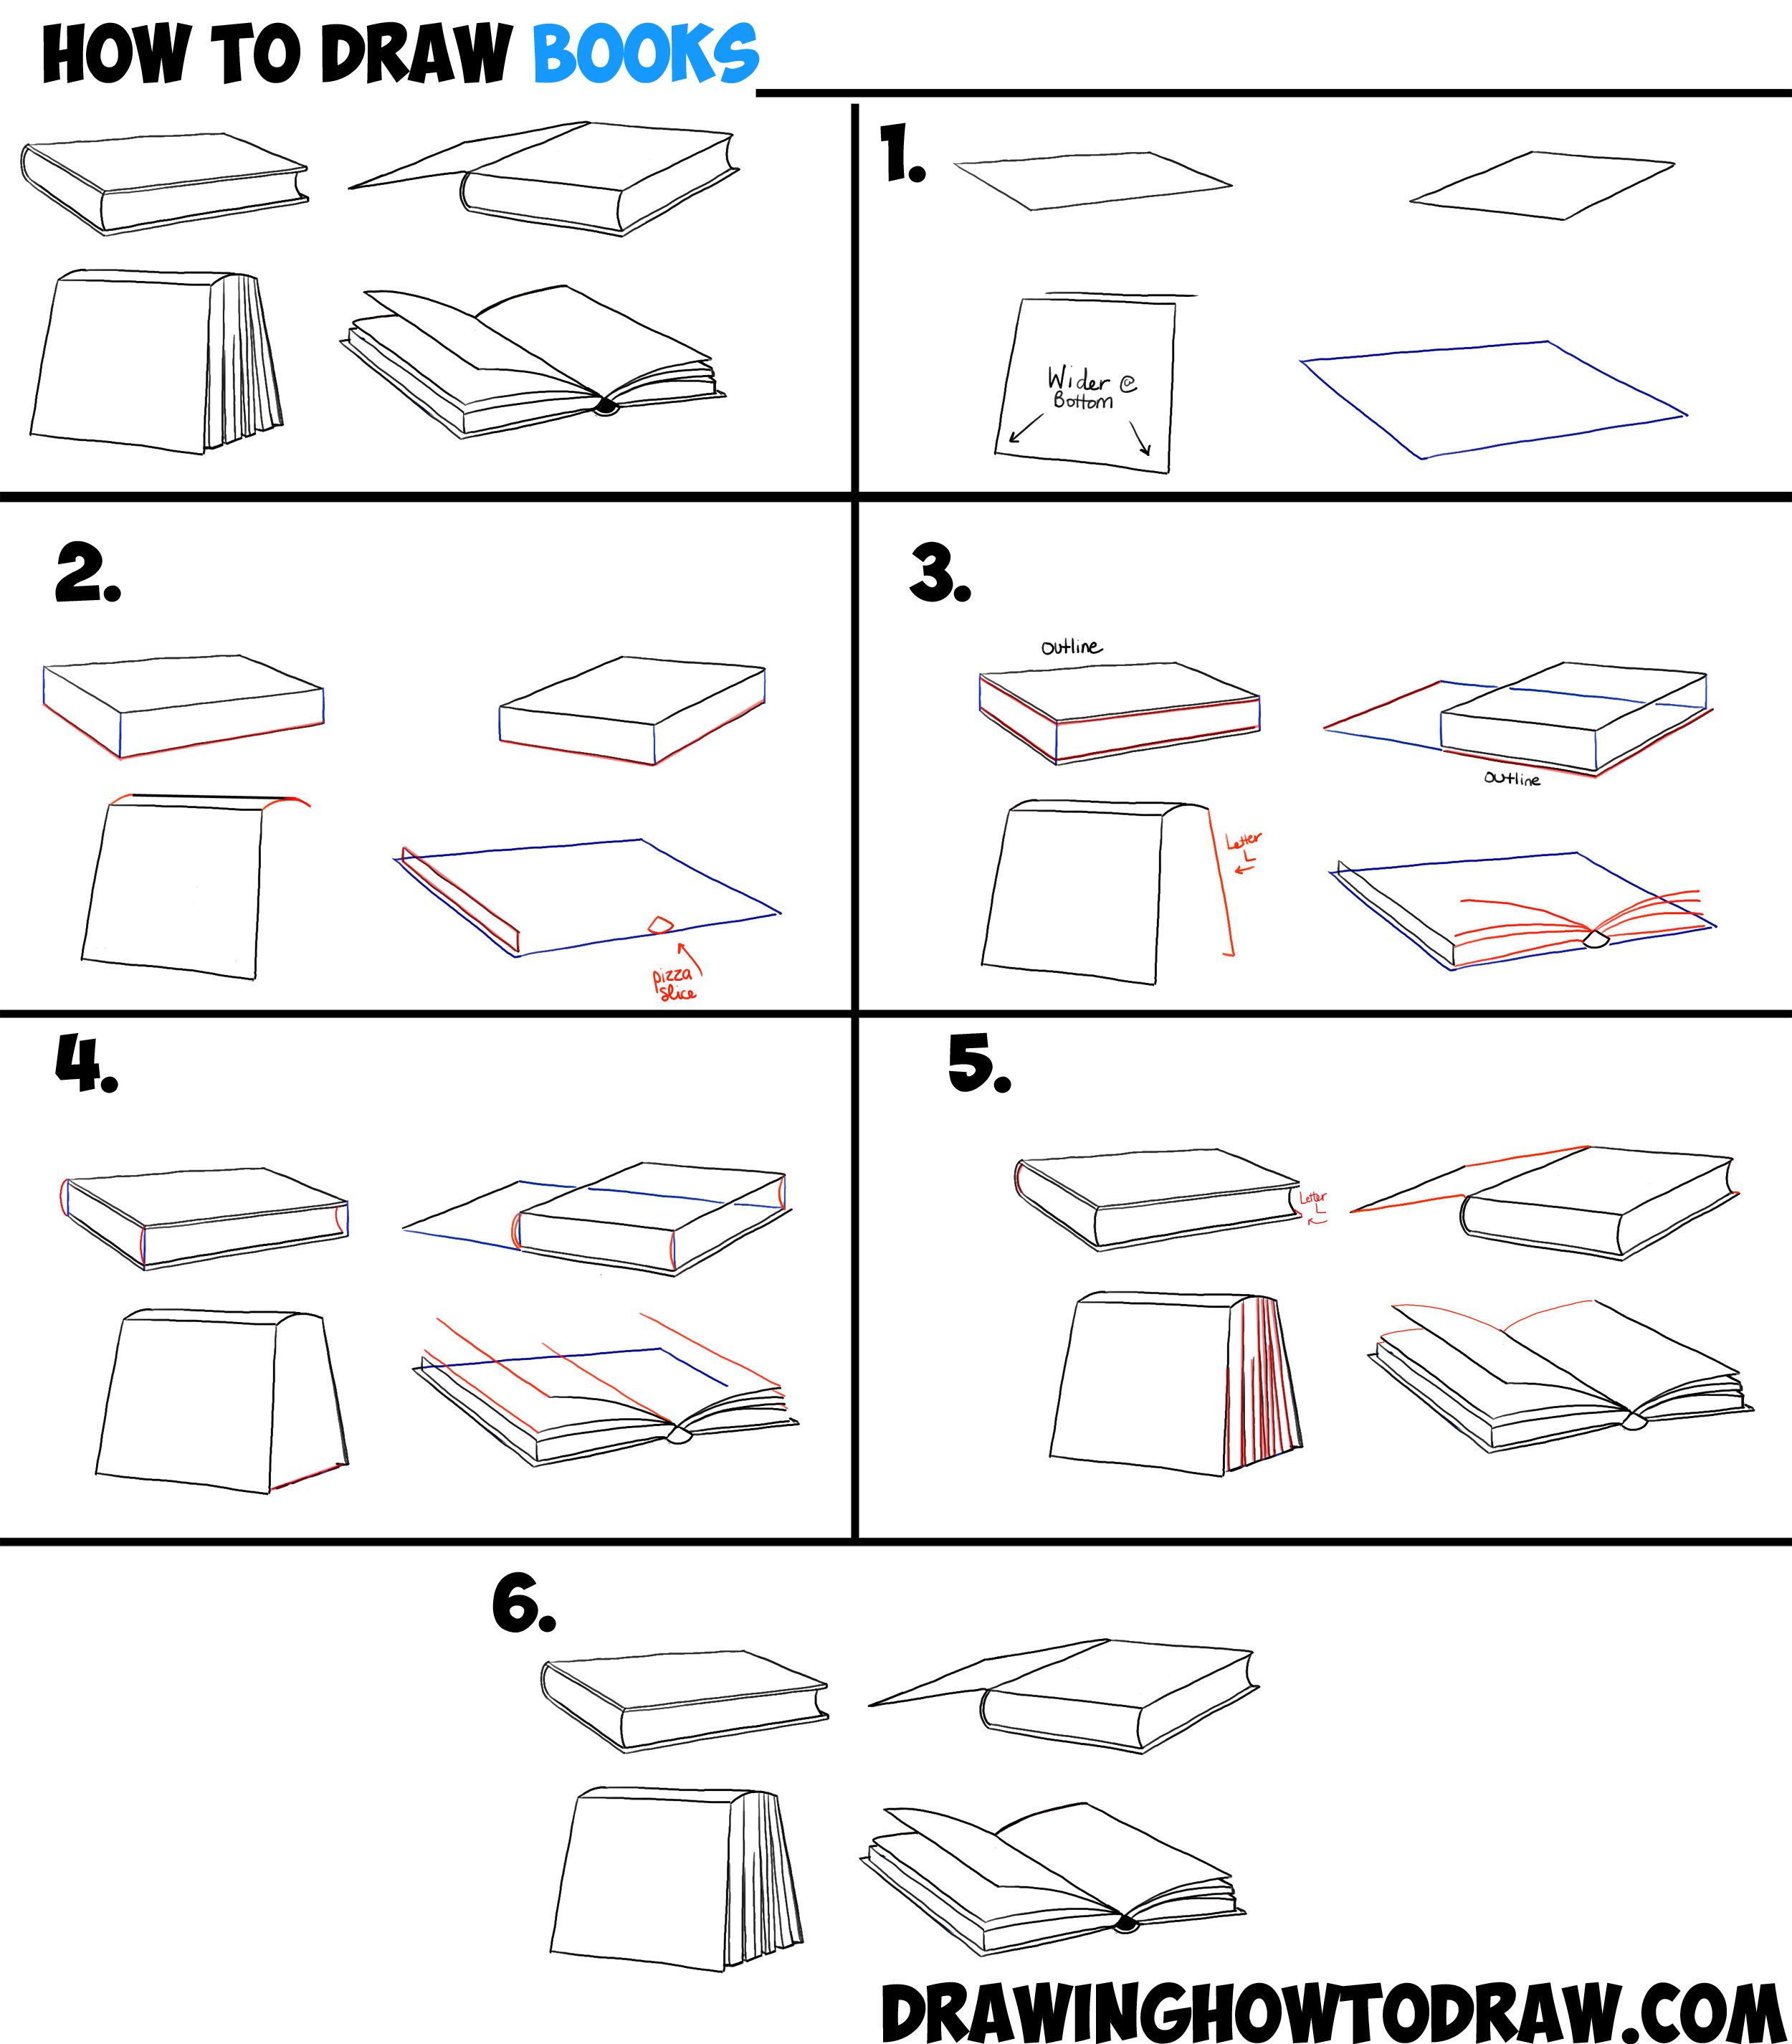
Drawing A Book Step By Step - Draw the outline of the book. Draw two lines at an angle from the top of the two book pages you just drew. Learning to draw has never been easier! Here, i go through one line at a time and rephrase things, fix grammatical mistakes, and change things that don't flow well. Drawing the basic shape of the book. This shape represents the open leaves of the pages. With a variety of animals, magical creatures, vehicles, foods, plants and more your kids will never get. Cute creatures (hello, llama!), fairytale fun,. Shaping the upper curve of the book’s pages. Draw a rectangle and the page split middle line.
You should start with the top point perspective since it covers a wider area. Then, let the line continue to form the top of the next page. Web want to learn how to draw a book sketch easy?watch this entire video as we show you step by step sketch tutorial for a simple book drawing.we guarantee you'l. Learning to draw has never been easier! Draw two lines at an angle from the top of the two book pages you just drew. Next, draw two curves to join the parallel lines on either end to make. To draw the front cover of the book, draw a parallelogram as seen in the image below. Web how to create a flower with butterfly sketch drawing with pencil step by step||fantastic sketch bookhow to draw a hibiscus flower step by step hibiscus flowe. Connect your spines with small curved lines and add a straight line to close your book cover. Continue shaping the book pages with two straight lines by leaving a space.
The top cover is rectangular and gives you the starting point. Then, let the line continue to form the top of the next page. Now that you have the outline of your book drawn in, you can start to draw in the inner details. Shape the top curve of book pages. I like to put mine on a slant for a little interest. For more drawing videos, you can visit my youtube channel: Web draw two lines parallel to each to other, this will form the spine of the book. As the image details, each end of the “m” shape will sweep and extend towards the book’s outer edges. Web follow this easy tutorial to draw a book in a few steps. On the top line of your rectangle, you will create an “m” type shape.
How to draw a Open Book Step by Step Open Book Drawing Lesson YouTube
Then, let the line continue to form the top of the next page. You should start with the top point perspective since it covers a wider area. Web book drawing for beginners. On the top line of your rectangle, you will create an “m” type shape. 1 5 steps to draw a realistic book.
How To Draw A Book 7 Easy Step By Step Tutorials Masha Plans
Drawing the basic shape of the book. You will now create the open page shape. Web the shape might get more or less exaggerated depending on the volume of pages and their positioning. Then, let the line continue to form the top of the next page. Start the drawing of the book by first making an “in perspective” 3d rectangle.
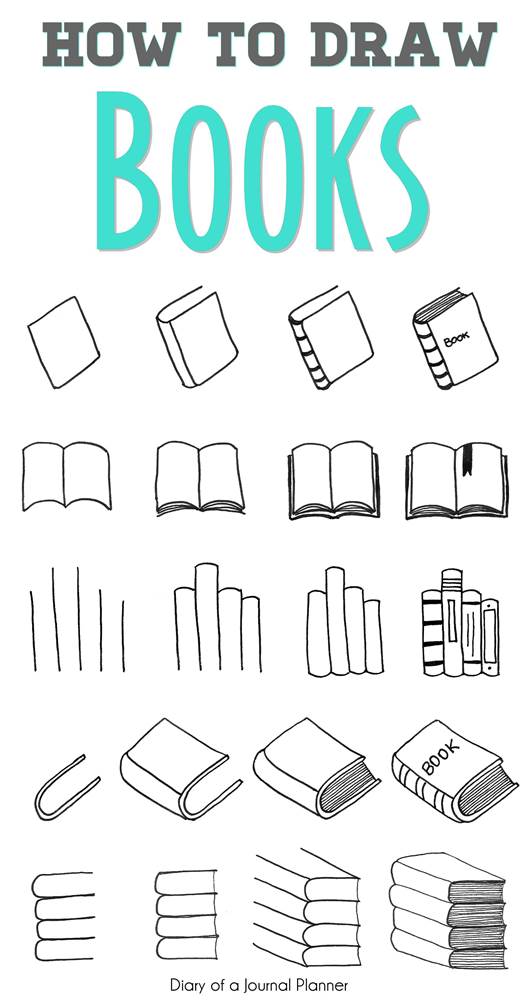
How to Draw Books in 4 Different Angles / Perspectives (Open / Closed
If you want to draw similar curve lines inside the spine as decoration as well. With a variety of animals, magical creatures, vehicles, foods, plants and more your kids will never get. Draw parallel lines coming from the curves of the us and one from the top. All lines that are “horizontally parallel” in our book will always head towards.

How To Draw A Book Easy Step By Step Tutorial You'll Love
Web book drawing for beginners. Find the middle point of the longest horizontal border and pull a line toward the vanishing point we’ve chosen. This shape represents the open leaves of the pages. If you want to draw similar curve lines inside the spine as decoration as well. As the image details, each end of the “m” shape will sweep.

How to draw a Book Step by Step Book Drawing Lesson
For more drawing videos, you can visit my youtube channel: These are your spines and the cover. You will now create the open page shape. Learning to draw has never been easier! Our how to draw book is here!
How to Draw Books Step by Step Easy Drawing Guides Drawing Howtos
To draw the front cover of the book, draw a parallelogram as seen in the image below. Start the open book drawing with a simple flat rectangle again. With a variety of animals, magical creatures, vehicles, foods, plants and more your kids will never get. Web the shape might get more or less exaggerated depending on the volume of pages.
Easy How to Draw a Book Tutorial and Book Coloring Page
With a variety of animals, magical creatures, vehicles, foods, plants and more your kids will never get. Shaping the upper curve of the book’s pages. Our printable drawing guide (optional) pencil or black marker; After that, add another one to the left and right. If you want to draw similar curve lines inside the spine as decoration as well.
How To Draw A Book (5 Super Easy Step By Step Tutorials For Beginners)
This line will also curve and continue into an adjacent line. To start drawing the basic shape of the book, connect each straight line with a curved. If you want to draw similar curve lines inside the spine as decoration as well. This will be the outline of our book. Then, let the line continue to form the top of.

How to Draw a Book Book drawing, Drawing lessons, Drawings
Shape the top curve of book pages. The center of the “m” will meet the book’s spine. Web join me on patreon for background information, drawing videos, step by steps and happy mails💌 link in bio 🗒. Trace with a pen and erase unnecessary lines. Shaping the upper curve of the book’s pages.

How to Draw a Book Step by Step Drawing books for kids, Book drawing
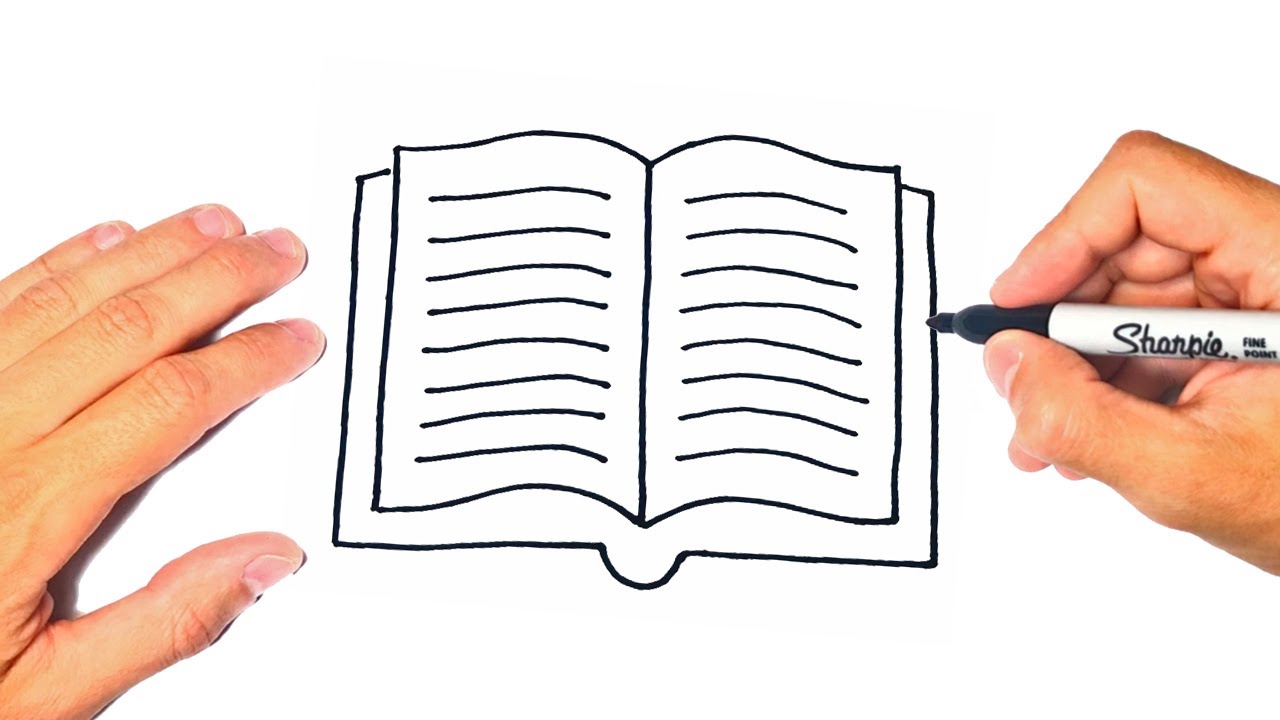
This will act as as a “construction frame” for the book and therefore should have about the same width, height and length. Finally, we were able to draw an easy book, and in this last step, we write many lines on the two pages in the middle of the book, as you can see in the picture. Draw a rectangle.
Next, Draw Two Curves To Join The Parallel Lines On Either End To Make.
1.3 troubleshooting your book drawing challenges; Draw another straight line along the spine, from the top of the cover to the l shaped line. Learning to draw has never been easier! If you want to draw similar curve lines inside the spine as decoration as well.
Draw A Square From Extending The Lines From The Vertices.
Trace with a pen and erase unnecessary lines. On the top line of your rectangle, you will create an “m” type shape. Web follow this easy tutorial to draw a book in a few steps. Now that you have the outline of your book drawn in, you can start to draw in the inner details.
Design Your Own Anime And Manga Characters:
Next, add a line for the back of the book that is parallel to the front cover. Along the top of your drawing of a book, draw two curving shapes that extend out from the dividing line of the base rectangle. To draw the front cover of the book, draw a parallelogram as seen in the image below. Join the two book lines on either side of the book spine.
Web How To Draw A Open Book Step By Step.
Web the first step in drawing an opened book is to make a straight line as a reference. This line will also curve and continue into an adjacent line. For more drawing videos, you can visit my youtube channel: These curves should curve up and then swoop down to the edges of the book drawing.