Drawing A Hood
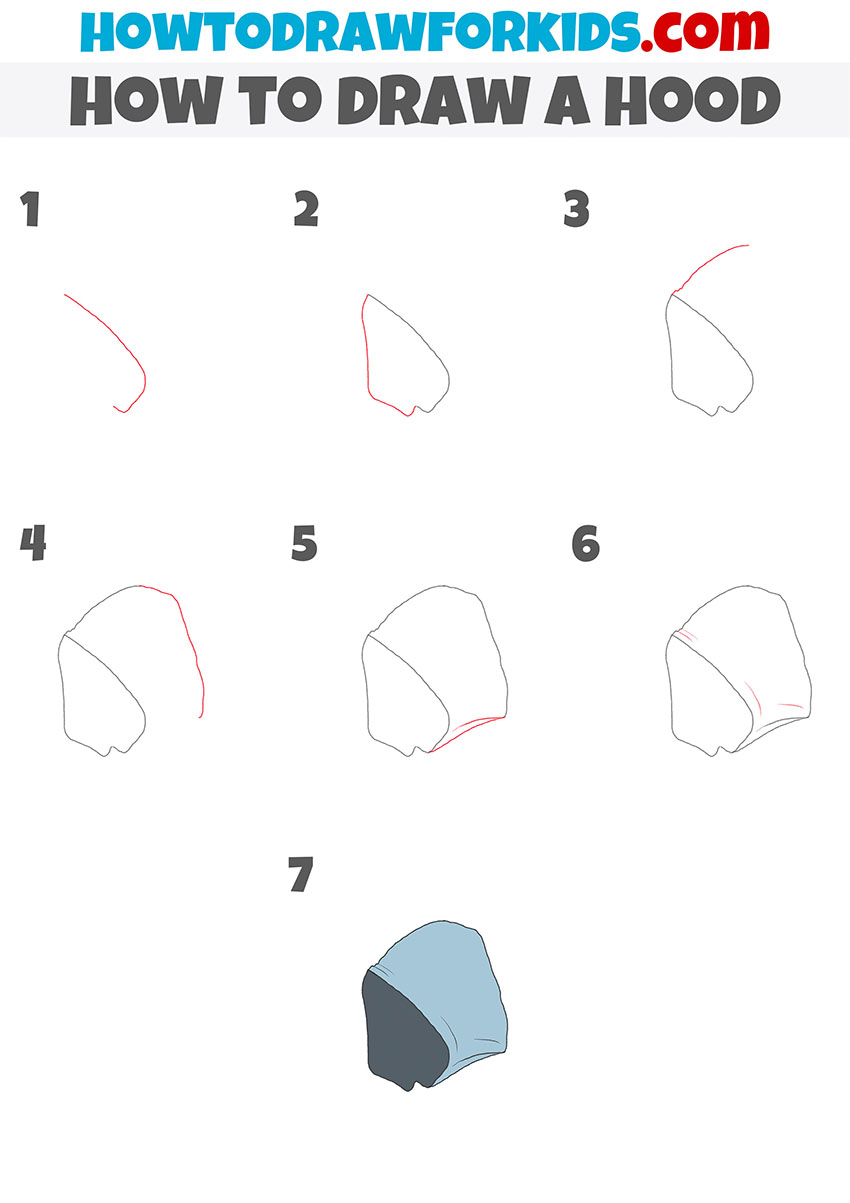
Drawing A Hood - Make sure to make them all bumpy and crinkly, just like when you scrunch up a piece of paper. Start by sketching the basic shape of the hood. With that arm done, you can then. Create fabric folds at the bottom of your sleeves by drawing curved lines, as we did above. Using the oval shape as a reference, sketch the outline of the hood. At the top of the hoodie add a figure drawn with a curved line. Then create the hoodie pocket by drawing a rectangle with inward curved corners at the top. Continue the line and go down to depict the back of the hood. Depict a connecting line at the bottom. Folds are mainly around the armpits, shoulders and waist.
With a bit of practice and perseverance, anyone can learn to sketch it accurately. Add some folds and creases for a more realistic look. Web begin with a curved line to create the top of the hood. The line for this arm will curve sharply before heading up towards the hood again. The trick to drawing clothes on a character is to keep the lines moving downwards toward gravity but keeping it long and flowy. Connect the arcs with a curved line to form the bottom of the hood. Folds are mainly around the armpits, shoulders and waist. Below the curved line, add an arch and curved lines, and draw laces with curved lines. Start by drawing a simple oval shape which will serve as the head. Web keep the lines loose and “s” shaped.
Showing how to draw a hood in a side view. Starting from the top of the head, draw an elongated shape that extends beyond the head. Begin by drawing a simple circle or oval shape to establish the framework of the head. Add some folds and creases for a more realistic look. Web just a digital art sketch tutorial on how i draw hoods on hoodies. For the arm on the left, simply draw a line from just above where the left side of the hood ends. Use a long, curved line to sketch the irregular rounded shape of the head. Web begin with a curved line to create the top of the hood. Web draw the hood: The trick to drawing clothes on a character is to keep the lines moving downwards toward gravity but keeping it long and flowy.

How to Draw Hoods or Hoodies Step by Step For Kids & Beginners
Folds are mainly around the armpits, shoulders and waist. With a bit of practice and perseverance, anyone can learn to sketch it accurately. Web under the hood, both vehicles house powerful and efficient engines. Define the outline of the hood: Web draw the top outline of the hood.

hooded cloak drawing reference monroeeger
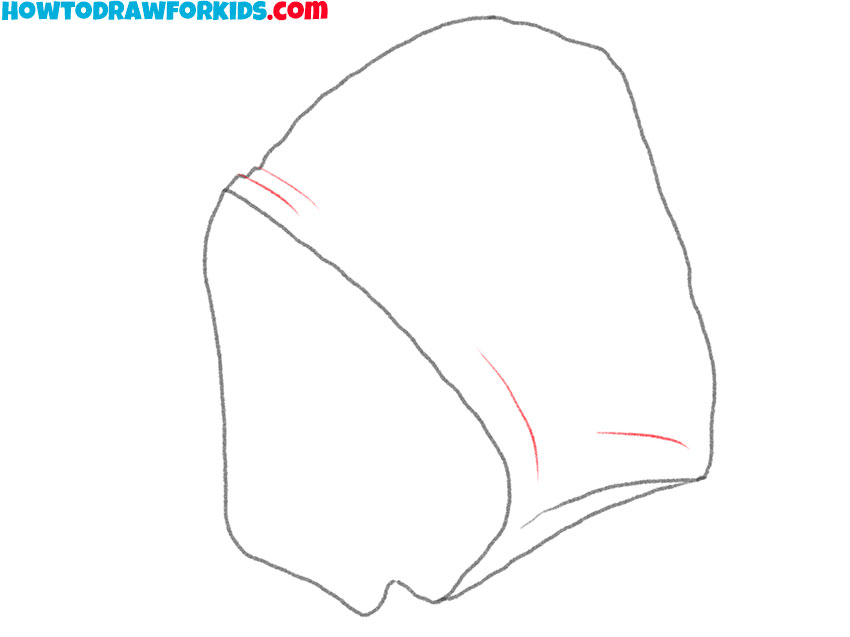
Hoods are made of soft fabric in real life, so the next few steps of your hood drawing will be about drawing some curved line details to represent the folds that fabric would have. Web begin with a curved line to create the top of the hood. Web i'm going to show you how to draw a hood, step by.
How to Draw a Hood StepbyStep Guide at WoWPencils
When you’re sketching it, draw lightly so you can erase any mistakes. Make the neckline longer to make a super cool hood for the hoodie! Use an eraser to remove auxiliary lines that appeared during the drawing process. Start by drawing a simple oval shape which will serve as the head. The line for this arm will curve sharply before.
How to Draw a Hood Easy Drawing Tutorial For Kids
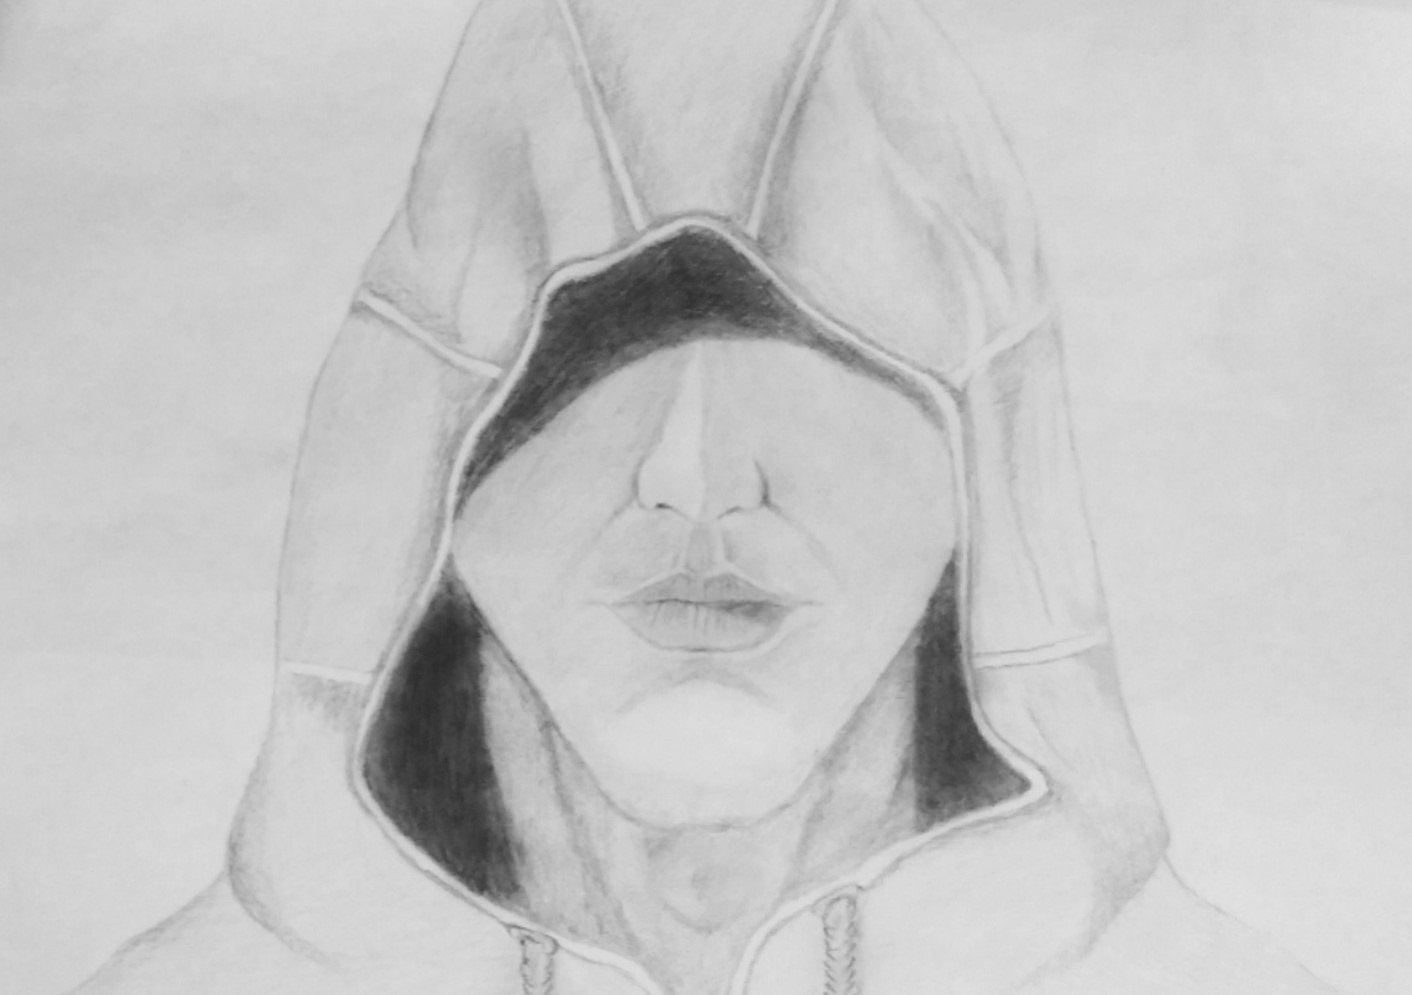
Web the most important part of drawing a hooded figure is understanding the hood. Web official crilley playlist: Web draw the top outline of the hood. Add the lower part of the hood. You will see the steps and tips to sketch the shape, folds and details of the clothing.

How to Draw a Hood Really Easy Drawing Tutorial
For the arm on the left, simply draw a line from just above where the left side of the hood ends. Use a long, curved line to sketch the irregular rounded shape of the head. For a good beginner’s guide, check out my book on drawing folds and clothes on amazon. Make the neckline longer to make a super cool.

How to Draw Hoods or Hoodies Step by Step For Kids & Beginners
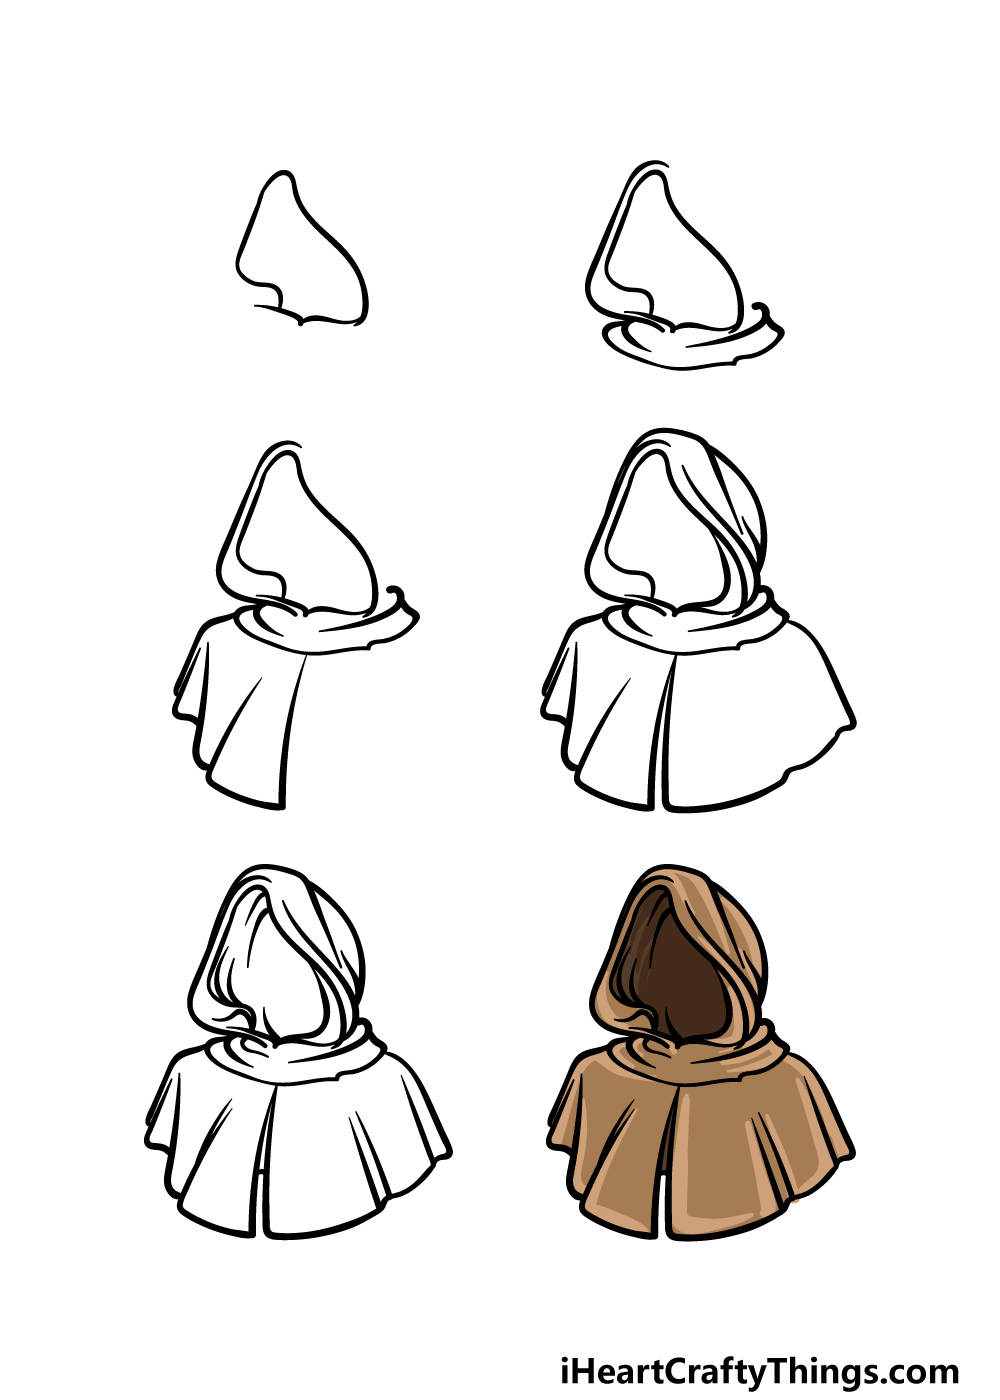
Use a long, curved line to sketch the irregular rounded shape of the head. Web begin with a curved line to create the top of the hood. Next, extend a pair of curved lines below the head to form the neck. Web draw the hood: Sketch a wavy line along the bottom to create the hood’s opening.
How To Draw A Hood
Web tutorial of how to draw a hood in short form! Shade two small ovals beneath the point of the hood's opening. Sketch a wavy line along the bottom to create the hood’s opening. Next, extend a pair of curved lines below the head to form the neck. Begin by sketching the wearer's head and neck.

How to Draw Hoods or Hoodies Step by Step For Kids & Beginners
Then, draw a curved line downward from each oval. Shade another small oval at the end of. Web follow these steps to draw hoods effectively: Web draw three lines inside the hood to create a fold. Sketch a wavy line along the bottom to create the hood’s opening.
How to Draw a Hood Easy Drawing Tutorial For Kids
With the hood drawn in, you can now begin on the arms of your hoodie drawing. If you get this part wrong, the rest of the drawing won’t look right. Web i'm going to show you how to draw a hood, step by step!hope you guys like the video!! Web in a heartfelt address to the graduates of mesa community.
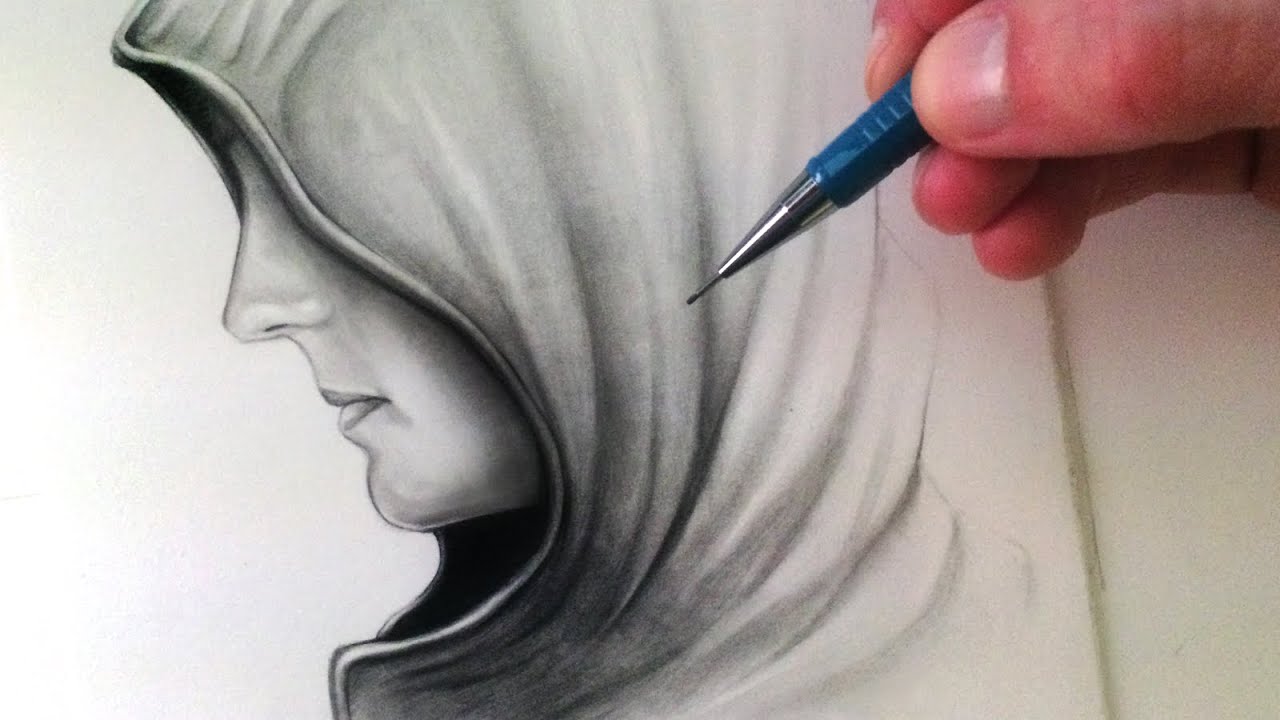
How to Draw a Hood Side View YouTube
Hope this snippet helps you all out. Web begin with a curved line to create the top of the hood. Begin by drawing a simple circle or oval shape to establish the framework of the head. Web keep the lines loose and “s” shaped. Use a long, curved line to sketch the irregular rounded shape of the head.
Define The Outline Of The Hood:
Showing how to draw a hood in a side view. Here are a few tips on drawing the hood This will serve as a guide for positioning the hood. Make the neckline longer to make a super cool hood for the hoodie!
Put On The Sleeves, Just Like When You Put On Your Favorite Superhero Cape!
After that, go down and contour the neck. Use an eraser to remove auxiliary lines that appeared during the drawing process. Folds are mainly around the armpits, shoulders and waist. Hoods are made of soft fabric in real life, so the next few steps of your hood drawing will be about drawing some curved line details to represent the folds that fabric would have.
Web Draw The Hood:
Web just a digital art sketch tutorial on how i draw hoods on hoodies. Web all 3 brody's ghost books at amazon: Then create the hoodie pocket by drawing a rectangle with inward curved corners at the top. If you get this part wrong, the rest of the drawing won’t look right.
This Is Your Starting Point And Will Serve As A Guideline For The Hood.
You’ll want a hood that frames the face and hangs down in the back. Start by drawing a simple oval shape which will serve as the head. Add the lower part of the hood. Start by sketching the basic shape of the hood.