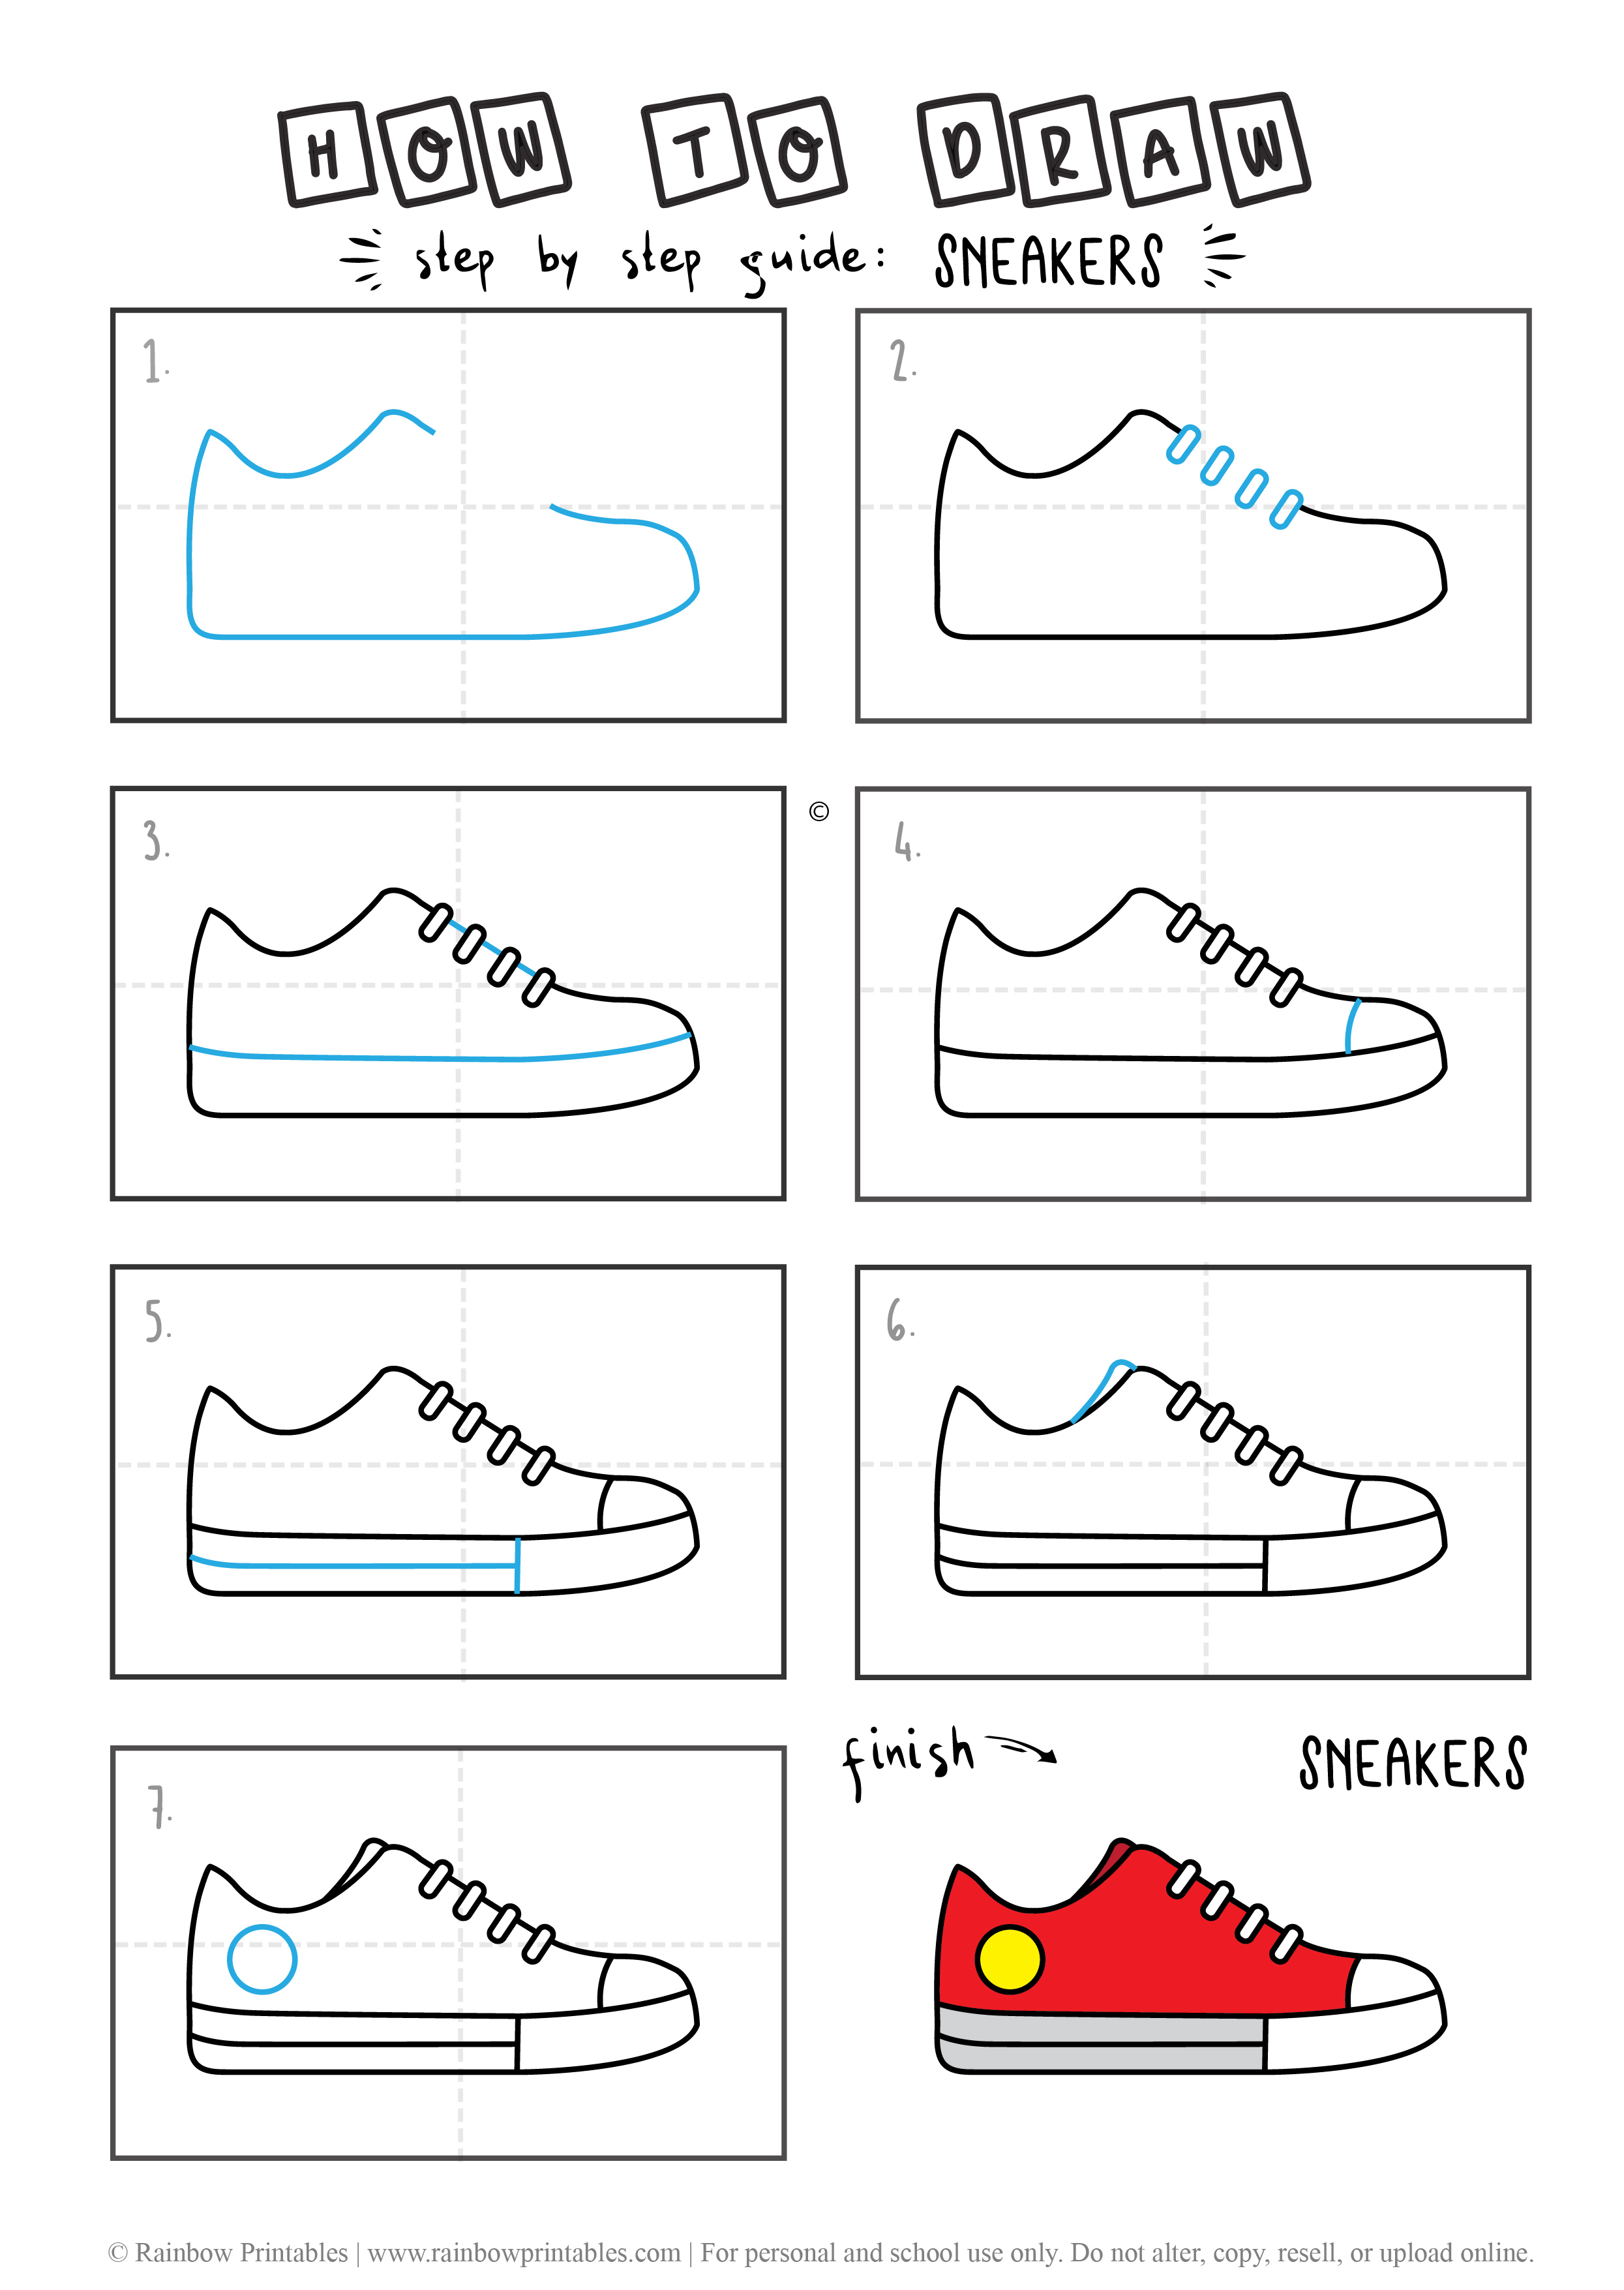
Drawing A Shoe Step By Step
Drawing A Shoe Step By Step - This may seem simple, but there are some small curves and details that we need to add. Web table of contents. Web hand wash the laces. When drawing a shoe, capturing the shape and contours of the sole is a crucial first step in establishing the overall form of the footwear. Design and draw a character. Sketch one out that your shoe can fit inside. Going across the tongue draw the shoe laces (as shown in the example). You will need to again erase little bits of the drawing where you want to insert the different parts of the lace. Experiment with side views, top views, and even dynamic poses to capture the full range of motion and style. Draw curved lines from the sole of the shoe to the curve of the toe.
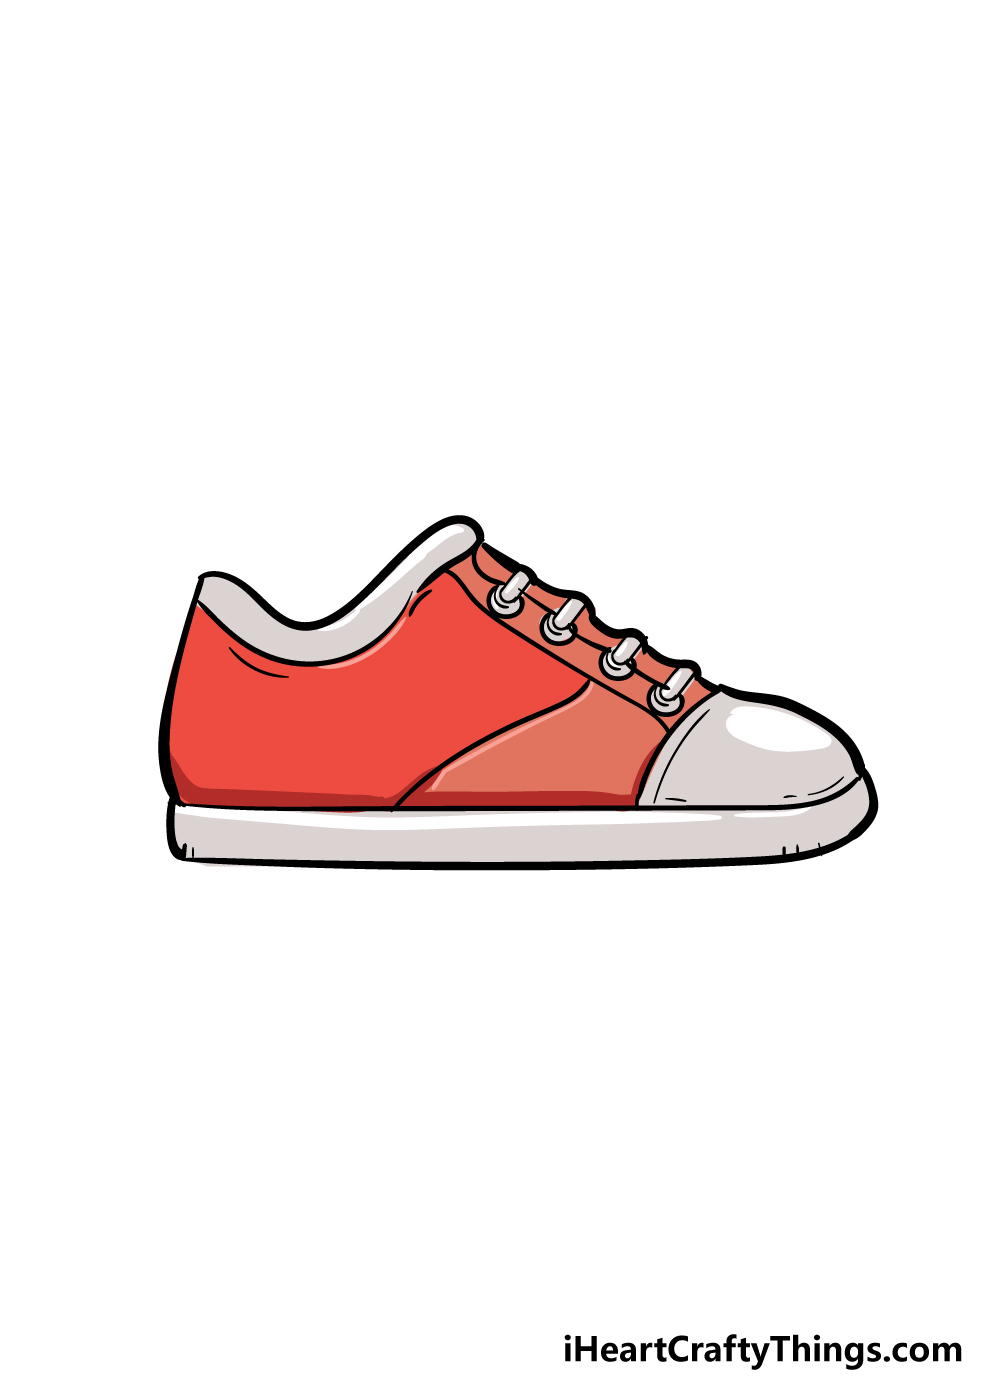
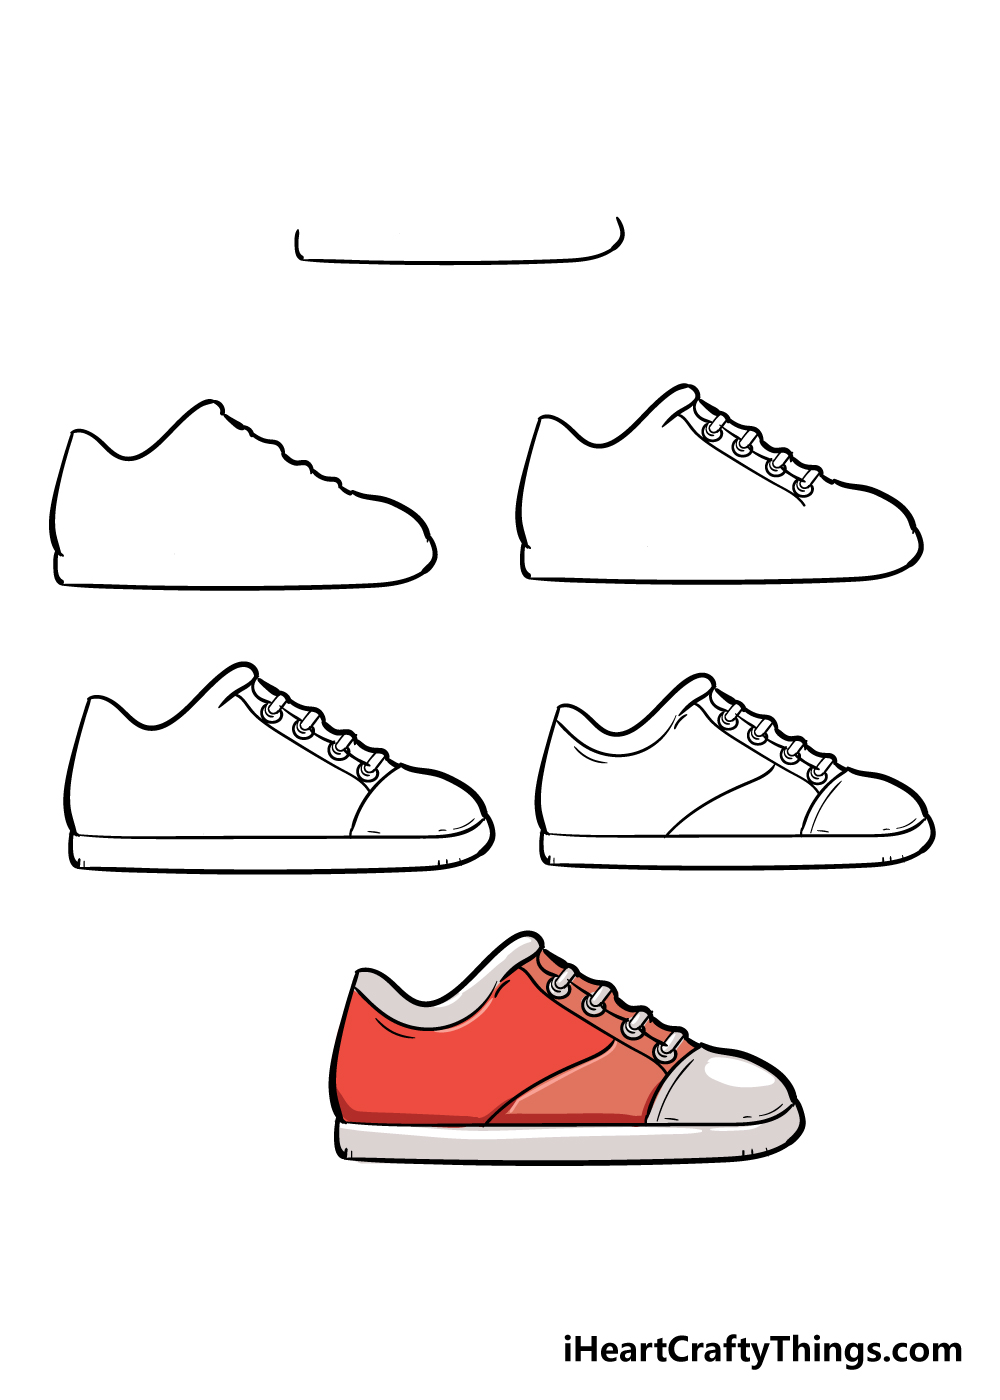
Draw curved lines from the sole of the shoe to the curve of the toe. We will take this step slowly as there are a lot of different elements to it. Now that we have the opening of this shoe, we can start drawing the back portion. Web nike is without doubt the best selling and most known brand in the world of sportswear. This may seem simple, but there are some small curves and details that we need to add. Sketch one out that your shoe can fit inside. Sketch the shoe’s upper by drawing a bold, arched line from the heel, symbolizing the shoe’s body. Experiment with side views, top views, and even dynamic poses to capture the full range of motion and style. Hi everyone, in this video i show you how to draw shoes step by step 👞. Curving the line is optional.
Expect to walk away with your head high in clouds of creativity. This step is crucial as it establishes a solid framework for the entire drawing. Design and draw a character. Start with the base, drawing rectangles to represent the soles. Web from the anatomy of a shoe to the play of light and shadow, we’ll delve into techniques that breathe life into your drawings. Draw the sole following the bottom shape of the sandals. We see people around us all the time, yet it is very hard to draw them in the right proportion, capture gestures and body language. Draw another curved line at the back of the shoe to connect the two vertical lines. You will need to again erase little bits of the drawing where you want to insert the different parts of the lace. Our how to draw book is here!
Shoe Drawing How To Draw A Shoe Step By Step
Curving the line is optional. Our how to draw book is here! This will be the heel. Remember, the shape of the shoe will depend on the style you want to draw, such as sneakers, heels, or boots. Add the top of the shoe.

Coloring & Activity Pages How to Draw Ballet Pointe Shoes
Begin by drawing the back line of the shoe; Finishing the shape of your sneaker drawing; 1 how to draw sneakers: Draw a curved line from the shoe's back to its interior, giving the drawing depth. Web follow my step by step drawing tutorial and make your own shoes drawing easy!👇 subs.
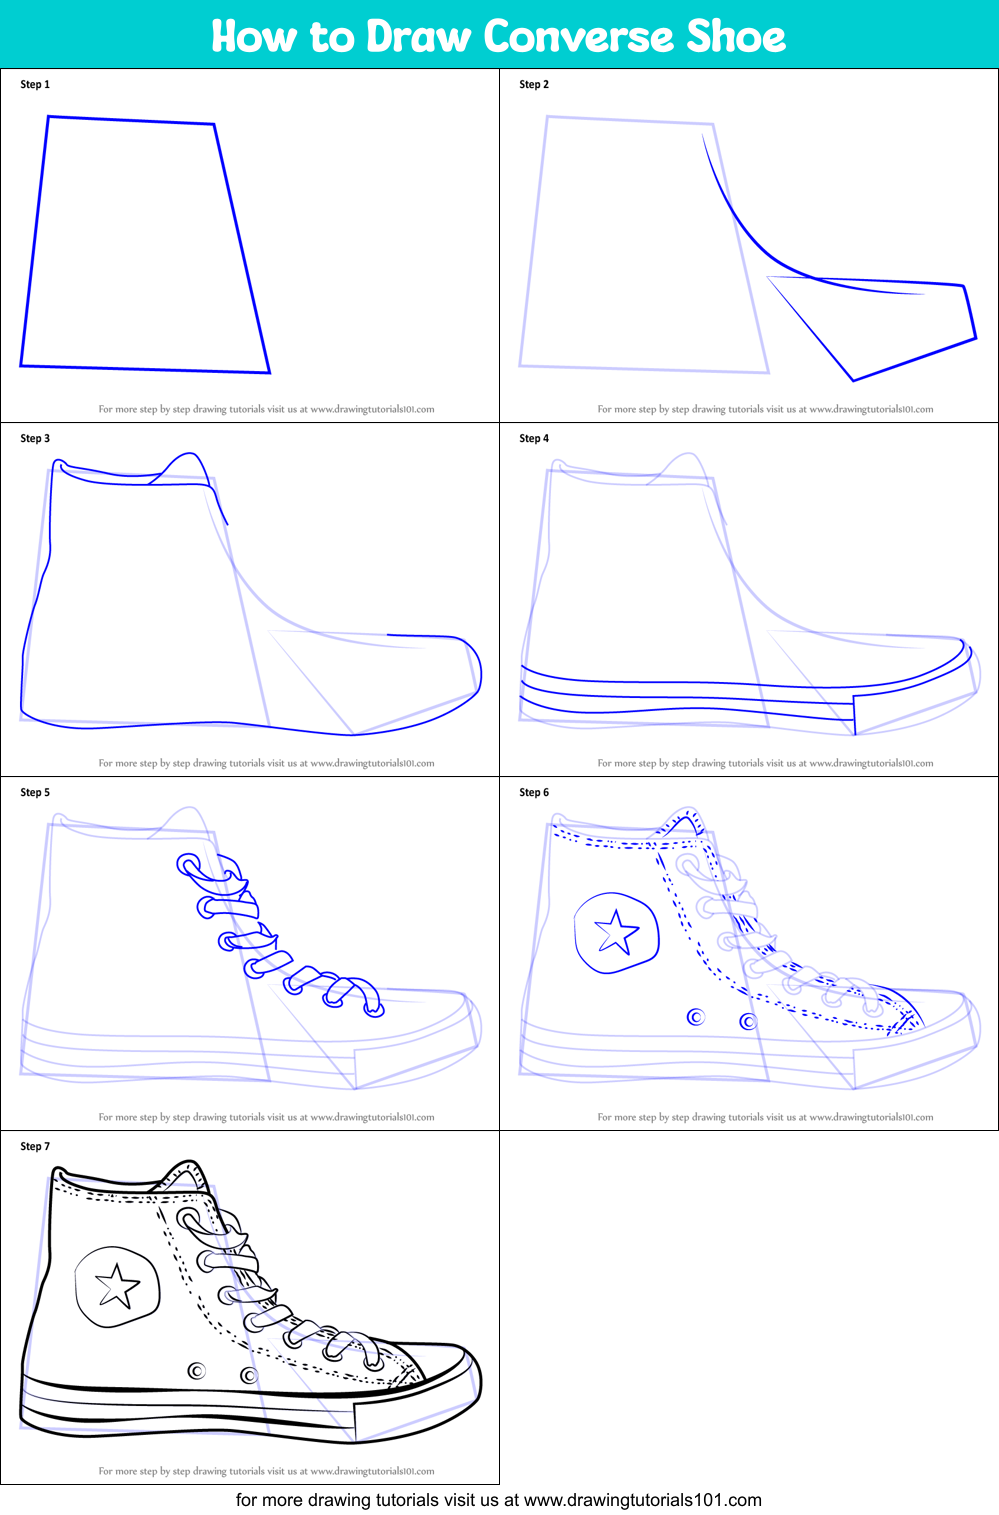
How to Draw Converse Shoe (Everyday Objects) Step by Step
Web from the anatomy of a shoe to the play of light and shadow, we’ll delve into techniques that breathe life into your drawings. Sketch the shoe’s upper by drawing a bold, arched line from the heel, symbolizing the shoe’s body. Take your time to get the basic shape right before moving on to the next step. This will be.
Shoe Drawing How To Draw A Shoe Step By Step
Draw short, curved lines at the back of the sole and heel of the shoe. Start by lightly sketching a rough outline of the shoe using an h pencil. Draw the top line of the sneaker; Experiment with side views, top views, and even dynamic poses to capture the full range of motion and style. Web draw the front of.

How To Draw Shoes Step By Step For Beginners Howto Techno
Focus on the overall shape and proportion. Drawing shoes from different perspectives will help you develop a deeper understanding of their form and structure. Remove the shoelaces and apply a small amount of the mild cleaning solution to them. The sole of a shoe serves as its foundation, providing support and protection while bearing the brunt of everyday wear. Web.
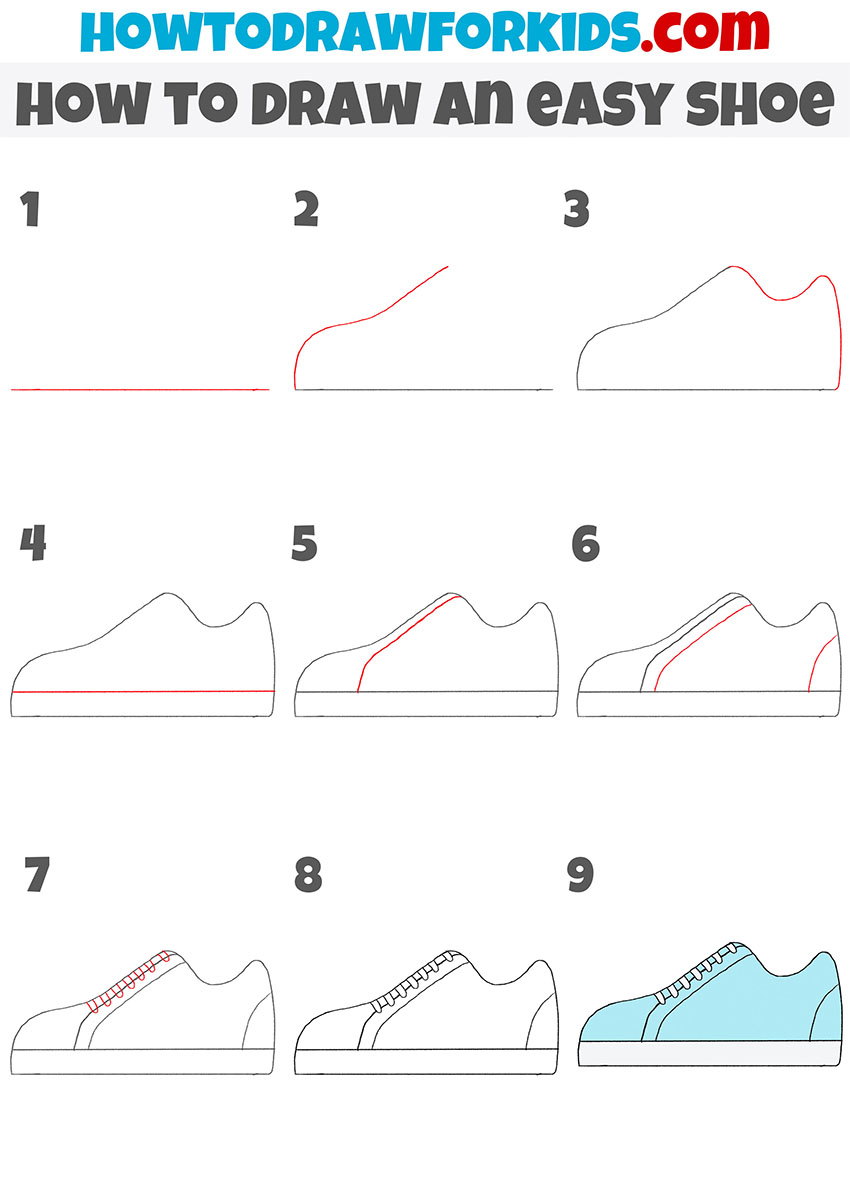
How to Draw an Easy Shoe Easy Drawing Tutorial For Kids
Web to truly master drawing shoes, practice drawing them from various angles and perspectives. Hi everyone, in this video i show you how to draw shoes step by step 👞. Start with the base, drawing rectangles to represent the soles. When drawing a shoe, capturing the shape and contours of the sole is a crucial first step in establishing the.

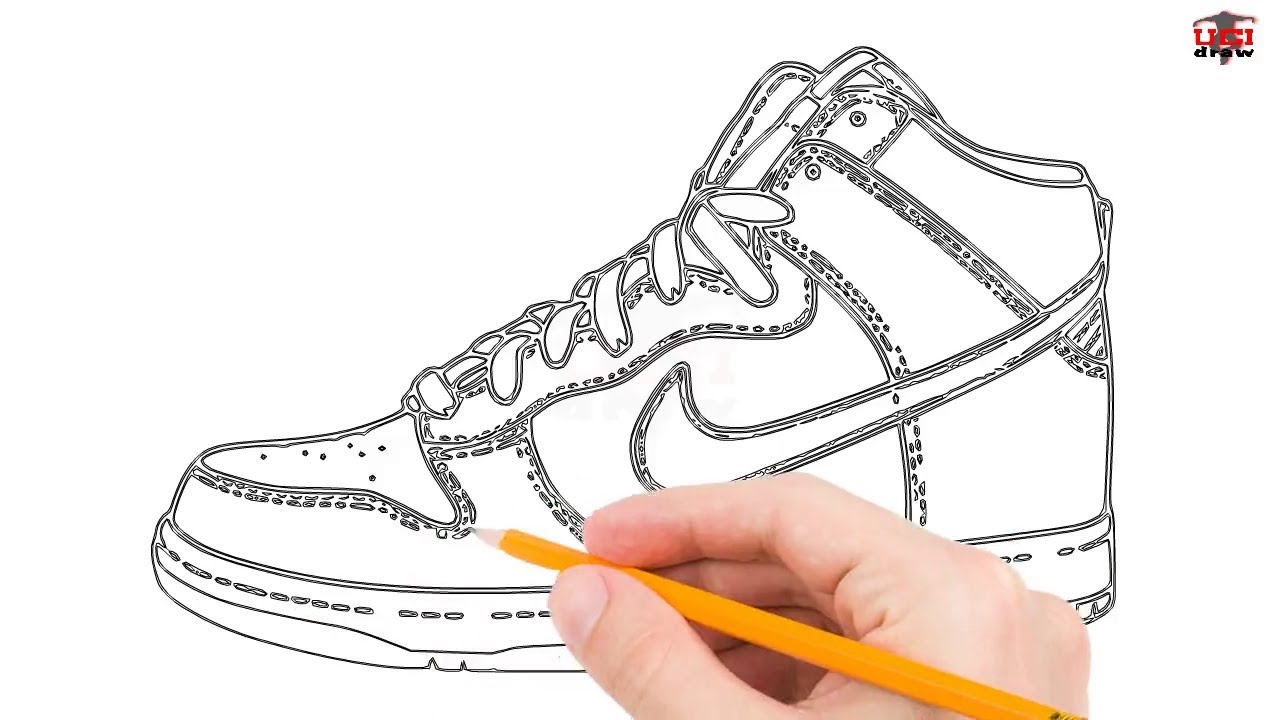
How To Draw A Nike Shoe Step By Step Easy This will be the most
Drawing shoes from different perspectives will help you develop a deeper understanding of their form and structure. Draw a curved line from the shoe's back to its interior, giving the drawing depth. Take your time to get the basic shape right before moving on to the next step. Draw short, curved lines at the back of the sole and heel.
How To Draw Converse Shoe Printable Step By Step Drawing Sheet Images
Now that we have the opening of this shoe, we can start drawing the back portion. Take your time to get the basic shape right before moving on to the next step. Web hand wash the laces. Design and draw a character. These will be the sides of the sole.
How To Draw Shoes Easy Step By Step Howto Techno
Detail the outline of the shoe. Connect the two vertical lines with a curved line at the top. Finally add the shoe laces as shown above. Expect to walk away with your head high in clouds of creativity. Draw a curved line from the shoe's back to its interior, giving the drawing depth.
How To Draw Jordans Shoes Step By Step Howto Techno
Detail the outline of the shoe. Web draw the front of the shoe. Remember, the shape of the shoe will depend on the style you want to draw, such as sneakers, heels, or boots. Connect the sides of the circle and the oblong. Web from the anatomy of a shoe to the play of light and shadow, we’ll delve into.
Web Join Me On Patreon For Background Information, Drawing Videos, Step By Steps And Happy Mails💌 Link In Bio 🗒.
Detail the outline of the shoe. To begin, envision the sole as the base on which the rest of. Connect the two vertical lines with a curved line at the top. Sketch one out that your shoe can fit inside.
Use A Faint, Erasable Pencil To Draw.
And these shoes are maybe the most beautiful the have ever designed. This step will be very easy for you, just draw two curved lines of different sizes. 1 how to draw sneakers: It’s up to you how thick the sole is.
Sketch The Outline Of The Shoe.
Draw the sole following the bottom shape of the sandals. Draw short, curved lines at the back of the sole and heel of the shoe. Learn how to draw high heels, wedges and sneakers from different view angles. As the middle laces will be facing pretty much directly towards the viewer the curve in their shapes will not be visible.
Now That We Have The Opening Of This Shoe, We Can Start Drawing The Back Portion.
Learn a simple method for developing an original character, from mind map to finished drawing. Our how to draw book is here! Massage the laces with your hands, rinse, then dab dry with a soft cloth. Curving the line is optional.