Drawing Battery
Drawing Battery - Web how to draw a cute battery step by step Learn how to draw easily with our simple method. Web a battery is a device that converts chemical energy into electrical energy. Web now, it’s time to get to sketching. Draw a curved line across the top of the terminal, emphasizing its cylindrical shape. Drawing a battery is a simple process that requires a few. On the side of the battery, draw a series of short, straight lines in an open rectangle shape. Next, shade the positive symbol and the bottom part of the battery with a dark gray crayon. Use shades of gray to color the positive terminal and the negative symbol. Finally, draw a small platform inside the circles to represent the solid core of the battery.
In the middle, go ahead and draw two horizontal lines. Hand drawn battery isolated on white background. Web now, it’s time to get to sketching. This will form the base of the battery and will make the drawing that much easier. Start by drawing a rectangle shape that will represent the main body of the battery. Web browse 8,600+ drawing of a battery stock photos and images available, or start a new search to explore more stock photos and images. For this quick step add a split in the battery where the two sides will be different colors later on. We start by making a circuit diagram, as in figure \(\pageindex{7}\), showing the resistors, the current, \(i\), the battery and the battery arrow.note that since this is a closed circuit with only one path, the current through the battery, \(i\), is the same as the current through the two resistors. The next thing you need to do is two draw the top and the bottom of the battery. The draw should be less than 25 milliamps (0.025 amps).
Next, draw two small circles near the top for the terminals. Web now, it’s time to get to sketching. Web let’s add a label to our battery drawing. Web #artlandhowtodraw #drawing #art #battery step by step video on how to draw a battery!!don't forget to subscribe!!!check out our art land products!merchandise. Draw a rectangle on the front of the battery body, slightly above the center. Draw a curved line across the top of the terminal, emphasizing its cylindrical shape. Start by drawing two simple circles. Remove the cover, if applicable, and use a wrench to unbolt the negative cable from the terminal. To start this, draw some straight lines down from the sides of the top surface of the battery. Web how to draw a battery easy and step by step.

How to Draw a Battery Really Easy Drawing Tutorial
Then, add a rectangle in the middle for the body of the battery. Web to fix this issue, you’ll need to test for a parasitic power draw. Web steps for drawing a battery step 1. Inside the rectangle, write the text or logo of your choice. Web now, it’s time to get to sketching.

How to Draw a Battery Really Easy Drawing Tutorial
Web learn how to draw step by step in a fun way!come join and follow us to learn how to draw. Inside the rectangle, write the text or logo of your choice. One of the metals wins out and pulls electrons from the other, through the outer circuit—and that flow of electrons from one metal to the other is how.

How to Draw a Battery Really Easy Drawing Tutorial
Remove the cover, if applicable, and use a wrench to unbolt the negative cable from the terminal. It consists of one or more electrochemical cells, which are connected in series or parallel to increase the voltage or current output. In this step by step drawing guide, we will walk you through how to draw a battery. Web how to draw.
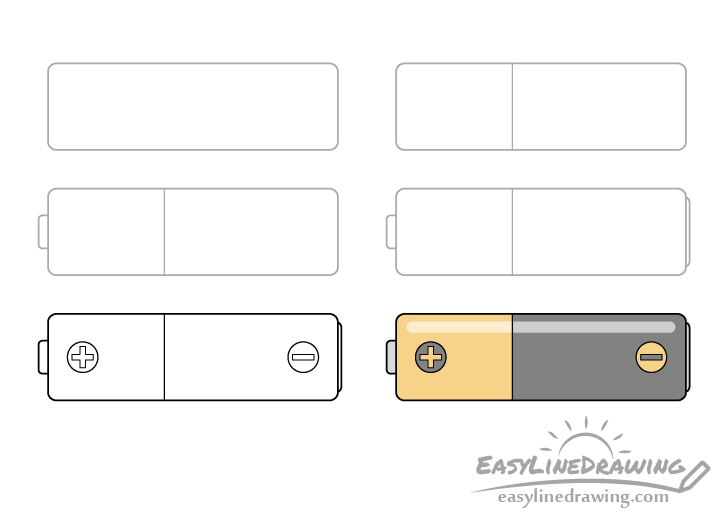
How to Draw a Battery Step by Step EasyLineDrawing
A battery schematic diagram is a graphical representation of how the various components are connected within the battery. Web how to draw a cute battery step by step In the middle, go ahead and draw two horizontal lines. We start by making a circuit diagram, as in figure \(\pageindex{7}\), showing the resistors, the current, \(i\), the battery and the battery.

How to Draw a Battery Really Easy Drawing Tutorial
Web let’s add a label to our battery drawing. One of the metals wins out and pulls electrons from the other, through the outer circuit—and that flow of electrons from one metal to the other is how a battery powers the circuit. In the middle, go ahead and draw two horizontal lines. Finally, use an orange crayon to color the.

How to draw a Battery Step by Step Battery Drawing Lesson YouTube
This will become the top of the plus sign + indicating the positive terminal of the battery. To start this, draw some straight lines down from the sides of the top surface of the battery. This will form the base of the battery and will make the drawing that much easier. Web to fix this issue, you’ll need to test.
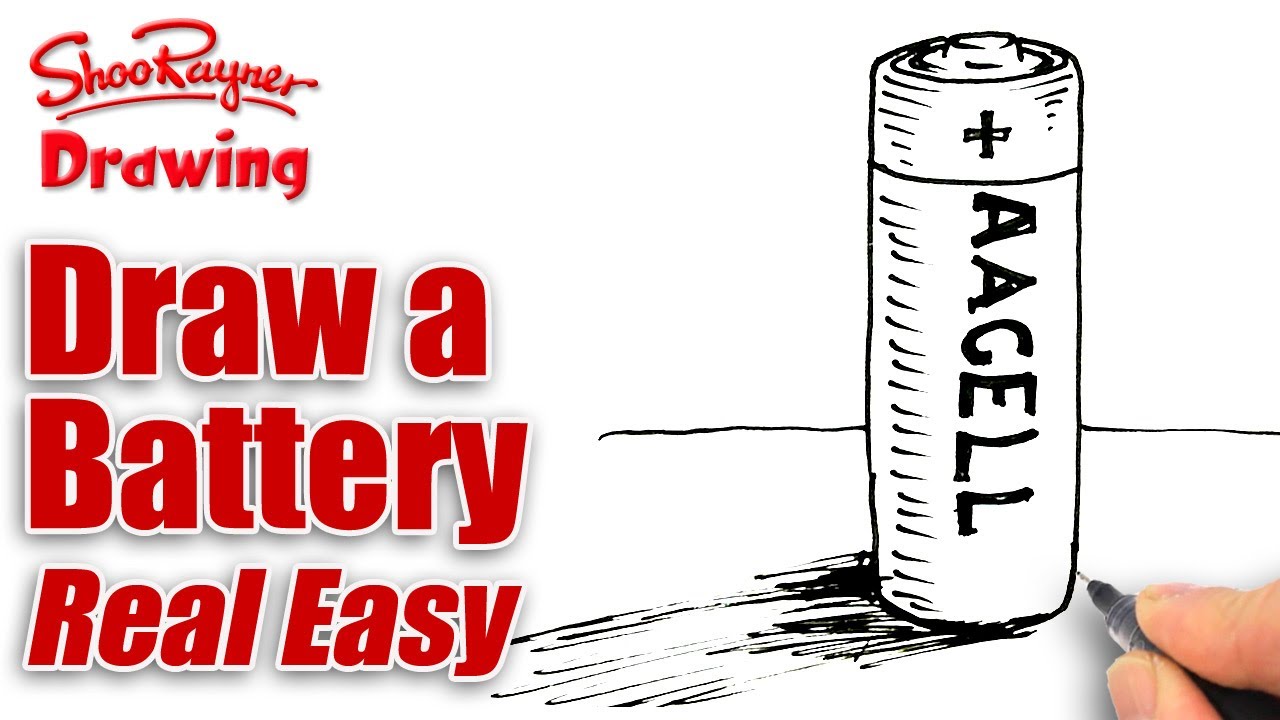
How to draw a battery real easy spoken tutorial YouTube
One of the metals wins out and pulls electrons from the other, through the outer circuit—and that flow of electrons from one metal to the other is how a battery powers the circuit. Web remove the negative battery cable from the negative battery terminal. Vector battery icon with charge indicator in sketch style. Draw a curved line across the top.

How to Draw a Battery Really Easy Drawing Tutorial
For this quick step add a split in the battery where the two sides will be different colors later on. Next, draw two lines across the circles to form the negative and positive terminals. One of the metals wins out and pulls electrons from the other, through the outer circuit—and that flow of electrons from one metal to the other.

How To Draw A Battery Step By Step (Easy Drawing Guide) Bujo Babe
On the side of the battery, draw a series of short, straight lines in an open rectangle shape. Web #artlandhowtodraw #drawing #art #battery step by step video on how to draw a battery!!don't forget to subscribe!!!check out our art land products!merchandise. Finally, use an orange crayon to color the top part of the battery and the thunderbolt. To start this,.

How To Draw A Battery Step By Step (Easy Drawing Guide) Bujo Babe
Learn how to draw easily with our simple method. In this step by step drawing guide, we will walk you through how to draw a battery. In the middle, go ahead and draw two horizontal lines. Next, draw two small circles near the top for the terminals. Draw this battery by following this drawing lesson.
Web Steps For Drawing A Battery Step 1.
In this step by step drawing guide, we will walk you through how to draw a battery. Be sure to use the negative, not the positive, cable to test for the draw to. These will angle inward very slightly, as this will create. Web let’s add a label to our battery drawing.
Use Shades Of Gray To Color The Positive Terminal And The Negative Symbol.
The next thing you need to do is two draw the top and the bottom of the battery. Draw the positive terminal of the battery as a little bump on. Start by drawing two simple circles. Start by drawing a rectangle shape that will represent the main body of the battery.
It's Simple!Simply Subscribe Us For More Drawing Tutorial.
Simply subscribe and allow notificati. Web a battery is a device that converts chemical energy into electrical energy. Web #artlandhowtodraw #drawing #art #battery step by step video on how to draw a battery!!don't forget to subscribe!!!check out our art land products!merchandise. This will become the top of the plus sign + indicating the positive terminal of the battery.
Web How To Draw A Cute Battery Step By Step
We start by making a circuit diagram, as in figure \(\pageindex{7}\), showing the resistors, the current, \(i\), the battery and the battery arrow.note that since this is a closed circuit with only one path, the current through the battery, \(i\), is the same as the current through the two resistors. One of the metals wins out and pulls electrons from the other, through the outer circuit—and that flow of electrons from one metal to the other is how a battery powers the circuit. Web learn how to draw step by step in a fun way!come join and follow us to learn how to draw. Next, shade the positive symbol and the bottom part of the battery with a dark gray crayon.