Drawing Of A Lily
Drawing Of A Lily - The circle will become the bud of the lily and the line will become the stem. Web learn how to draw a pretty lily flower easy, step by step drawing tutorial. The finished drawing will be finished off with color resulting in a drawing you will want to share with friends! Web the goal is to complete a drawing of a lily by creating one area at a time. Draw a circle attached to a line. Begin by drawing a small u shaped line at the flower's center, just below the base of the anthers. This project will take 9 steps in total as we continue to create each area moving closer to the completed artwork. After that, turn the top part of your original oval into larger lily flower petals. Then, extend a graceful curving line from the flower's center towards the tip of each petal. Add some detail to the flower's petals.
This project will take 9 steps in total as we continue to create each area moving closer to the completed artwork. Connect the line directly to the outline of the circle and make it roughly five to seven times longer than the. Web learn how to draw a pretty lily flower easy, step by step drawing tutorial. After that, turn the top part of your original oval into larger lily flower petals. Then, extend a graceful curving line from the flower's center towards the tip of each petal. Draw a circle attached to a line. Next, draw small 3 circles at the bottom of the oval that will turn into petals. Web full blog post with text instructions: The finished drawing will be finished off with color resulting in a drawing you will want to share with friends! Add some detail to the flower's petals.
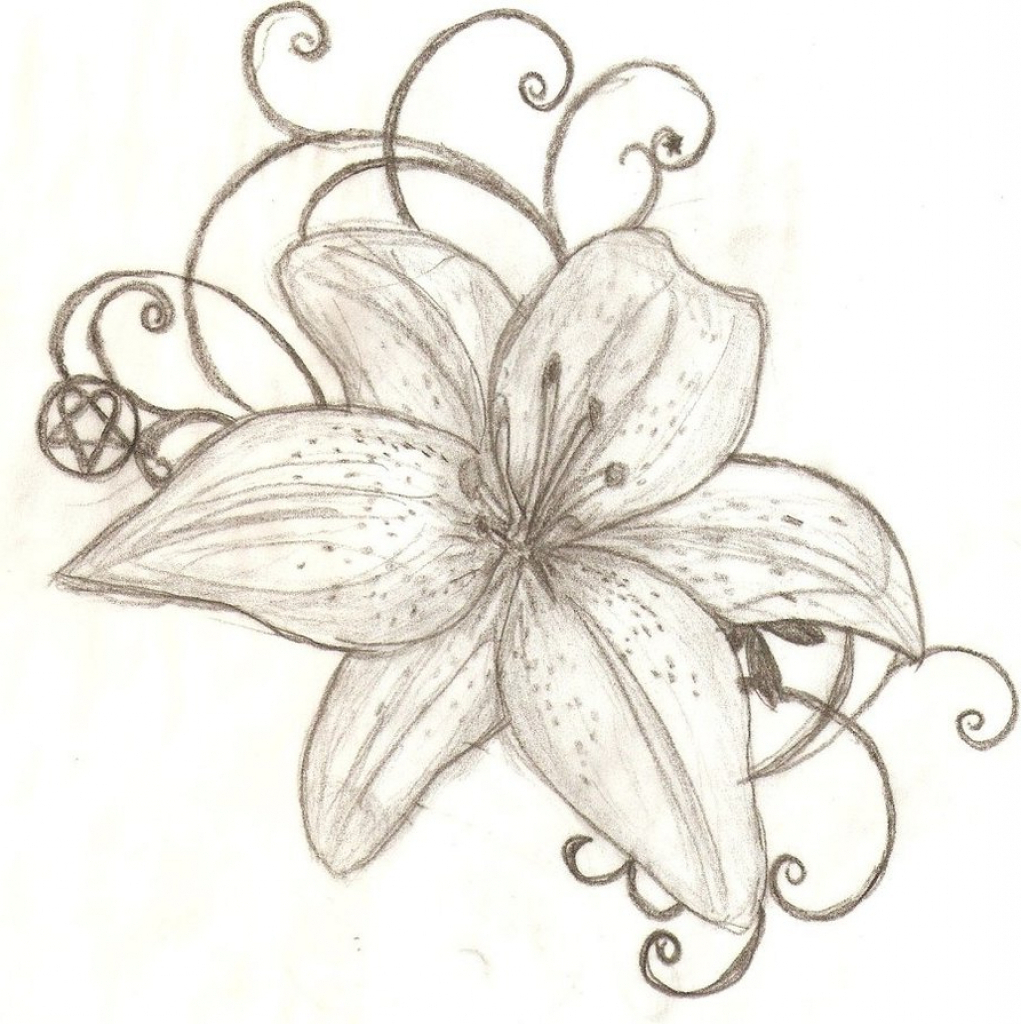
Let me know in the comments which flower i should do next! This forms the detail of the petal vein. After that, turn the top part of your original oval into larger lily flower petals. This project will take 9 steps in total as we continue to create each area moving closer to the completed artwork. Draw a circle attached to a line. Web the goal is to complete a drawing of a lily by creating one area at a time. The circle will become the bud of the lily and the line will become the stem. Web first, start by drawing a sideways oval. Beautiful easter lily flower colored with copic markers with leaves and buds. Web full blog post with text instructions:
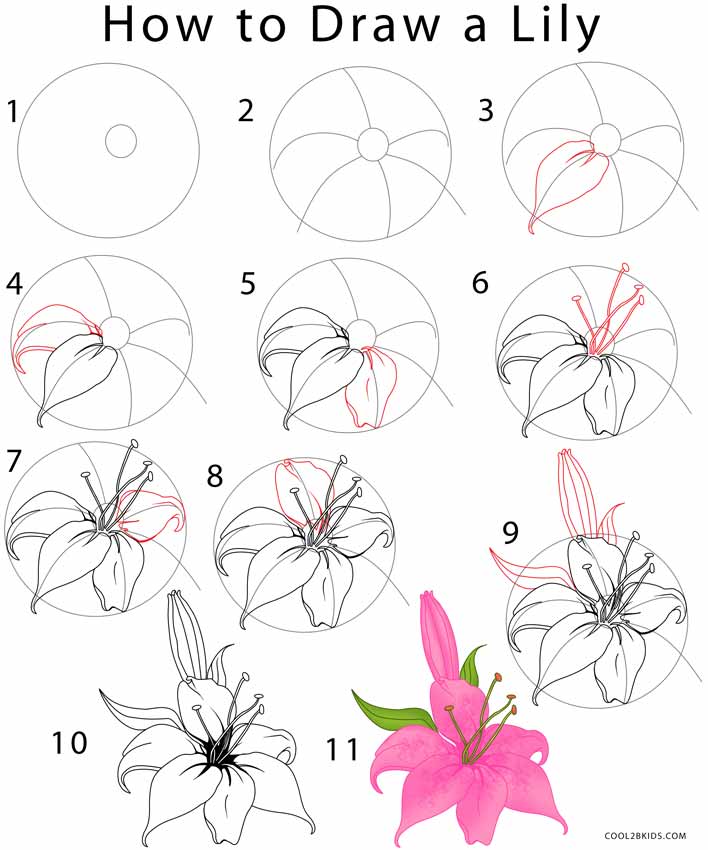
How to Draw a Lily (Step by Step Pictures) Cool2bKids
Next, draw small 3 circles at the bottom of the oval that will turn into petals. After that, turn the top part of your original oval into larger lily flower petals. Web first, start by drawing a sideways oval. Let me know in the comments which flower i should do next! Web learn how to draw a pretty lily flower.

How to Draw A Lily Step by Step
Next, draw small 3 circles at the bottom of the oval that will turn into petals. This project will take 9 steps in total as we continue to create each area moving closer to the completed artwork. Beautiful easter lily flower colored with copic markers with leaves and buds. Web learn how to draw a pretty lily flower easy, step.
Lilies Flower Drawing at GetDrawings Free download
Beautiful easter lily flower colored with copic markers with leaves and buds. Begin by drawing a small u shaped line at the flower's center, just below the base of the anthers. This project will take 9 steps in total as we continue to create each area moving closer to the completed artwork. Let me know in the comments which flower.

Lilies drawing Google Search Lilies drawing, Flower drawing, Drawings
Let me know in the comments which flower i should do next! This forms the detail of the petal vein. Web the goal is to complete a drawing of a lily by creating one area at a time. Web learn how to draw a pretty lily flower easy, step by step drawing tutorial. The circle will become the bud of.

How to Draw a Lily in a Few Easy Steps Easy Drawing Guides
This project will take 9 steps in total as we continue to create each area moving closer to the completed artwork. Beautiful easter lily flower colored with copic markers with leaves and buds. Connect the line directly to the outline of the circle and make it roughly five to seven times longer than the. Web the goal is to complete.

How to Draw a Lily in a Few Easy Steps Easy Drawing Guides
This forms the detail of the petal vein. Web the goal is to complete a drawing of a lily by creating one area at a time. Beautiful easter lily flower colored with copic markers with leaves and buds. The finished drawing will be finished off with color resulting in a drawing you will want to share with friends! Web learn.
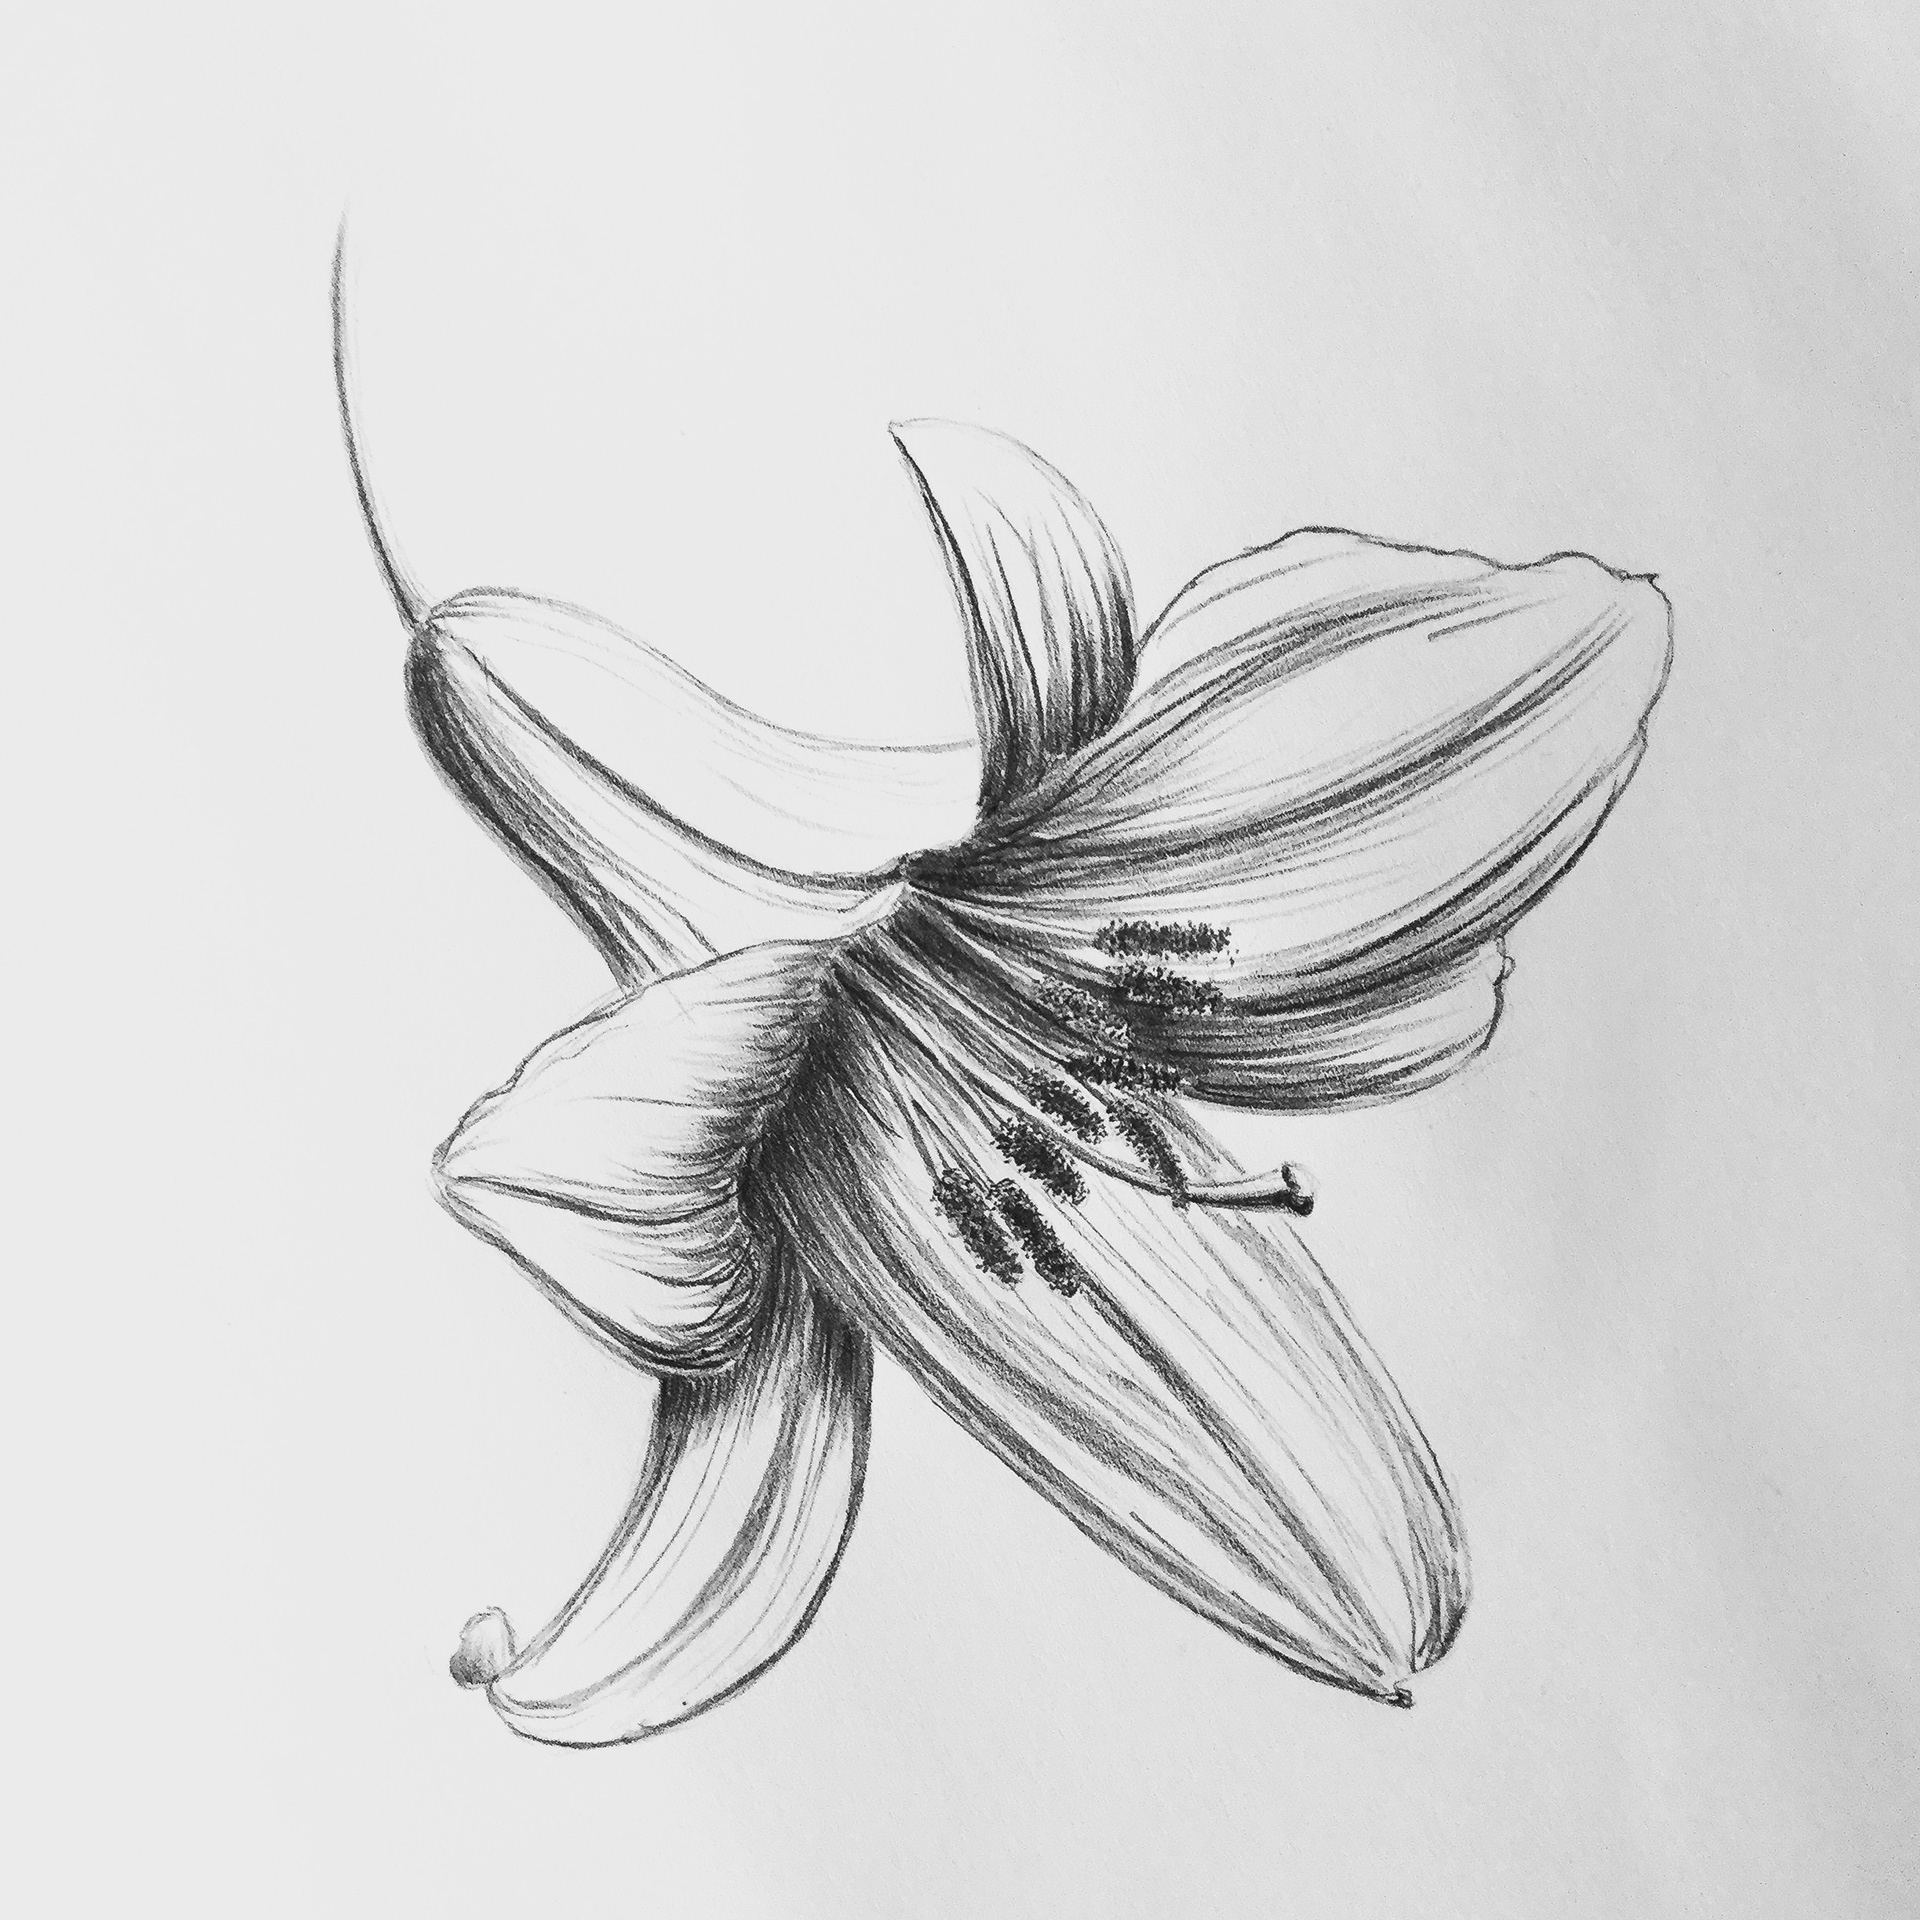
Lily flower. Pencil drawing. on Behance
Web learn how to draw a pretty lily flower easy, step by step drawing tutorial. This forms the detail of the petal vein. Then, take the circles and turn them into lily flower petals, which are rounded at the bottom and come to a tip. The circle will become the bud of the lily and the line will become the.

How to Draw a Lily Easy Drawing Tutorial For Kids
After that, turn the top part of your original oval into larger lily flower petals. Web full blog post with text instructions: This project will take 9 steps in total as we continue to create each area moving closer to the completed artwork. Add some detail to the flower's petals. Then, take the circles and turn them into lily flower.

How to Draw A Lily Step by Step
Draw a circle attached to a line. The circle will become the bud of the lily and the line will become the stem. Then, extend a graceful curving line from the flower's center towards the tip of each petal. Web full blog post with text instructions: Web the goal is to complete a drawing of a lily by creating one.

How to Draw a Lily in a Few Easy Steps Easy Drawing Guides
Then, extend a graceful curving line from the flower's center towards the tip of each petal. Beautiful easter lily flower colored with copic markers with leaves and buds. This project will take 9 steps in total as we continue to create each area moving closer to the completed artwork. Add some detail to the flower's petals. Web full blog post.
Let Me Know In The Comments Which Flower I Should Do Next!
Connect the line directly to the outline of the circle and make it roughly five to seven times longer than the. Web learn how to draw a pretty lily flower easy, step by step drawing tutorial. This forms the detail of the petal vein. Draw a circle attached to a line.
Then, Extend A Graceful Curving Line From The Flower's Center Towards The Tip Of Each Petal.
After that, turn the top part of your original oval into larger lily flower petals. Web full blog post with text instructions: The circle will become the bud of the lily and the line will become the stem. Next, draw small 3 circles at the bottom of the oval that will turn into petals.
Add Some Detail To The Flower's Petals.
Beautiful easter lily flower colored with copic markers with leaves and buds. Web the goal is to complete a drawing of a lily by creating one area at a time. The finished drawing will be finished off with color resulting in a drawing you will want to share with friends! Web first, start by drawing a sideways oval.
Begin By Drawing A Small U Shaped Line At The Flower's Center, Just Below The Base Of The Anthers.
Then, take the circles and turn them into lily flower petals, which are rounded at the bottom and come to a tip. This project will take 9 steps in total as we continue to create each area moving closer to the completed artwork.