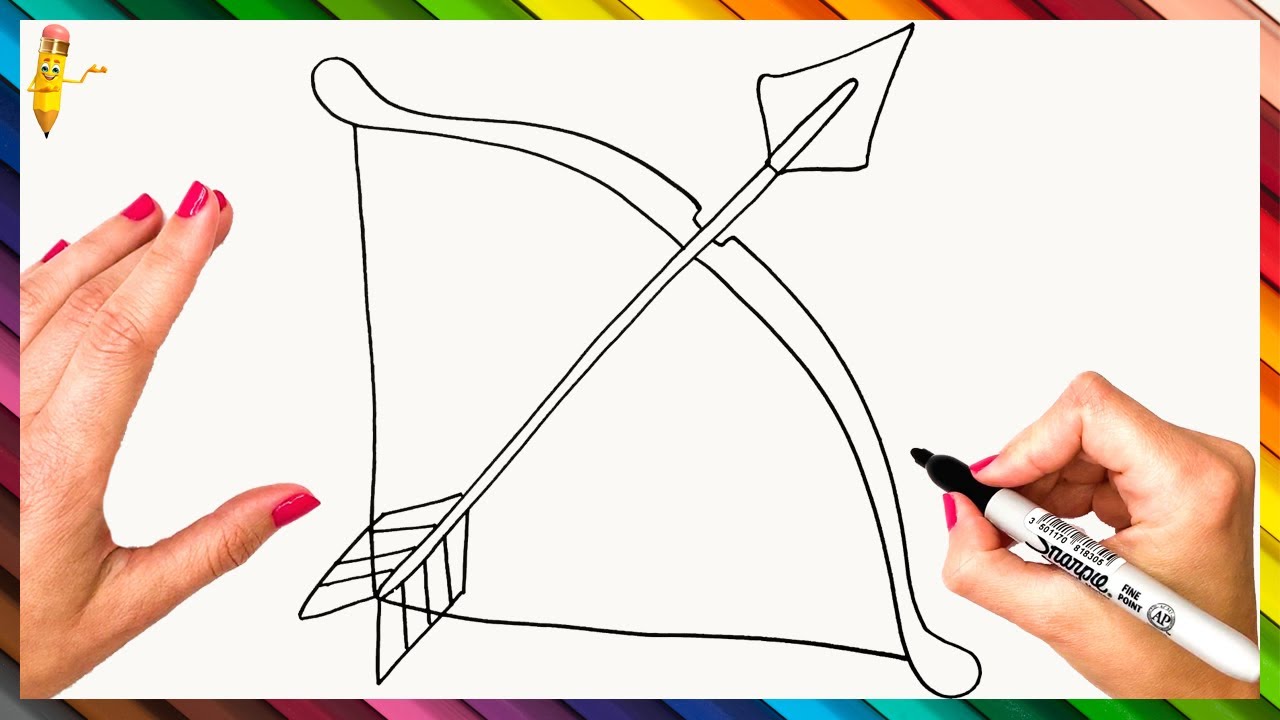
Easy Bow And Arrow Drawing
Easy Bow And Arrow Drawing - Then add two rectangles on top of the peak of the curve. Draw a straight line connecting both ends of the bowed limbs to represent the bowstring. As you draw the bow, maintain a smooth and steady motion until you reach full. Draw the feathers at the end of the arrow. When the arrow is nocked, the index finger is above the arrow, while the middle and ring finger are beneath the arrow. From this line, extend another short line at an opposite angle. Then, draw a curved line at the top of the rectangle, extending beyond its sides. Make sure it’s slightly longer than the length of the bow. From each end of this line, extend a straight line. Ensure the string is taut and straight.
Draw a straight line from one tip of the bow to the other. After sketching this shape out, add an arrow. Draw a straight line down its center. Begin by drawing an outline of the bow. This will be done in a tutorial format. Start by drawing a long, straight line for the shaft of the arrow. All drawing steps are included here which make it fun and easy to follow! Connect the top and bottom ends of the bow with a v shaped line. Web learn how to draw a bow and arrow with the help of our drawing lessons! Make a triangle on the left corner of the line.
All drawing steps are included here which make it fun and easy to follow! Make a triangle on the left corner of the line. Make sure it’s slightly longer than the length of the bow. Web learn how to draw a bow and arrow for kids easy and step by step. This will be done in a tutorial format. Web ready to take your drawing to the next level!? Draw a straight line connecting both ends of the bowed limbs to represent the bowstring. From each end of this line, extend a straight line. Plan for this drawing to take about 20 minutes, but the drawing process may actually take more time if a background is included in addition to the subject matter. Start by sketching a rectangle shape for the center knot of the bow.
How To Draw a Bow and Arrow Weapon (Archery) Easy Drawing Guide for
:)thanks for watching our channel. Then make some crooked rectangles on both sides of the line on the right side. Switch to a slightly softer pencil (like 2b) to add depth and definition to. Web how to draw a bow and arrow | dhanush drawing | drawing for kids | smart kids artlearn how to draw a bow and arrow.
How To Draw A Bow And An Arrow Step By Step 🏹 Bow And Arrow Drawing
Bow and arrow drawing tutorial. Draw a straight line connecting both ends of the bowed limbs to represent the bowstring. Allow them to meet at a point, forming the arrowhead. When the arrow is nocked, the index finger is above the arrow, while the middle and ring finger are beneath the arrow. As you draw the bow, maintain a smooth.
How to Draw a Bow and Arrow for Kids How to Draw for Kids
Bow and arrow drawing tutorial. Web as the first step of bow and arrow drawing, sketch out the general shape of a bow using a light pencil so it is easy to erase later if necessary. Make a triangle on the left corner of the line. Web then, draw a rectangular feather on each side with two lines inside each.
How To Draw a Bow and Arrow Weapon (Archery) Easy Drawing Guide for
The triangle should be pointed and narrow. This line represents the bowstring, which should have a slight tautness to it, even when the arrow isn’t drawn. Draw a small curved rectangle at the top of the shaft. This begins to outline the nock, the part of the arrow that is placed on the string of the bow. Web it is.
Learn How to Draw Bow and Arrow for Kids (Everyday Objects) Step by
Start by sketching a rectangle shape for the center knot of the bow. Web what is your request drawing?please comment below. After sketching this shape out, add an arrow. This line represents the bowstring, which should have a slight tautness to it, even when the arrow isn’t drawn. Take note the bow’s body should be parallel to the.
How to Draw a Bow and Arrow Really Easy Drawing Tutorial
Add some patterns on the bow’s body. Then, grip the bow with a relaxed yet firm hold, ensuring your fingers are correctly positioned. Now let’s move on to drawing the arrows: Web it is the draw utilized in olympic archery with recurve bows. Then make some crooked rectangles on both sides of the line on the right side.
How to Draw a Bow and Arrow Really Easy Drawing Tutorial
Web learn how to draw a bow and arrow for kids easy and step by step. :)thanks for watching our channel. Web this easy bow and arrow instruction guide is perfect for younger children looking to learn how to draw. Draw the body of the bow. From each end of this line, extend a straight line.
How to Draw a Bow and Arrow 5 Steps (with Pictures) wikiHow
Simple quick string draw into release, can be used as a combo of 3 repeating where the first two shots are normal with the third shot firing 2 arrows in quick succession. Then, grip the bow with a relaxed yet firm hold, ensuring your fingers are correctly positioned. Web it is the draw utilized in olympic archery with recurve bows..
How to Draw a Bow and Arrow Really Easy Drawing Tutorial
Then, grip the bow with a relaxed yet firm hold, ensuring your fingers are correctly positioned. Make sure the loops are symmetrical and of equal size. This line represents the bowstring, which should have a slight tautness to it, even when the arrow isn’t drawn. This draw typically anchors somewhere around the mouth or jaw. In this part of your.
How to draw a Bow and Arrow Bow and Arrow Easy Draw Tutorial YouTube
How to make a bow and arrow,bow and arrow drawing realistic,how to d. All drawing steps are included here which make it fun and easy to follow! Take note the bow’s body should be parallel to the. Draw the feathers at the end of the arrow. Web learn how to draw a bow and arrow for kids easy and step.
To Make Things Easier On Yourself, You Could Use A Pencil To Draw The Lines Of The Shaft To Give You.
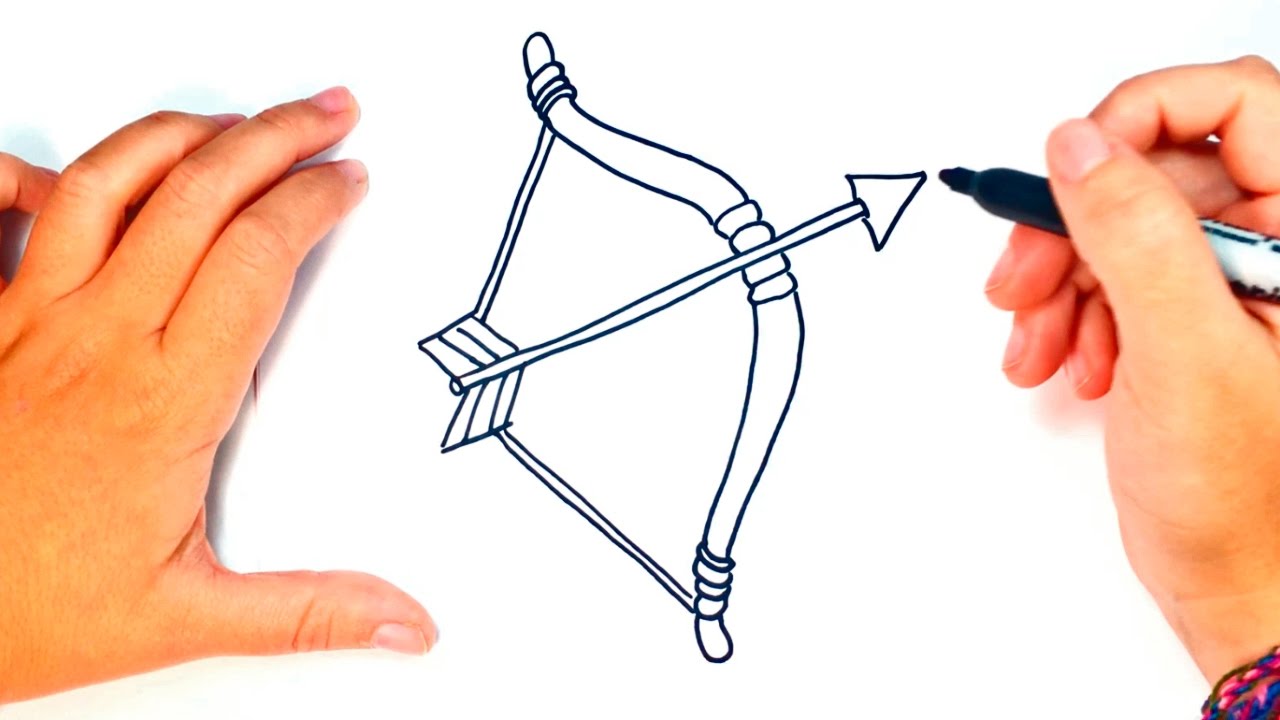
At the top of the shaft, draw a triangle shape to represent the arrowhead. On each side of the arrow’s body, draw a short and thin rectangular bow’s body with a slightly curved on each end. Make sure the loops are symmetrical and of equal size. Start by drawing a long, straight line for the shaft of the arrow.
Draw It Thicker Towards The Middle And Narrower Towards The Ends.
This line represents the bowstring, which should have a slight tautness to it, even when the arrow isn’t drawn. The string should appear taut, as if ready to release an arrow from it. Then add two rectangles on top of the peak of the curve. Make it’s middle sections fairly straight followed by a pair of bends and then again straight areas (on both sides) followed by small curves (in the opposite direction of the first two) near the tips.
It Should Look Something Like A Handle.
Web in this video we'll show you how to draw a person holding a bow & arrow. In this part of your arrow drawing, we will be drawing the central body or ‘shaft’ of the arrow. Web as the first step of bow and arrow drawing, sketch out the general shape of a bow using a light pencil so it is easy to erase later if necessary. Start to draw the arrow.
Next, Draw Two Loops On Either Side Of The Rectangle, Which Will Serve As The Main Body Of The Bow.
This begins to outline the nock, the part of the arrow that is placed on the string of the bow. Connect the top and bottom ends of the bow with a v shaped line. This draw utilizes three fingers, the index, middle, and ring. Draw the body of the bow.