Ghost Drawing Easy Step By Step
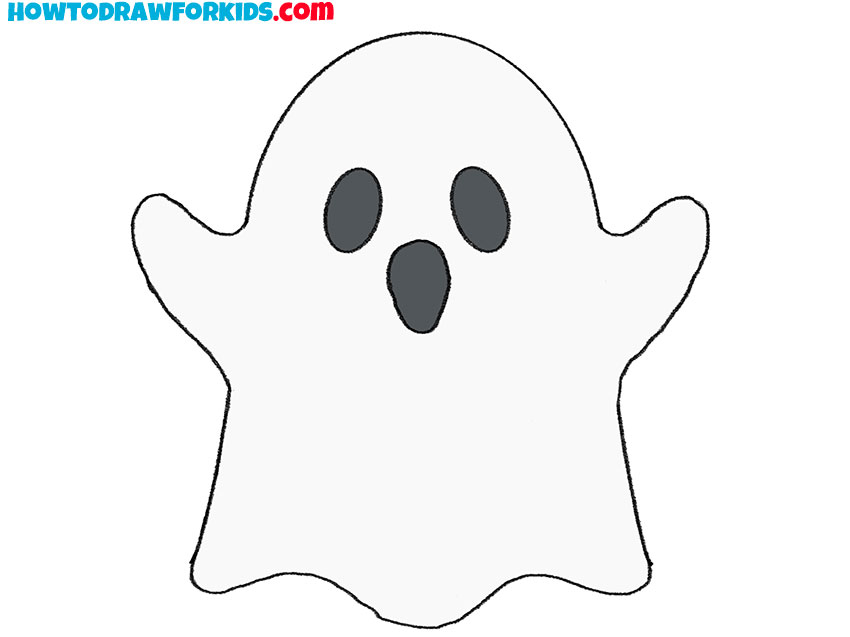
Ghost Drawing Easy Step By Step - Begin by lightly sketching a circle on your drawing paper. Perfect for a scary, fun halloween drawing. Web to practice, start by drawing the ghost’s outline first with a pencil. Let’s start working on the body. Draw a long curved line to form the basic shape of the ghost, as you can see in the reference image. Begin by drawing a gently curving line that arches towards the top and then slopes back down. Start with a simple ghost outline with a curved line at the top for the head of the ghost. Web print the template below to help you draw the ghost. As you can see in the reference image, the head will be made from a rounded line that has a small curly tail section at the back. Erase the rest of the oval outline that lies inside the tail.
Once done accurately, you shall get a shape similar to the one in the above picture. Let’s start working on the body. Draw a vertical oval which overlaps almost half of the circle. This will serve as the ghost’s head. You can use a compass if you want. Erase the rest of the oval outline that lies inside the tail. We will start with the head of the ghost in this first step of our guide on how to draw a ghost. To begin our tutorial on how to draw a ghost, start by drawing a vertical oval shape. Start with a simple ghost outline with a curved line at the top for the head of the ghost. We have tutorials for cute ghosts, realistic ghost drawings, and even a ghost that is trick or treating.
You’re going to find this is so easy!!! Let’s start working on the body. Draw a second shorter curved line on the right side and connect it. Draw a wavy curved line on the left side of your paper using a light pencil stroke. If you want to make this more of a ghost illustration, use fine line black markers to go over your lines after you complete your drawing and erase your pencil marks. Draw 2 curved lines on either side of the u. Draw the main body of your ghost drawing. Draw curves at the bottom of the oval to create a sense of flotation to the ghost. We have tutorials for cute ghosts, realistic ghost drawings, and even a ghost that is trick or treating. Keep the lines faint as they will be erased later.
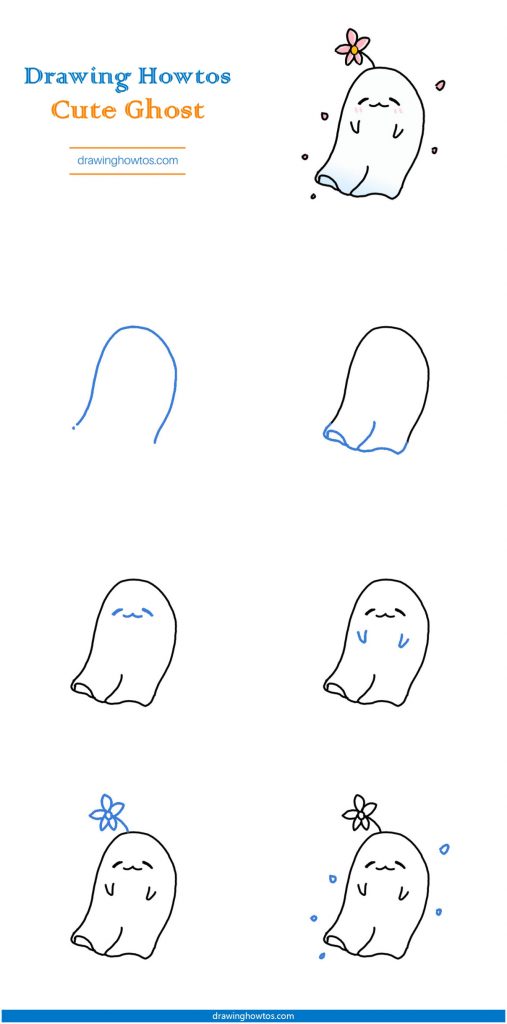
How to Draw a Ghost Step by Step Easy Drawing Guides Drawing Howtos
This will serve as the ghost’s head. Get free printable coloring page of this drawing. Begin by lightly sketching a circle on your drawing paper. 34k views 6 months ago how to draw cartoon characters. Draw a vertical oval which overlaps almost half of the circle.
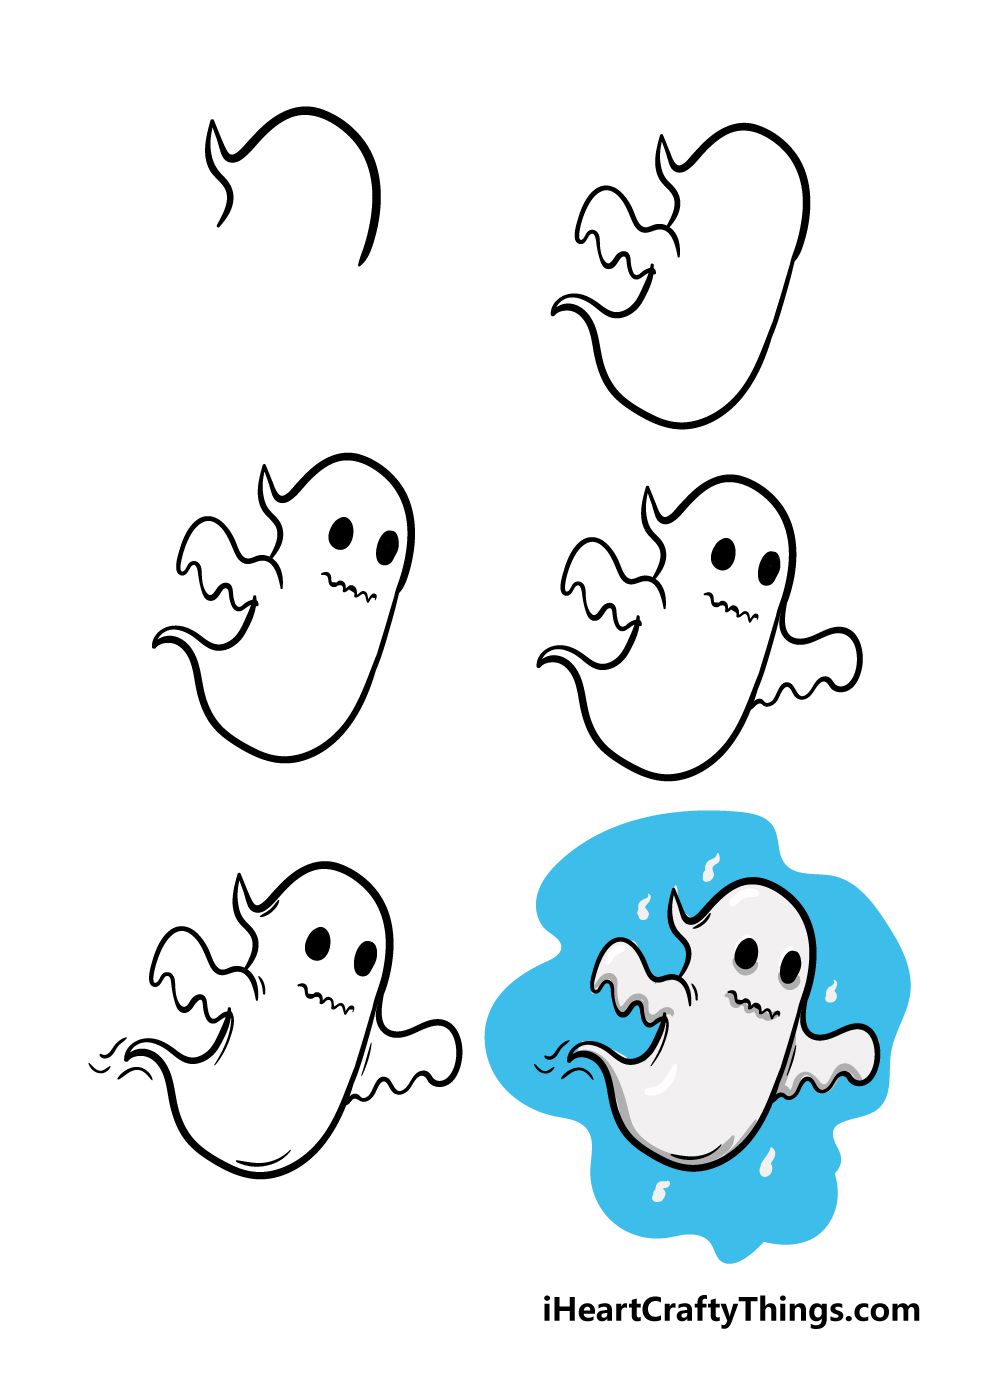
Ghost Drawing How To Draw A Ghost Step By Step
Start on the left side, drawing a curved line from the hand downwards. Sketching the ghost’s basic shape. Learn how to draw a cute ghost with these easy drawing steps. Draw an additional titled oval overlapping the main body of your ghost. Begin by lightly sketching a circle on your drawing paper.
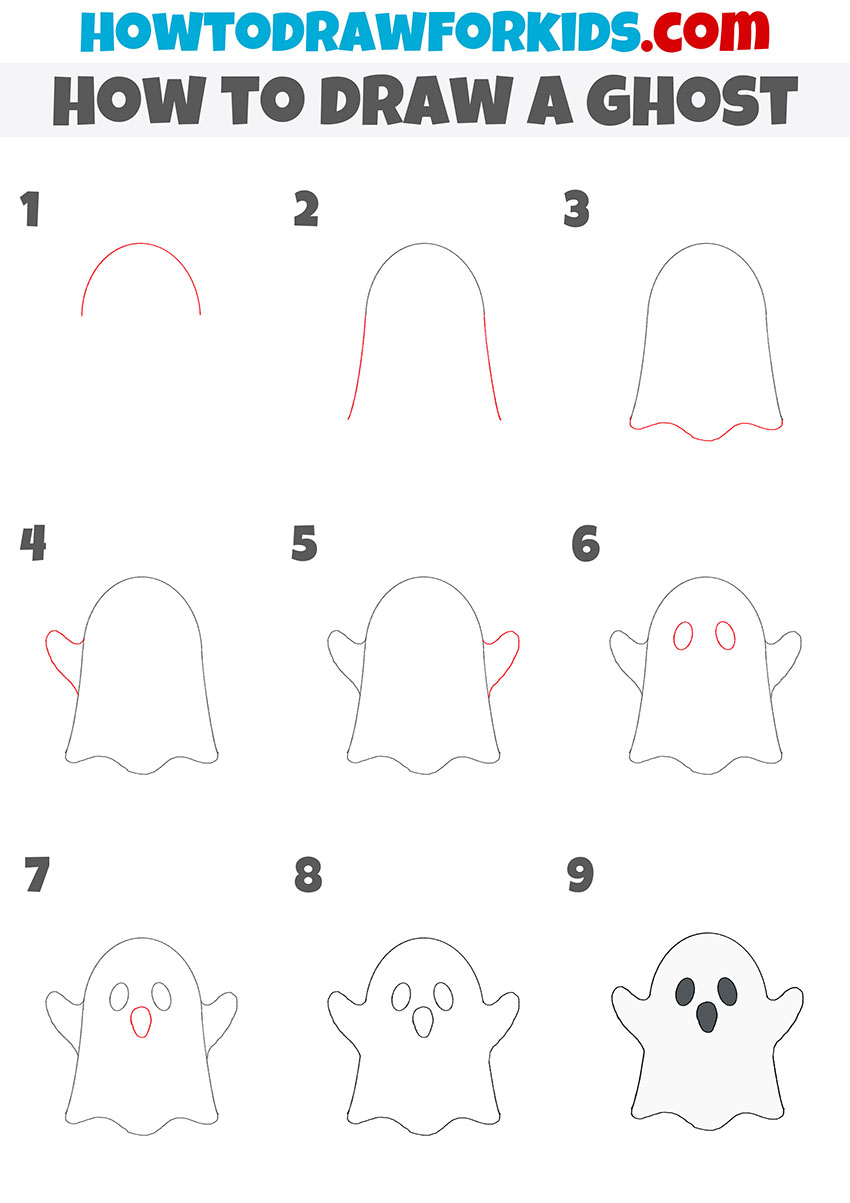
![How To Draw A Ghost Step by Step [9 Easy Phase] & [Video]](https://easydrawings.net/wp-content/uploads/2020/04/How-to-draw-a-Ghost-overview.jpg)
How To Draw A Ghost Step by Step [9 Easy Phase] & [Video]
To begin our tutorial on how to draw a ghost, start by drawing a vertical oval shape. Draw the main body of your ghost drawing. Add the hand construction lines. Get free printable coloring page of this drawing. 391k views 6 years ago.

How to draw halloween stuff step by step The Smart Wander
Let’s start working on the body. Web print the template below to help you draw the ghost. Draw a vertical oval which overlaps almost half of the circle. Next draw curves that are small at the bottom of the ghost. Keep the lines faint as they will be erased later.
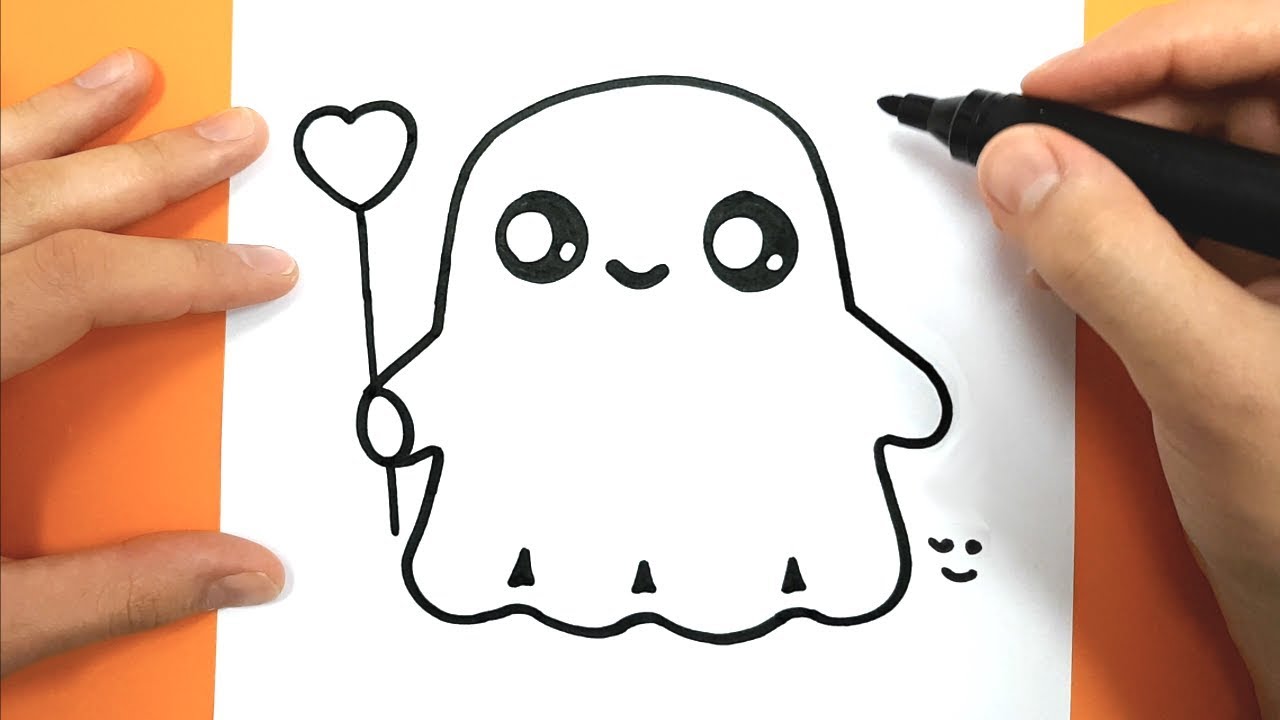
How to Draw and color a cute ghost Easy Drawing Tutorial HALLOWEEN
Start by drawing a curved shape (like a upside down letter u). Begin by lightly sketching a circle on your drawing paper. 40k views 3 years ago #halloween #ghost #howtodraw. Below the circle, draw a larger oval shape for the ghost’s body. We will start with the head of the ghost in this first step of our guide on how.
How to draw a Ghost Step by Step Ghost Drawing Lesson YouTube
This line will form the left side of the ghost’s head and body, shaping the overall contour of the ghost. Next draw curves that are small at the bottom of the ghost. Today we will learn how to draw a ghost using a few simple ovals and some squiggly lines. Draw an additional titled oval overlapping the main body of.
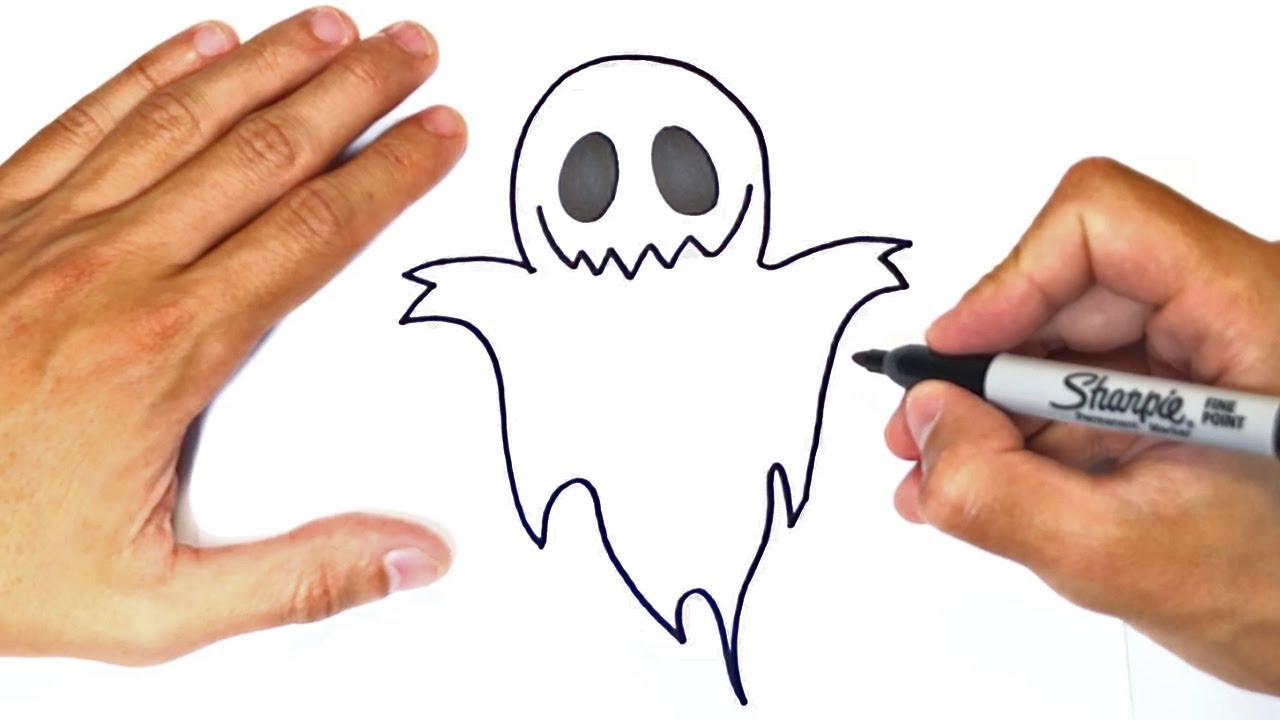
How to Draw a Ghost Step by Step Easy Drawing Tutorial For Kids
Let’s start working on the body. 391k views 6 years ago. Today we will learn how to draw a ghost using a few simple ovals and some squiggly lines. How to draw a ghost very easy step by step if you love my channel ️subscribe ️ and click that notification icon 🔔 so you don't miss any cute drawing. As.
How to Draw a Ghost Step by Step Easy Drawing Tutorial For Kids
How to draw a ghost very easy step by step if you love my channel ️subscribe ️ and click that notification icon 🔔 so you don't miss any cute drawing. This will be the top part of the ghost’s head. We will start with the head of the ghost in this first step of our guide on how to draw.

15 Ghost Drawing Ideas How To Draw A Ghost
40k views 3 years ago #halloween #ghost #howtodraw. How to draw a cute ghost tutorial. Learn how to draw a cute ghost with these easy drawing steps. Next draw curves that are small at the bottom of the ghost. Web to practice, start by drawing the ghost’s outline first with a pencil.
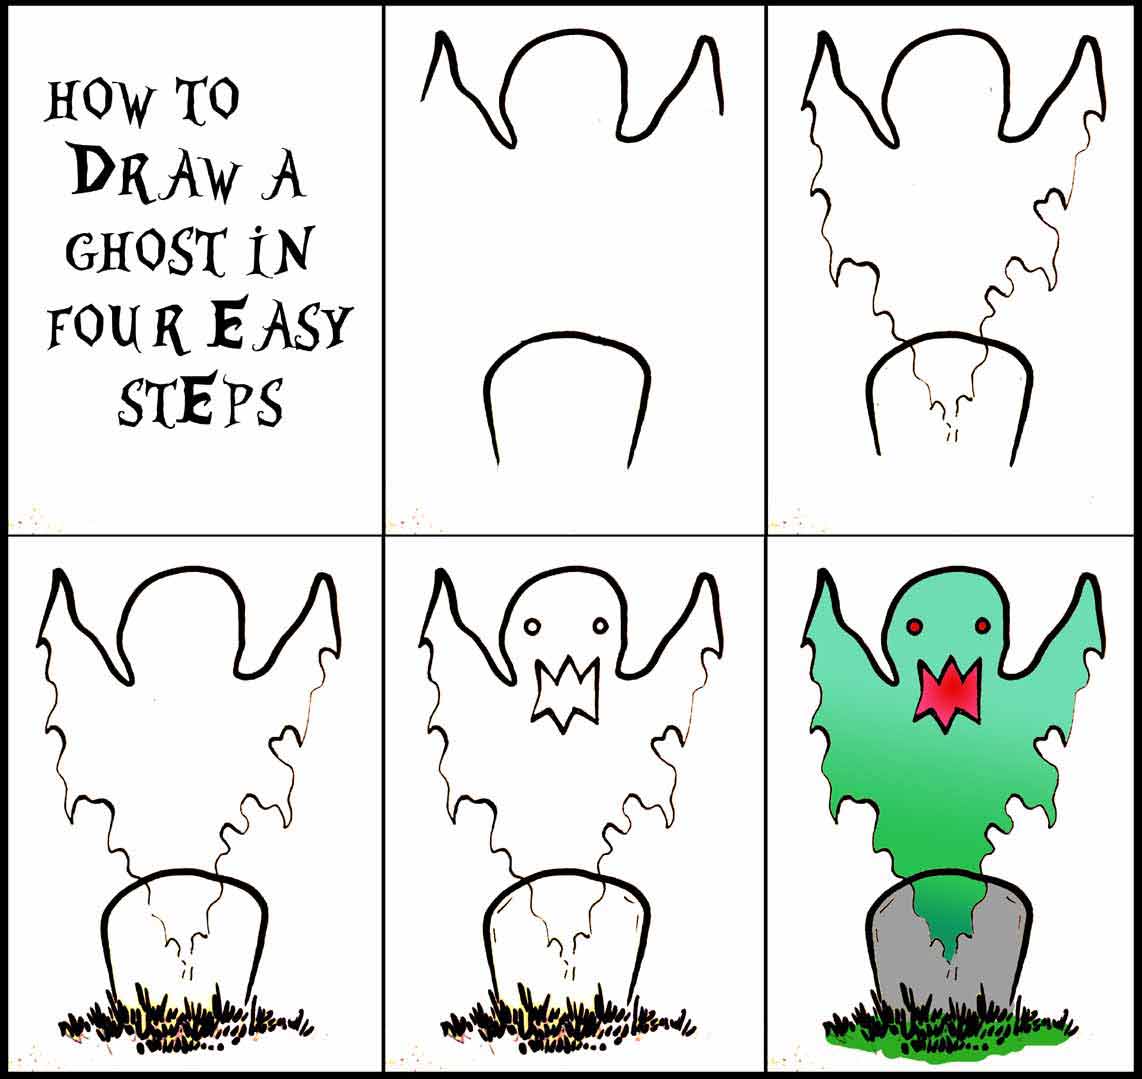
howtodrawhalloweenghostonpaperineasytofollowfourstepsimage
Let’s start working on the body. We will start with the head of the ghost in this first step of our guide on how to draw a ghost. Web easy things to doodle when you are bored || #viral #shorts #drawing #ytshorts #easy #ghost As you can see in the reference image, the head will be made from a rounded.
Web Print The Template Below To Help You Draw The Ghost.
Learn how to draw a cute ghost with these easy drawing steps. To begin our tutorial on how to draw a ghost, start by drawing a vertical oval shape. Follow along to learn how to draw this cute ghost and tombstone step by step, easy. This will be the top part of the ghost’s head.
This Line Will Form The Left Side Of The Ghost’s Head And Body, Shaping The Overall Contour Of The Ghost.
Next draw curves that are small at the bottom of the ghost. Learn how to draw a ghost with this easy drawing lesson for kids from super simple draw! Draw the left and right arms using curves. You’re going to find this is so easy!!!
Watch The Easy Step By Step Video As You Draw.
391k views 6 years ago. Let’s start working on the body. Draw a long curved line to form the basic shape of the ghost, as you can see in the reference image. Sketching the ghost’s basic shape.
Draw Curves At The Bottom Of The Oval To Create A Sense Of Flotation To The Ghost.
Perfect for a scary, fun halloween drawing. 40k views 3 years ago #halloween #ghost #howtodraw. 244k views 5 years ago. This will represent the main body of your ghost.