Grim Reaper Drawing Easy
Grim Reaper Drawing Easy - Mark off the width and height of the picture. Web hi everyone, !welcome to moshley drawing channel. Web the facial expression becomes a compelling focal point with the right shading and details. The last step gives you an option to ink your sketch. Draw the sides and the bottom of the hood to finish framing the skull of your grim reaper drawing. Draw the reaper’s cloak, neck and snath of his scythe. Web the first step is all about creating the basic proportions. Then start drawing out the details for the hood. The ground was a lot of fun to draw, but it is hard to describe exactly how i did it. Color your grim reaper drawing using colored pencils, markers or crayons!
Web how to draw a grim reaper. Give the grim reaper a face. Drawing of the grim reaper. After you have the inside of your hood all drawn out, move onto the outside of the hood. Take your time and be careful when you ink to avoid any accidents. Draw a scary grim reaper with tips from a. Color your grim reaper drawing using colored pencils, markers or crayons! Now it is time to draw the grim reaper’s tools properly. It's simple!simply subscribe us for more drawing tutorial. Above each eye, draw a small, curved line to make the brows thicker.
You’ll find that grim reaper pictures and grim reaper tattoos are very popular. Web the first step is all about creating the basic proportions. I used the airbrush to layer some black and dark blue paint along the bottom. Every stroke contributes to bringing this enigmatic figure to life, complete with robe and scythe. Web how to draw a grim reaper step by step.we want to share to you the joy in doing the steps of the online video lesson how to draw a grim reaper step by step. Starting on the lower, left side of the hood, draw a long, curved vertical line for the first part of the grim reaper's arm. The last step gives you an option to ink your sketch. Web the facial expression becomes a compelling focal point with the right shading and details. Draw the sides and the bottom of the hood to finish framing the skull of your grim reaper drawing. After you have the inside of your hood all drawn out, move onto the outside of the hood.

How to Draw the Grim Reaper Really Easy Drawing Tutorial
Web complete the grim reaper drawing. I started by adding a new layer. Draw two curved lines to indicate the brows. After you have the inside of your hood all drawn out, move onto the outside of the hood. This second step of your cartoon grim reaper drawing will focus on finishing off the lower half of the head.

How To Draw The Grim Reaper, Death, Step by Step, Drawing Guide, by
The last step gives you an option to ink your sketch. Take your time and be careful when you ink to avoid any accidents. Then, shade the blade of the scythe with light and. Web learn how to draw step by step in a fun way!come join and follow us to learn how to draw. Then start drawing out the.

Sketch Grim Reaper Drawing Easy Go Images Cafe
This second step of your cartoon grim reaper drawing will focus on finishing off the lower half of the head. Now, color the snath of the scythe with a brown crayon. Web how to draw a grim reaper step by step.we want to share to you the joy in doing the steps of the online video lesson how to draw.
Hood Grim Reaper Drawings Pict Art
Web learn how to draw a cartoon grim reaper easy, step by step drawing tutorial. Draw two curved lines to indicate the brows. Do the area at the top of the skull first. Web the facial expression becomes a compelling focal point with the right shading and details. I started by adding a new layer.
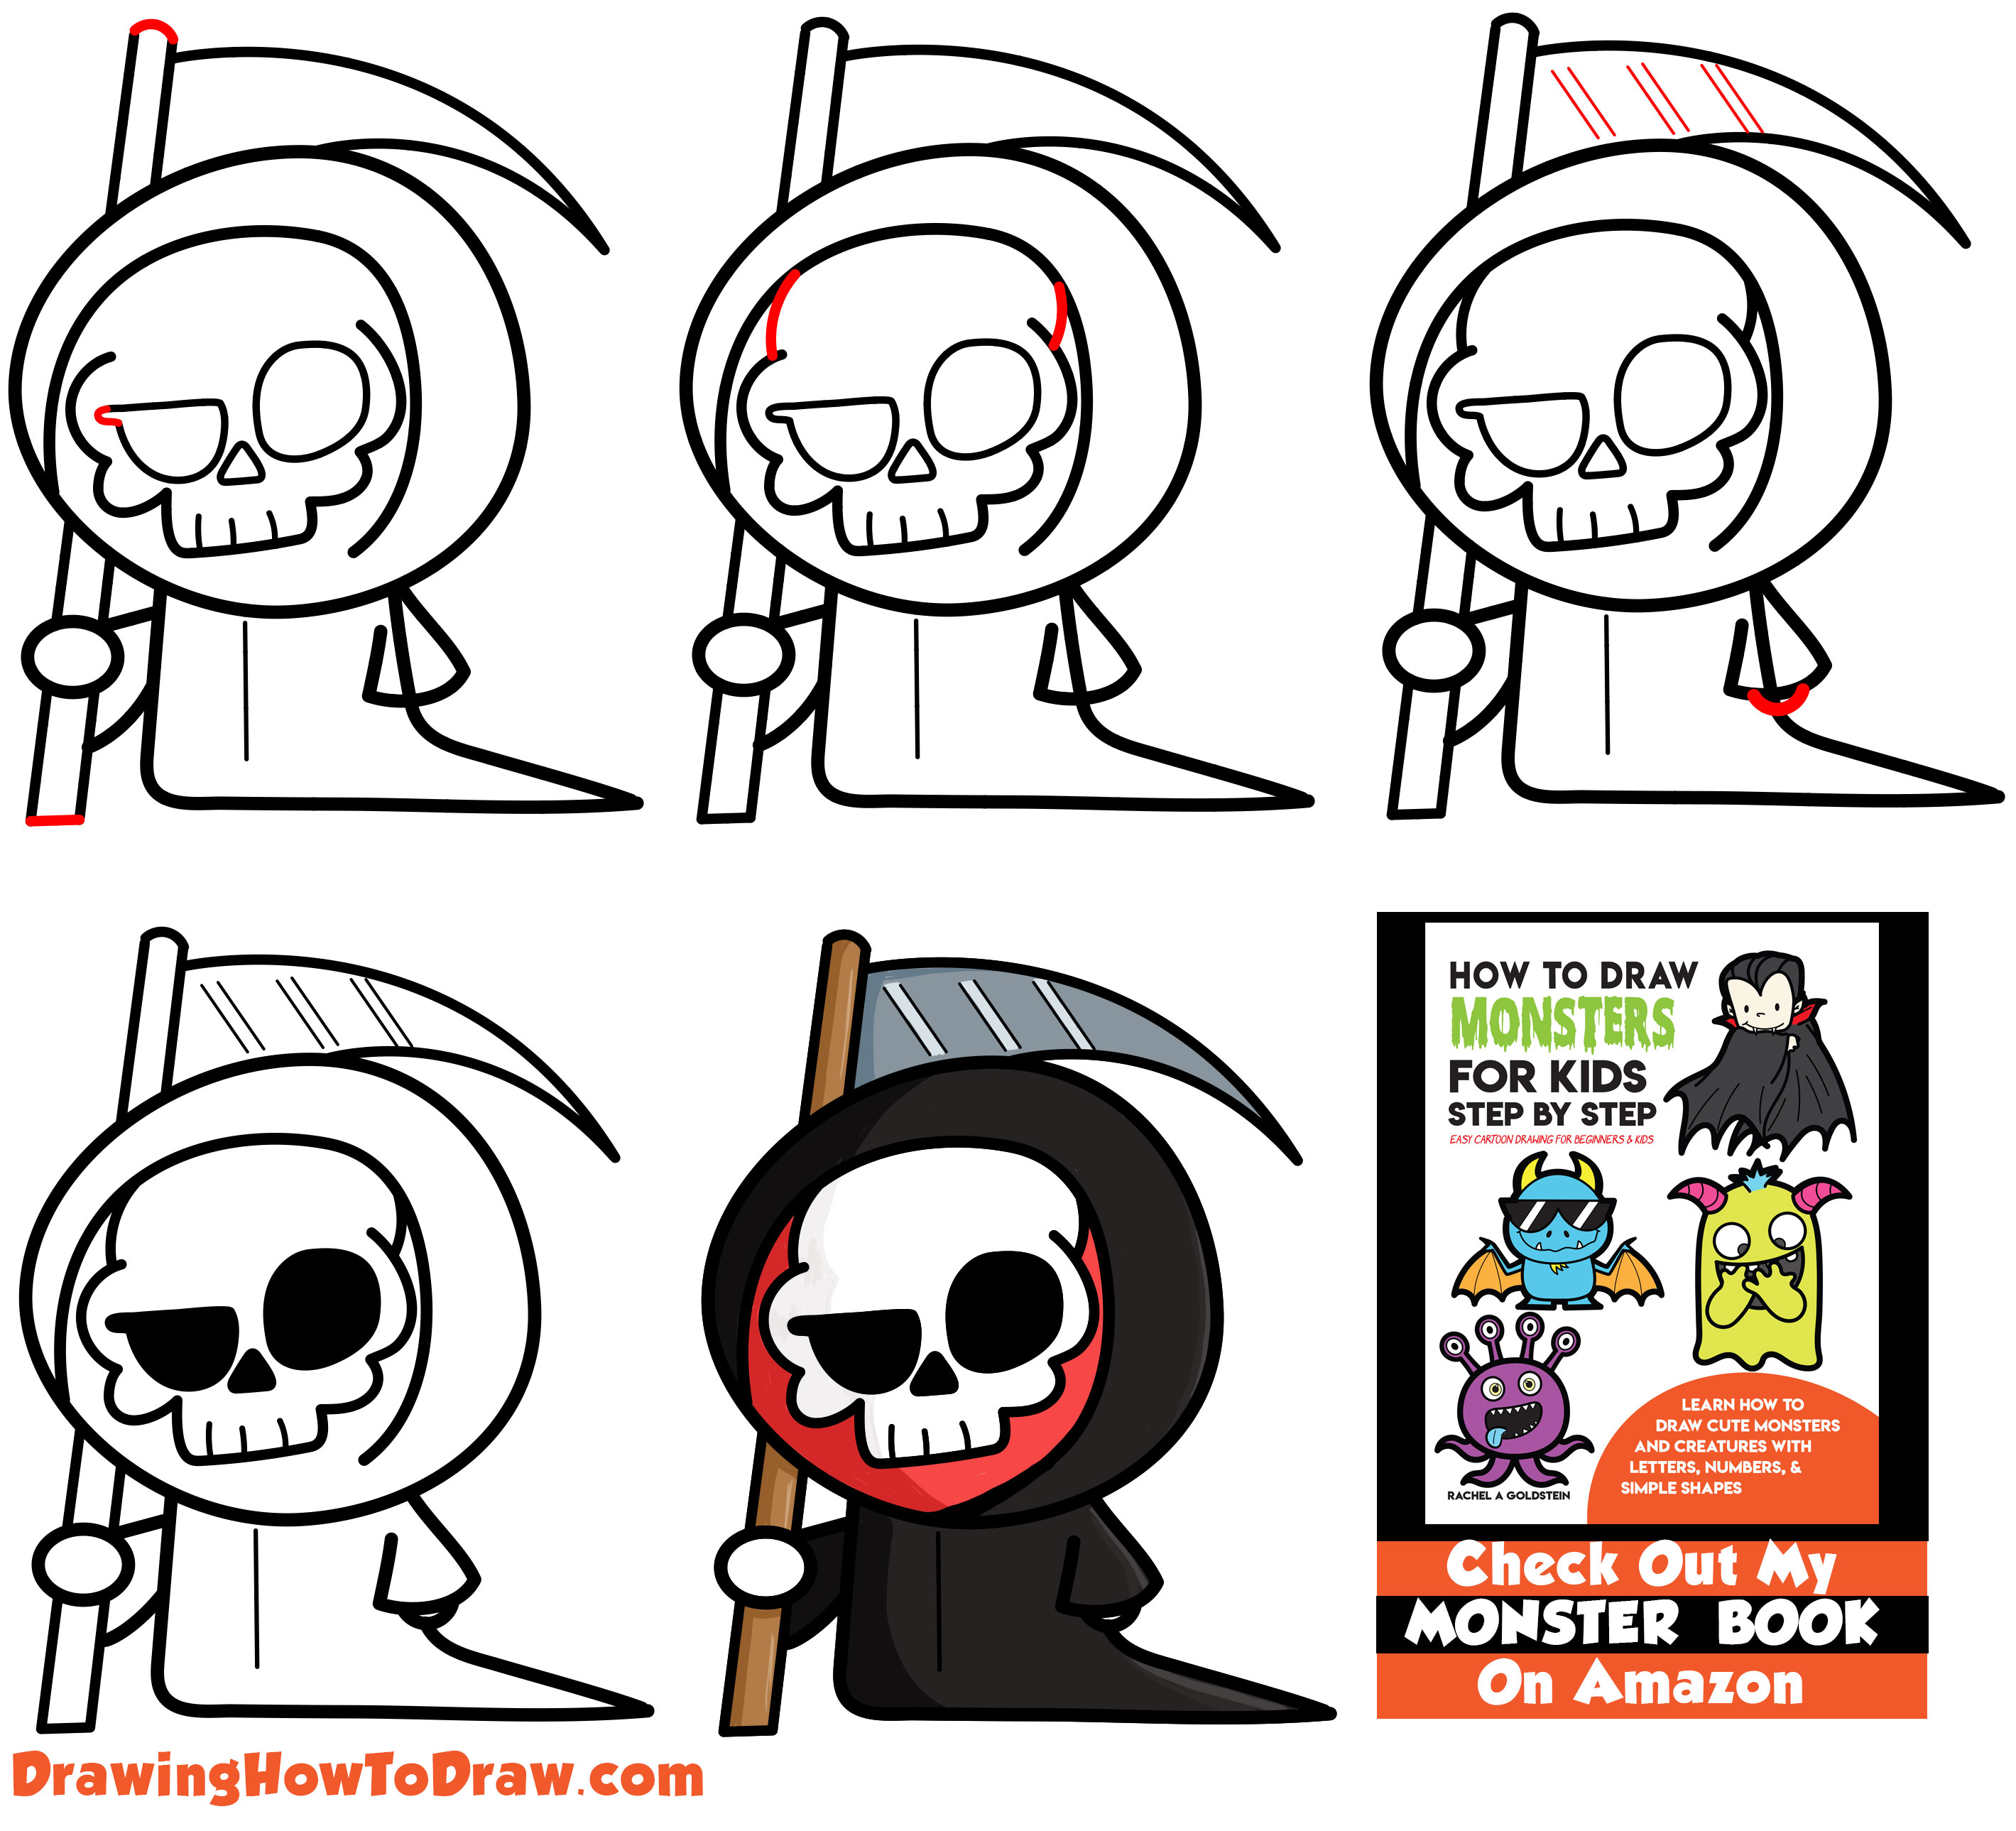
How to Draw a Cute Cartoon Grim Reaper (Kawaii / Chibi) Easy Step by
I started by adding a new layer. To begin drawing a grim reaper, you will need the. It's simple!simply subscribe us for more drawing tutorial. Web hi everyone, !welcome to moshley drawing channel. Check out what we have prepared for you guys!execute the first step by sketching the shape of the.

How to Draw the Grim Reaper Really Easy Drawing Tutorial
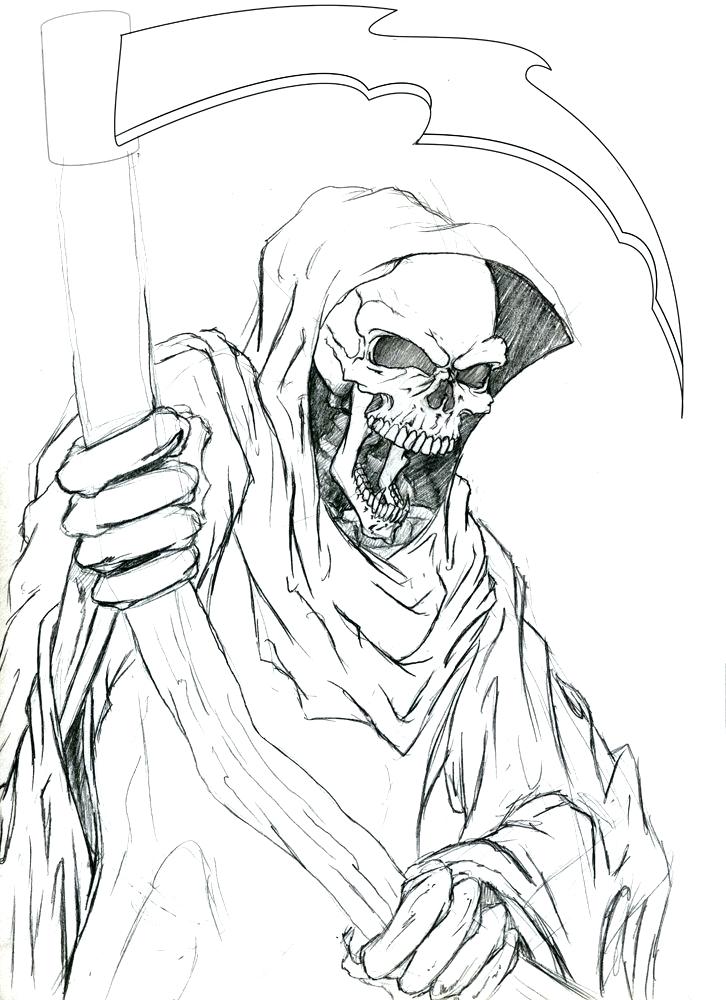
Draw the blade of the scythe by extending two long, curved lines from the rod, allowing them to meet in a sharp point. Drawing of the grim reaper. Web hi everyone, !welcome to moshley drawing channel. Remember to sketch lightly in this phase, so you can adjust lines as necessary. Draw the scythe and hourglass.
Simple Grim Reaper Drawing at GetDrawings Free download
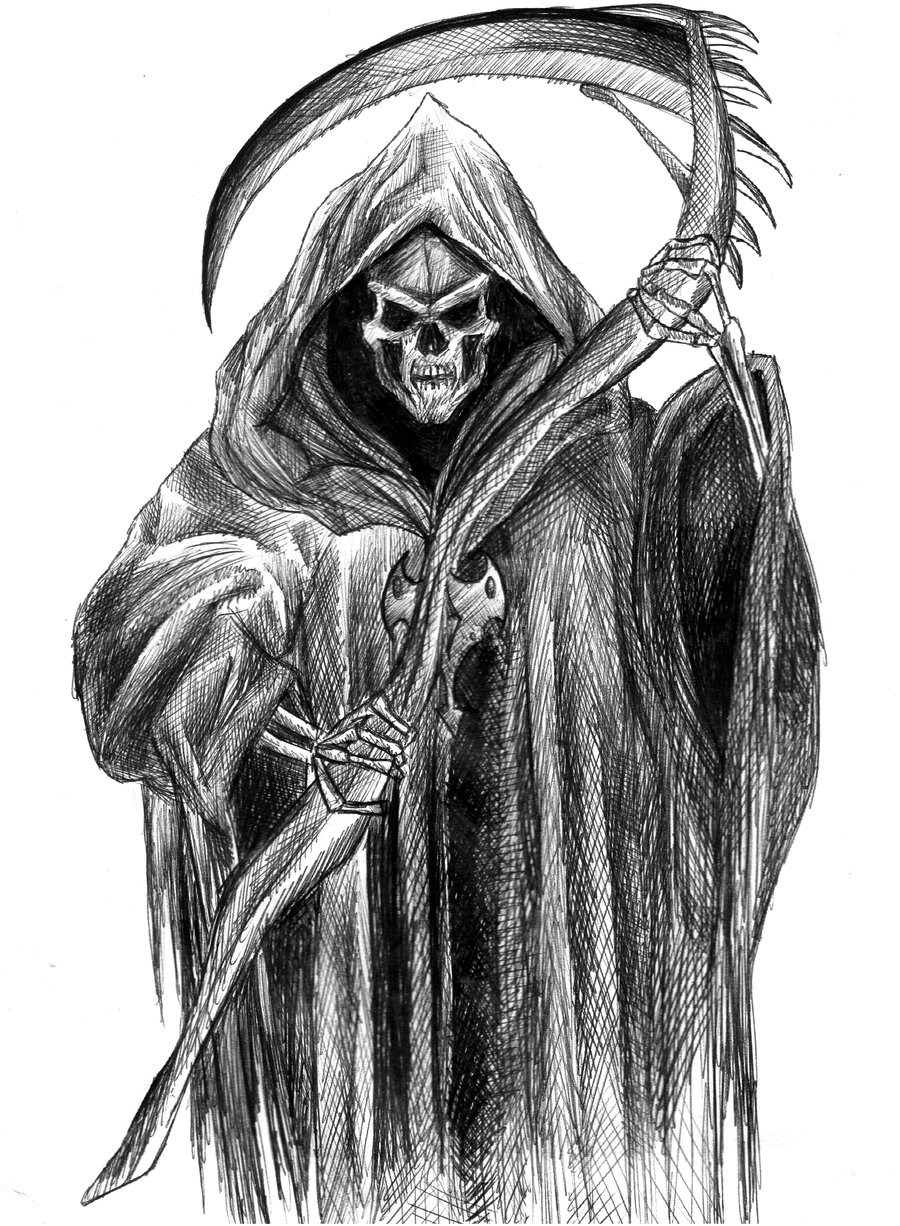
Every stroke contributes to bringing this enigmatic figure to life, complete with robe and scythe. The grim reaper is famously a skeleton in a cloak, so we will draw his skull in this step of our guide on how to draw the grim reaper. I kept adding paint and smudging it to get a dense layer and then. This second.

Adult Coloring Pages Grim Reaper Ferrisquinlanjamal
The ground was a lot of fun to draw, but it is hard to describe exactly how i did it. Check out what we have prepared for you guys!execute the first step by sketching the shape of the. Ink provides a bold finish, but it’s important to wait for the ink to dry before gently erasing the pencil lines to.

Grim Reaper Reaper drawing, Grim reaper tattoo, Grim reaper art
Take your time and be careful when you ink to avoid any accidents. Mark off the width and height of the picture. You’ll find that grim reaper pictures and grim reaper tattoos are very popular. Ink provides a bold finish, but it’s important to wait for the ink to dry before gently erasing the pencil lines to prevent smudging. First,.

How To Draw A Grim Reaper HOWTONB
Remember to sketch lightly in this phase, so you can adjust lines as necessary. Now it is time to draw the grim reaper’s tools properly. I kept adding paint and smudging it to get a dense layer and then. Draw two curved lines to indicate the brows. Web the facial expression becomes a compelling focal point with the right shading.
Web Shade The Sides Of The Lower Jaw A Bit And Draw A Series Of Short, Vertical Lines Along The Bottom Edge For The Grim Reaper's Teeth.
Check out what we have prepared for you guys!execute the first step by sketching the shape of the. Begin a grim reaper drawing by outlining the hood. Below the nose, draw a curved, horizontal line for the first part of the upper jaw. Color your grim reaper drawing using colored pencils, markers or crayons!
Web Hi Everyone, !Welcome To Moshley Drawing Channel.
Beneath each brow, enclose a half circle to form the eye. A full drawing of the grim reaper showcases a blend of skill and imagination. Then, shade the blade of the scythe with light and. Mark off the width and height of the picture.
Take Your Time And Be Careful When You Ink To Avoid Any Accidents.
We have made all the steps very easy to follow because they are all for kids. Outline the blade of the scythe with straight curves as it was in the sketch. ⭐ become a club member and get instant access to exclusive tutorials that will help acceler. Add guidelines for the grim reaper’s body.
Pay Attention To How Long This Line Is.
It's simple!simply subscribe us for more drawing tutorial. Now, let’s complete our drawing of the angel of death! I then smudged it with the smudge web brush (set to a larger size). Ink provides a bold finish, but it’s important to wait for the ink to dry before gently erasing the pencil lines to prevent smudging.