Hiw To Draw A Hand
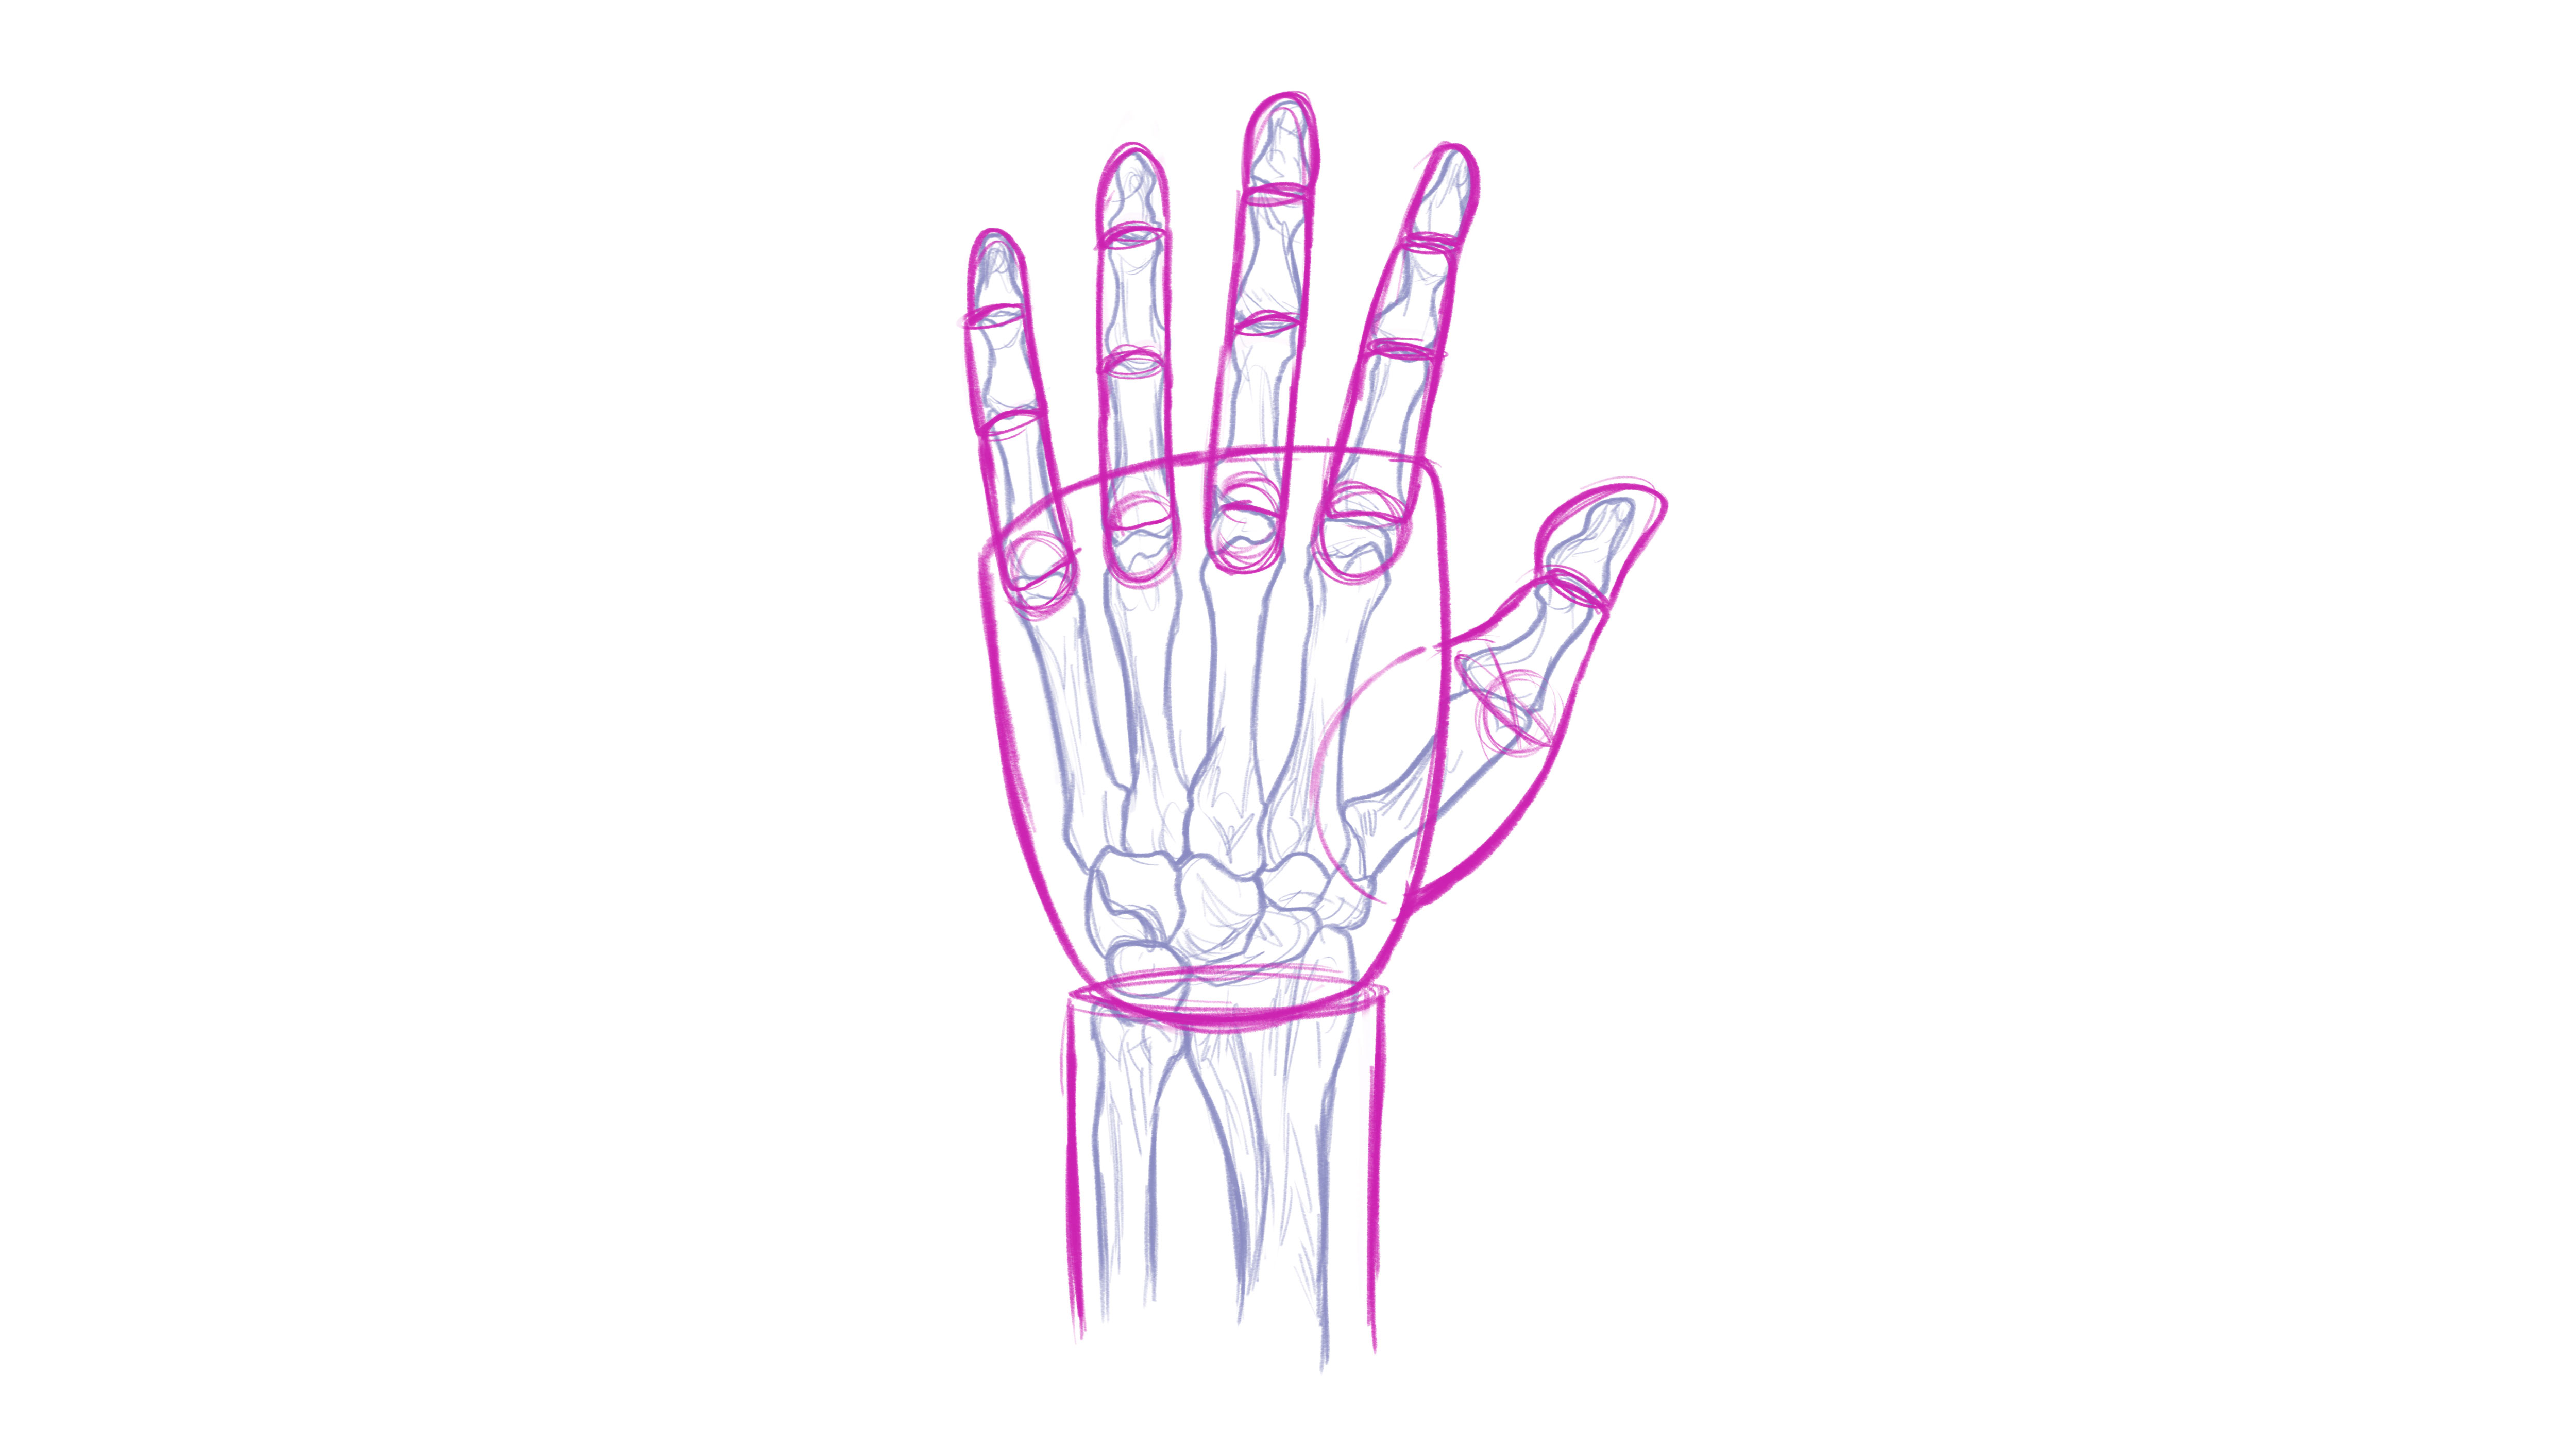
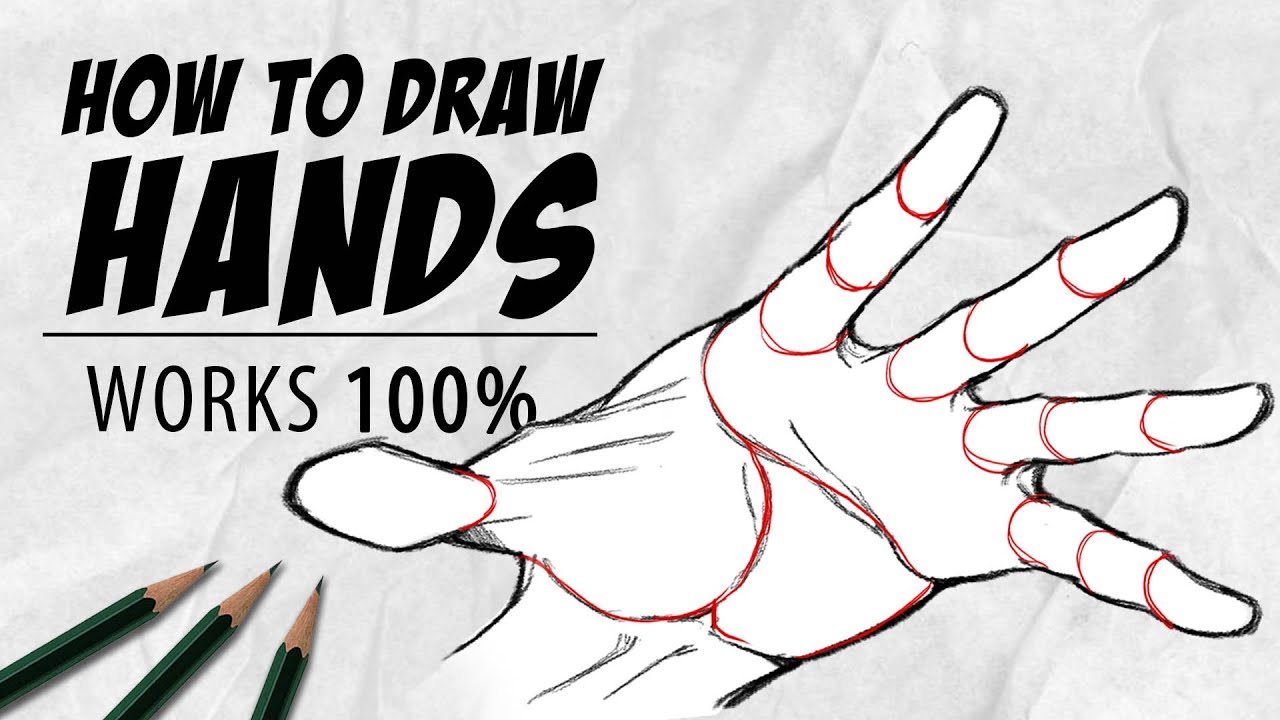
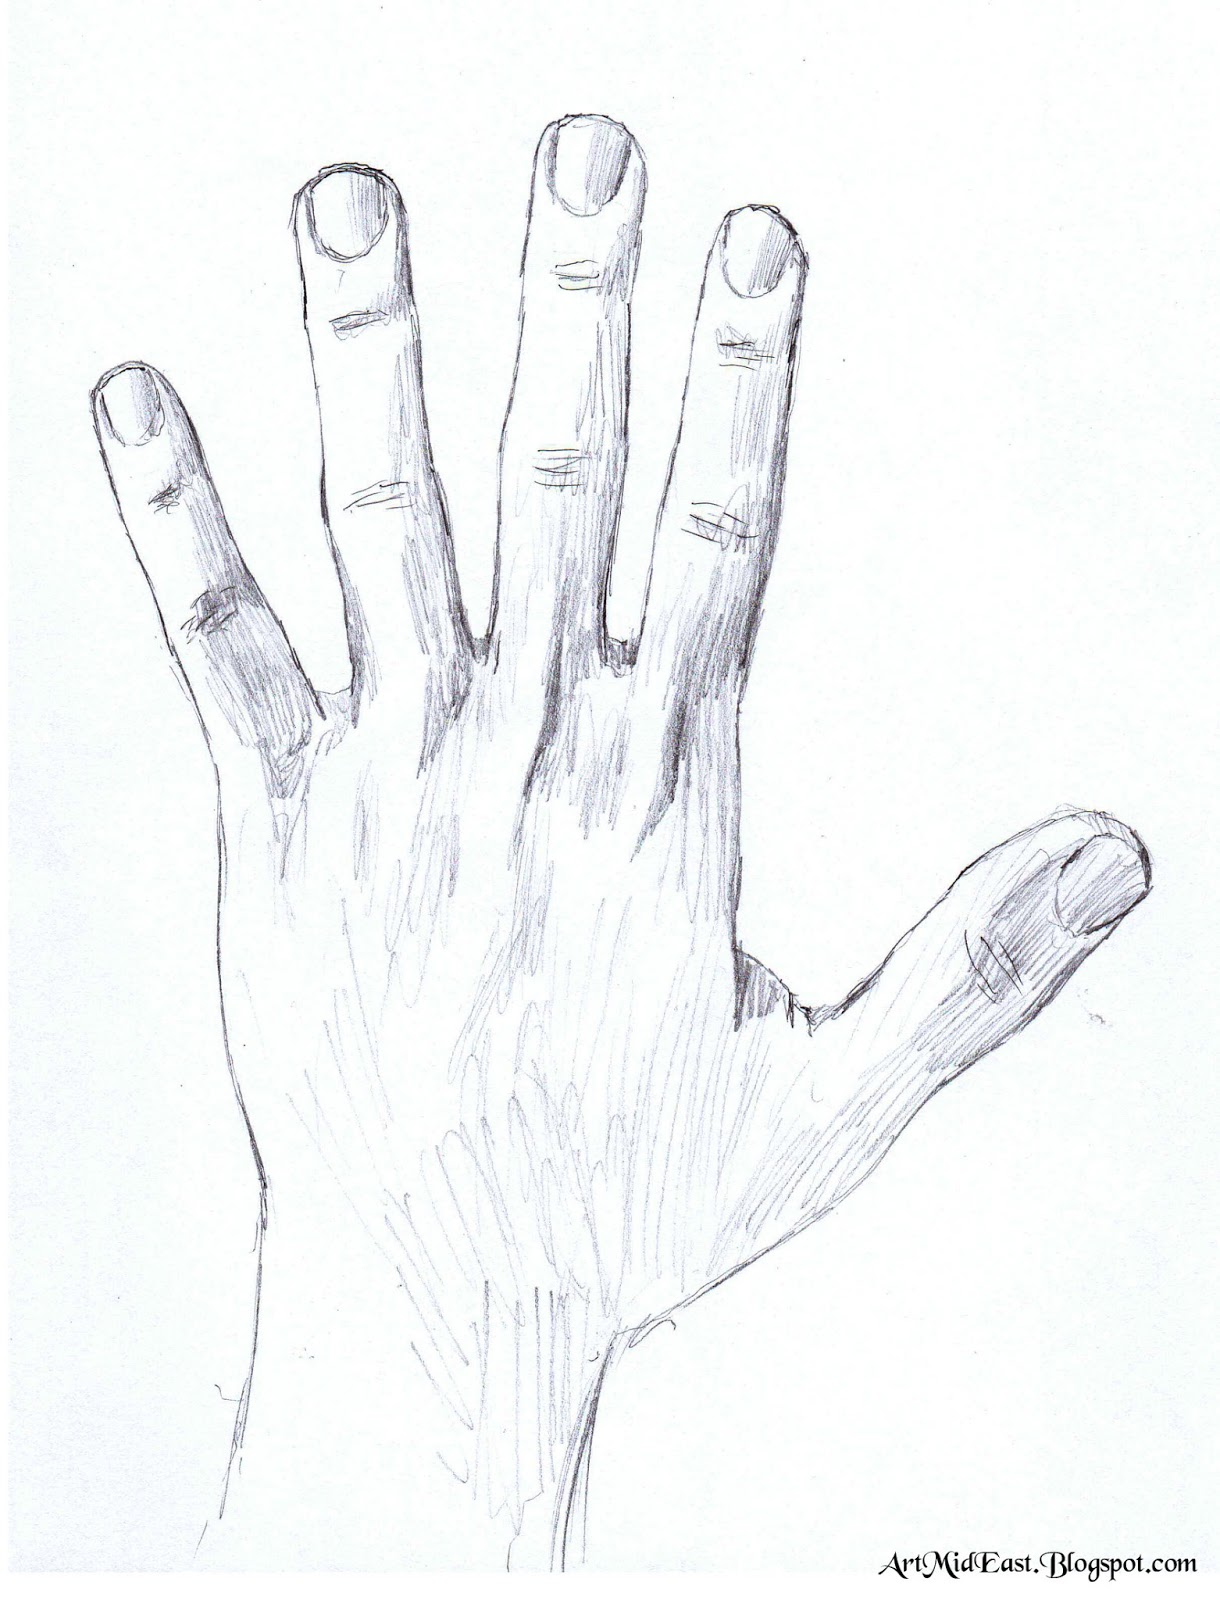
Hiw To Draw A Hand - Web this video is all about drawing hands. If the splinter is thick and unlikely to break, a good alternative to tweezers is a sturdy pair of sterilized nail clippers. Draw the rest of the fingers using curved lines. The pointer and ring fingers might be the same length, but this varies on different peoples' hands! Make sure to position the fingers so that they are not all in a straight line. Don’t worry about making it pretty; After cleaning the area with the splinter, add the paste to the splinter area. Note that the fingers are of different lengths, the thumb and pinkie fingers being the shortest. You can use the skeletal image above as a base for this step (click on the icon in the top right to enlarge the image). From a reference photo, sketch the basic shapes and lines of the hand.
Unlock ad free and printable drawing and coloring tutorials. Hands are quite tricky to paint or draw, and painting them when you're a beginner can be an uphill struggle, to say the least. If the splinter is thick and unlikely to break, a good alternative to tweezers is a sturdy pair of sterilized nail clippers. Hands have so much movement and exp. After cleaning the area with the splinter, add the paste to the splinter area. Web wash your hands before you try to remove your splinter. Draw lines to determine the fingers’ positions. 4 simple circles represent the knuckles of the hand. Make sure to position the fingers so that they are not all in a straight line. Doing this lays a good foundation for.
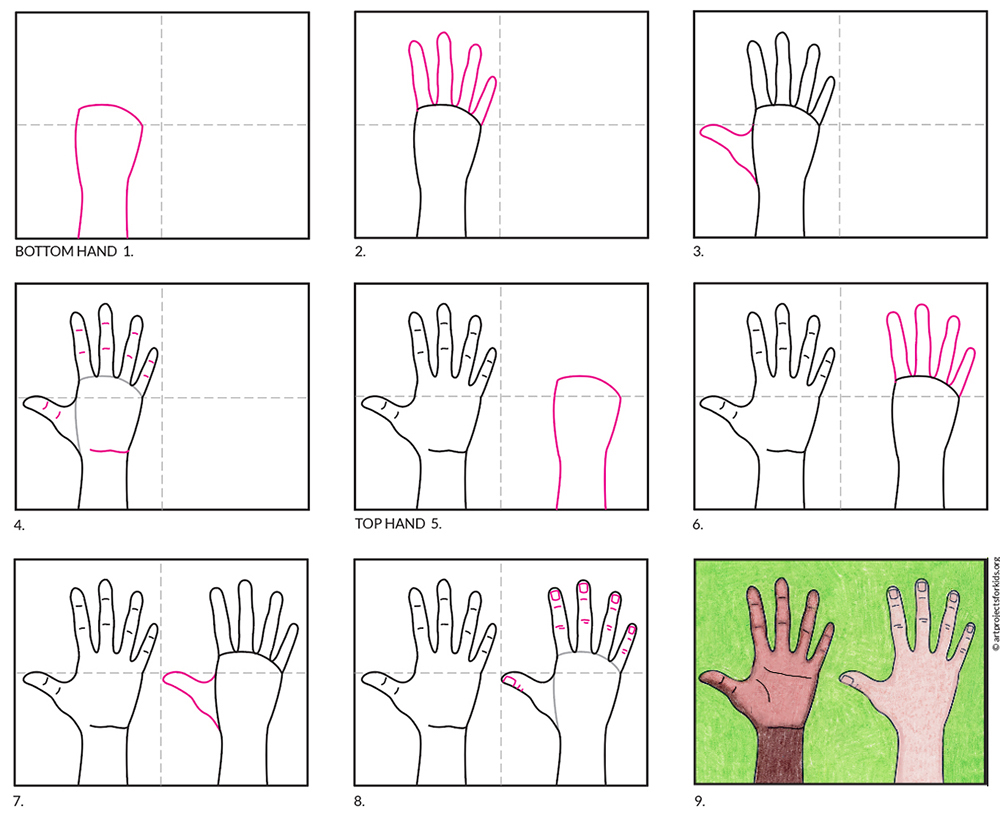
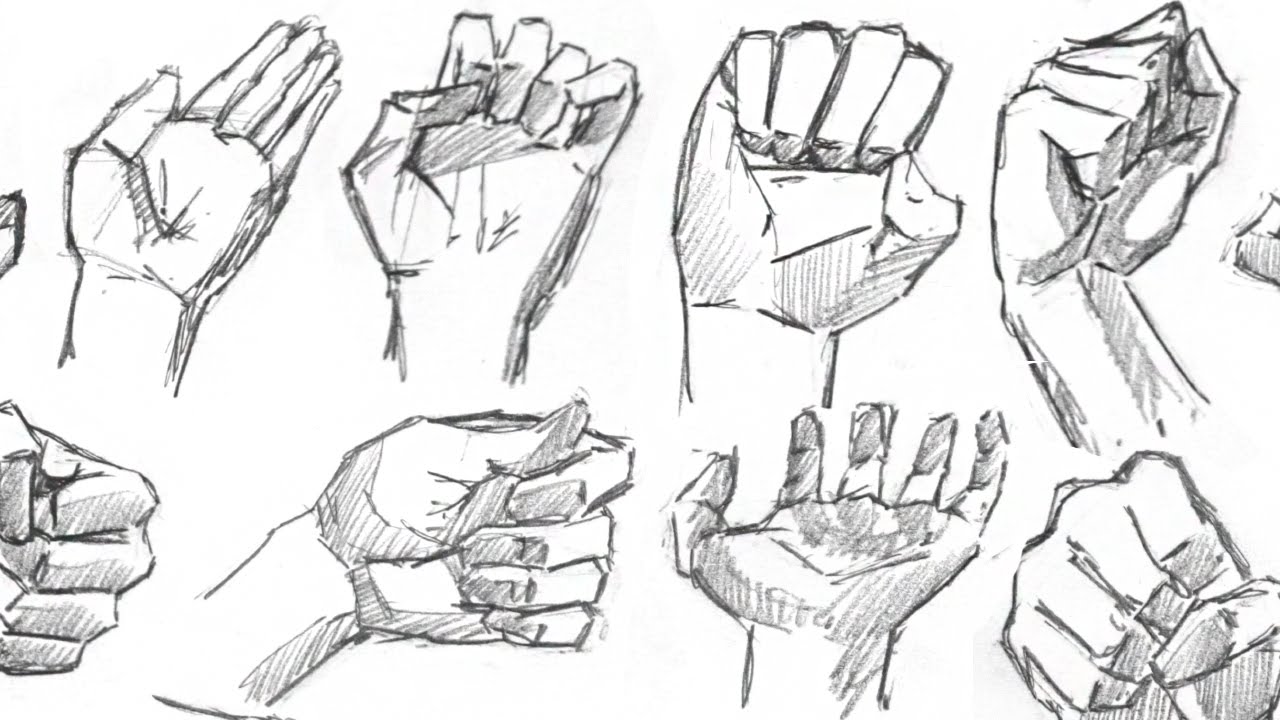
Doing this lays a good foundation for. Your first layer should be the bones of the hand, the carpals. Enclose each finger using a curved line. We are also starting to roll out to chatgpt free with usage limits today. Web 👉👉👉 get my stuff and support the channel: These can function in various ways. Notice in the drawing below how the hand is more refined but still has a strong 3 dimensional quality about it. Don’t worry about making it pretty; All gestures and movements hinge on the knuckles. Use the curve as a guide.

How To Draw Hands Tutorial Tutorial
Sketch a triangle for the base of the thumb and the wireframe for the fingers. Don’t worry about the lines being perfect at this stage—the goal is to lay the foundations of your hand drawing. Web you can lay in broad shapes over the skeletal view in order to build the hand. Enclose each finger using a curved line. Rectangles.
How to draw hands. Easy tutorials you can follow even as a beginner
Hands are quite tricky to paint or draw, and painting them when you're a beginner can be an uphill struggle, to say the least. After cleaning the area with the splinter, add the paste to the splinter area. We are also starting to roll out to chatgpt free with usage limits today. Web draw four circles along the upper line.
How to Draw Hands · Art Projects for Kids
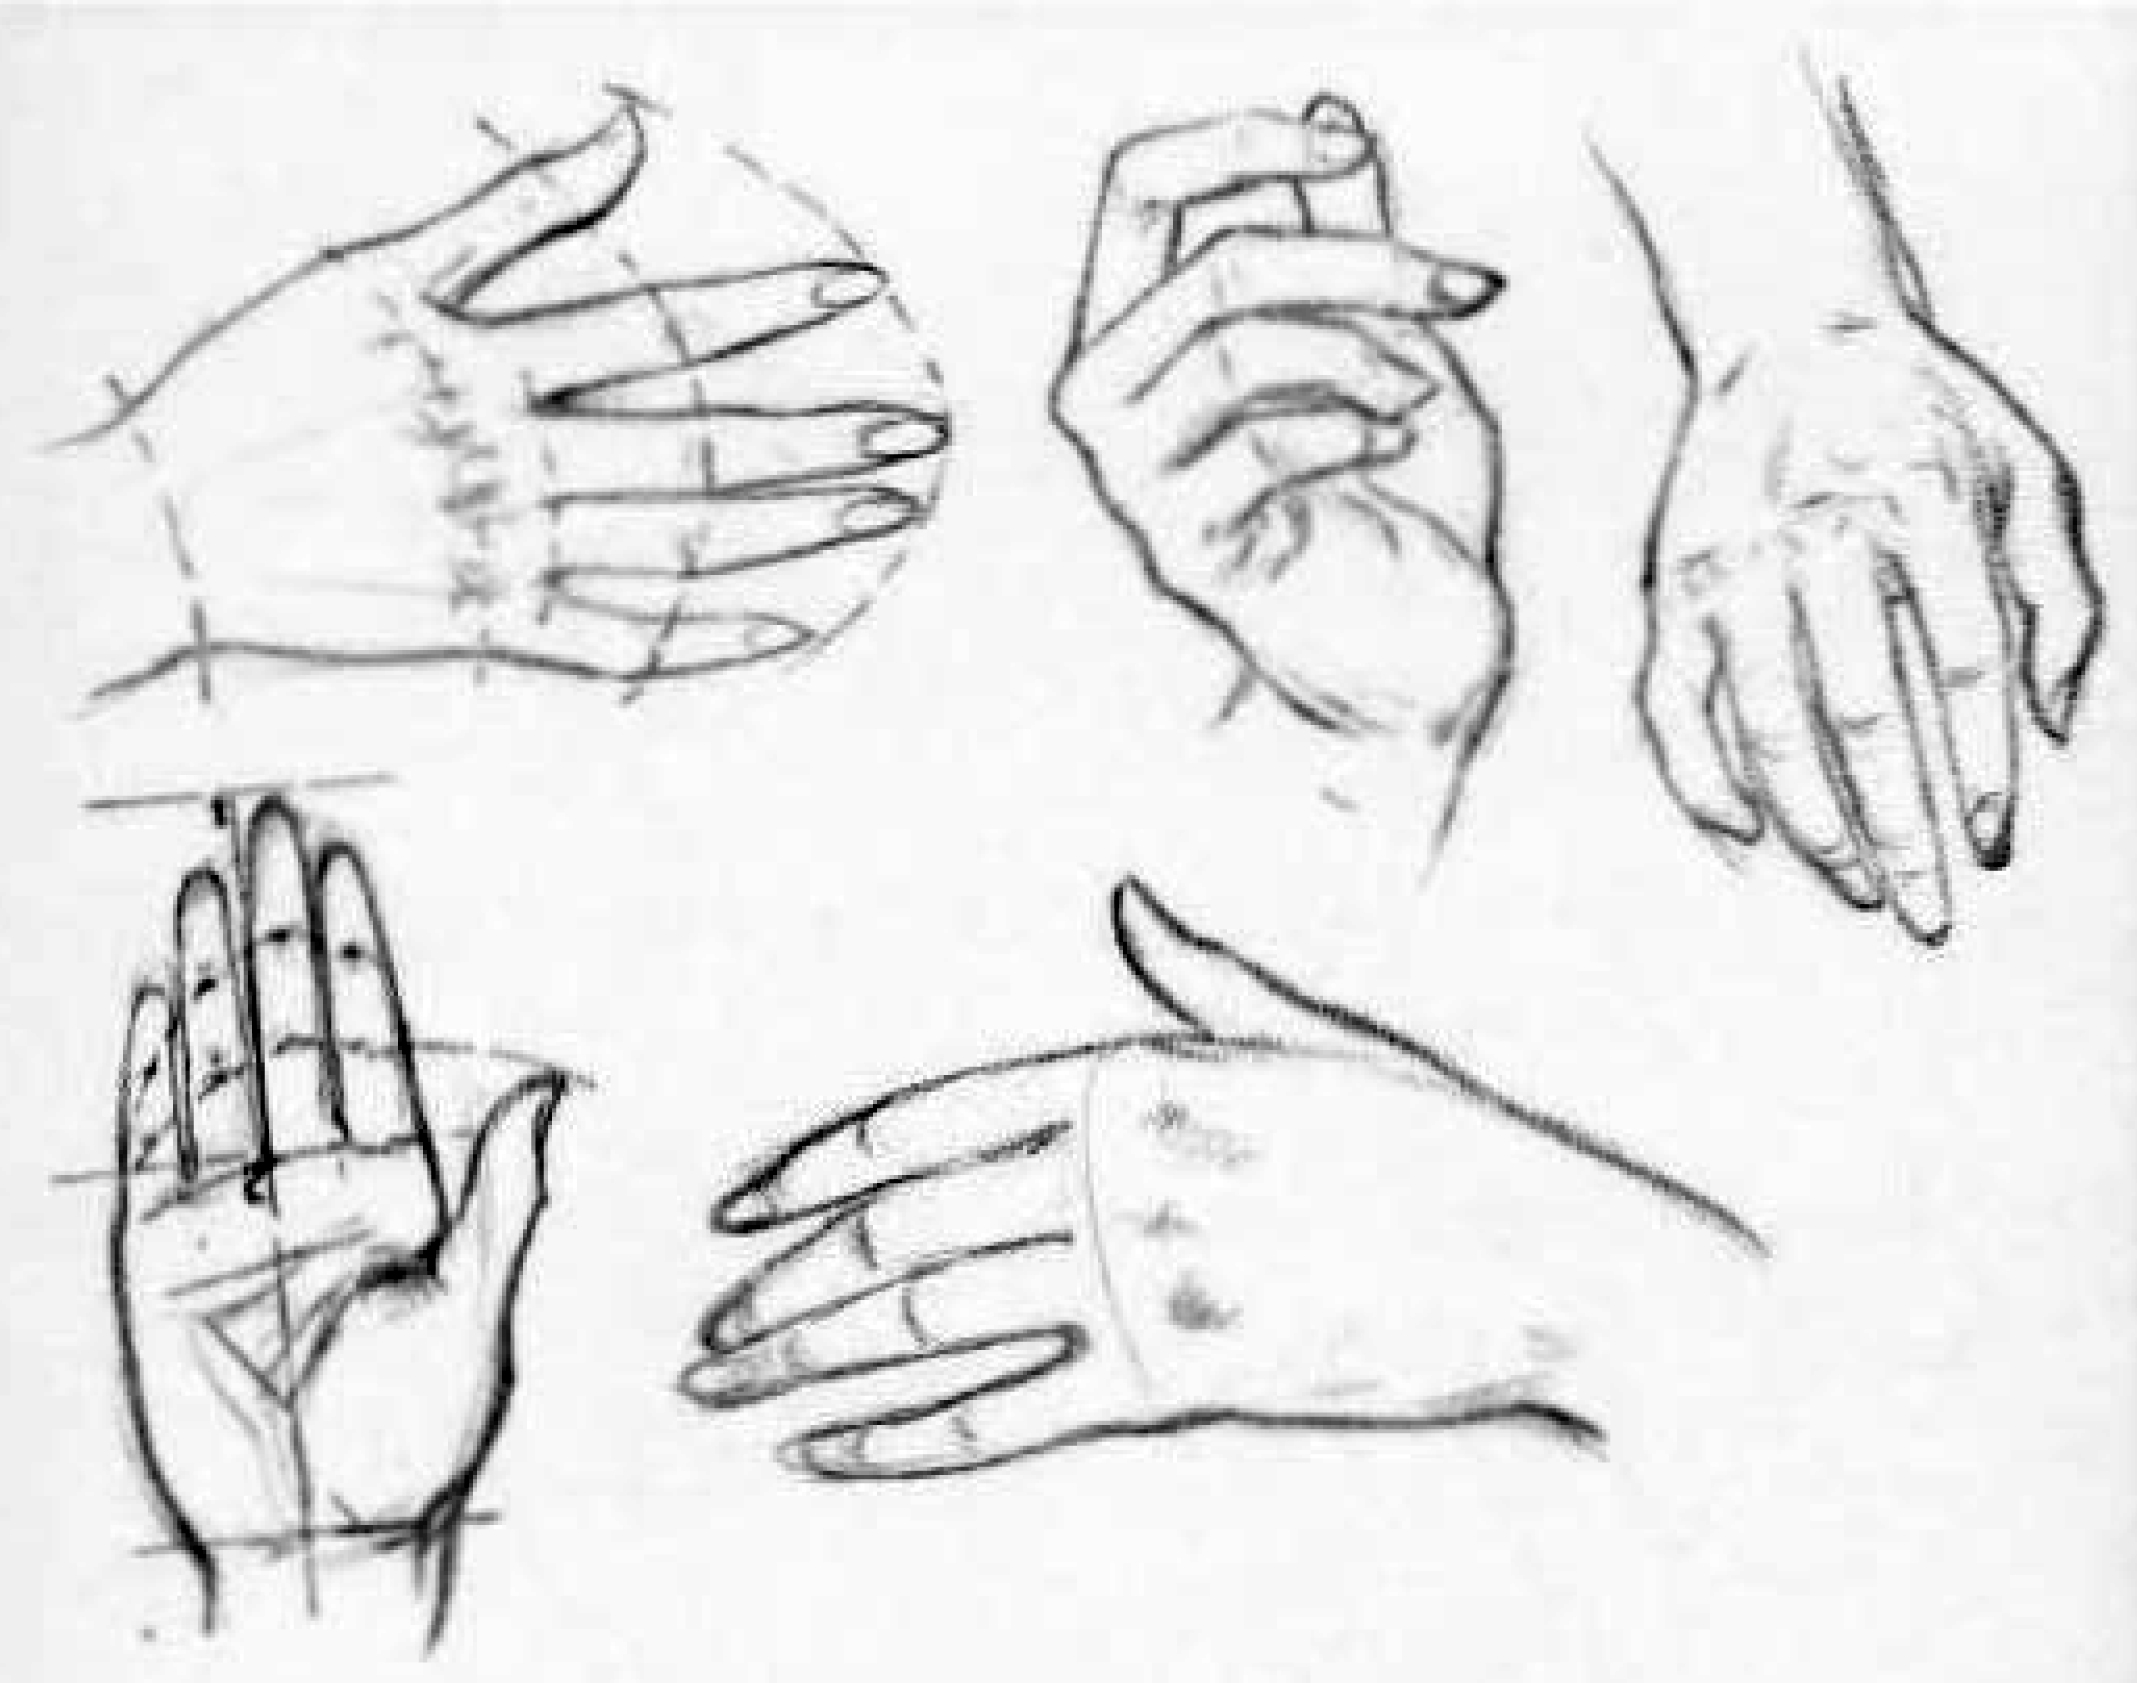
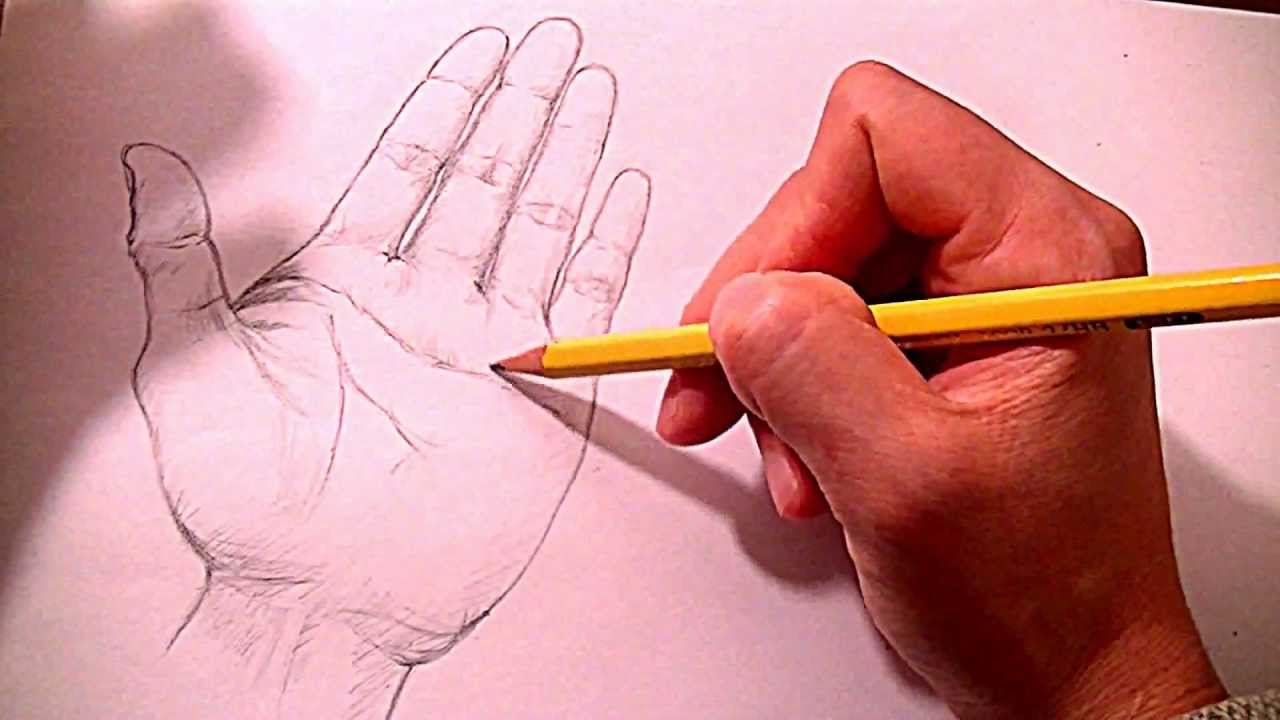
Doing this lays a good foundation for. Keep a human anatomy book handy to make sure you’re on the right track with proportions and positioning. From a reference photo, sketch the basic shapes and lines of the hand. Web image by megan levens. Web detailed step by step tutorial on how to draw and shade realistic hands.
How to Draw Hands Reference Sheets and Guides to Drawing Hands How
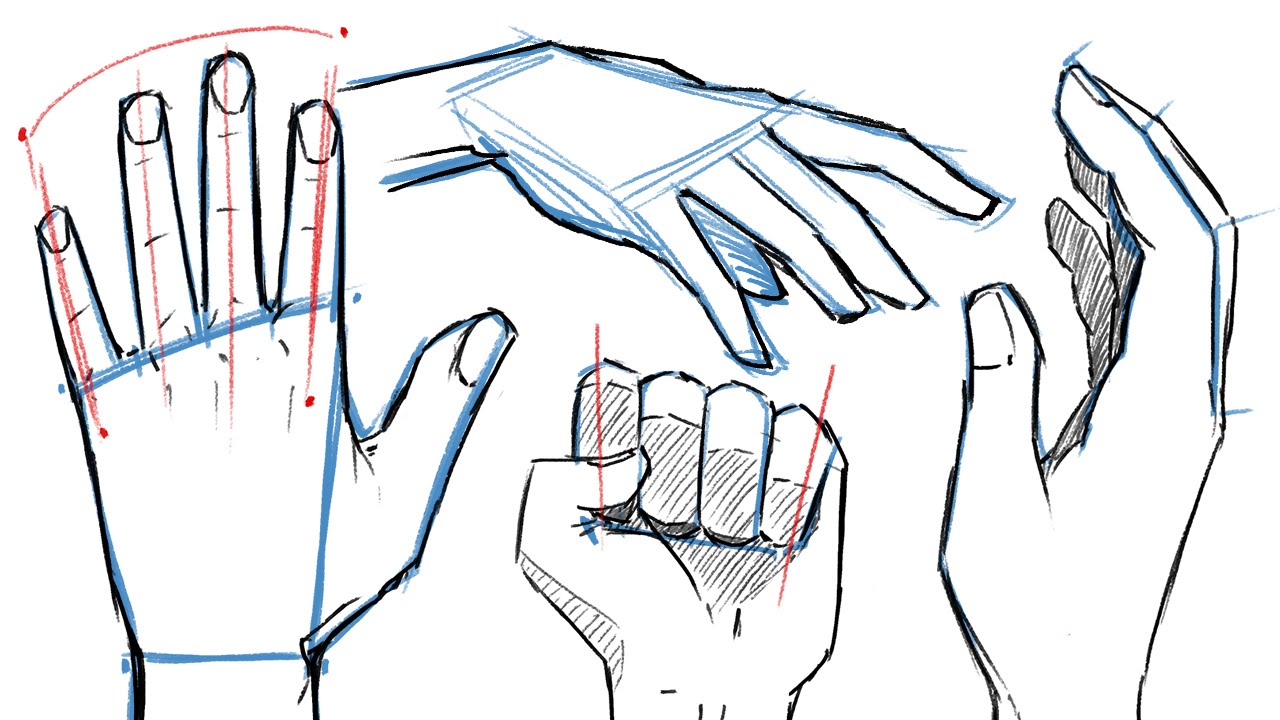
Start by sketching a rounded square. The hand is about the same length as the face from chin to forehead. We are also starting to roll out to chatgpt free with usage limits today. Notice in the drawing below how the hand is more refined but still has a strong 3 dimensional quality about it. Sketch the basic shapes and.

How to Draw a Hand Step by Step Drawing tutorial easy, Drawings, Draw
Then, draw a line down the side of the finger to the base. Make sure to position the fingers so that they are not all in a straight line. If the splinter is thick and unlikely to break, a good alternative to tweezers is a sturdy pair of sterilized nail clippers. We are also starting to roll out to chatgpt.
How to draw Hands in 10 Minutes Tutorial Drawlikeasir YouTube
Notice in the drawing below how the hand is more refined but still has a strong 3 dimensional quality about it. Position it at an angle away from the other fingers, ensuring it connects smoothly to the palm. After cleaning the area with the splinter, add the paste to the splinter area. Web add the thumb. Start at the base.
How to draw a hand A step by step guide Drawing Lessons
Make sure to position the fingers so that they are not all in a straight line. Web 👉👉👉 get my stuff and support the channel: Use the curve as a guide. Sketch a triangle for the base of the thumb and the wireframe for the fingers. Keep a human anatomy book handy to make sure you’re on the right track.
How to Draw Hands Step by Step Many Ways YouTube
Draw a rounded tip or oval at the end of the thumb, completing its basic shape. The hand is about the same length as the face from chin to forehead. Keep a human anatomy book handy to make sure you’re on the right track with proportions and positioning. Add some water to a 1/4 teaspoon of baking soda to form.
How to draw hands. Easy tutorials you can follow even as a beginner
If the splinter is stuck into thick skin at an extreme angle, clip some overlaying skin to improve visibility and access to. Pull lines from the carpal’s structure to determine the position of the fingers. Sketch the main shapes and lines of the hand first, using a hands reference photo. Hands have so much movement and exp. Don’t worry about.
How to draw hands. Easy tutorials you can follow even as a beginner
The pointer and ring fingers might be the same length, but this varies on different peoples' hands! From a reference photo, sketch the basic shapes and lines of the hand. As shown on 7b, the bottom segment is the longest, and the other segments get shorter toward the fingertips. I cover basic forms, things to avoid, tips and tricks, and.
After Cleaning The Area With The Splinter, Add The Paste To The Splinter Area.
Then, draw a line down the side of the finger to the base. Make your mark according to the shape you want your fingers and hand to make. Unlock ad free and printable drawing and coloring tutorials. For each finger, draw a pair of straight lines, allowing the lines to converge slightly at the tip.
Don’t Worry About Making It Pretty;
Web add the thumb. Position it at an angle away from the other fingers, ensuring it connects smoothly to the palm. Draw lines to determine the fingers’ positions. Use the curve as a guide.
Your First Layer Should Be The Bones Of The Hand, The Carpals.
Make sure to position the fingers so that they are not all in a straight line. Remember, the thumb bones have a wider movement range than the other fingers. Draw the rest of the fingers. Sketch rectangles for each finger segment and spheres for joints to build the hand shape.
All Gestures And Movements Hinge On The Knuckles.
Enclose each finger using a curved line. Draw a rounded tip or oval at the end of the thumb, completing its basic shape. Note that the fingers are of different lengths, the thumb and pinkie fingers being the shortest. Web learn to draw a skeleton with guuh, a popular youtube artist.