How To Digitise Drawings
How To Digitise Drawings - Now that you have your illustration traced in pen, it’s time to take it into the digital realm via a little magic machine called the scanner. Set your scanner to a high resolution—at least 300 dpi. Web here are 4 methods which are sure to help you in your artistic endeavours. Continue assigning colors until you’ve filled out your design. Next, select all the areas of your drawing that you’d like to digitize by pressing command + a on your keyboard. Web set up your tripod. Web the next step in digitizing a drawing in photoshop is to bring the artwork into the software. I find that a distance of 30 inches is a good place to start, but you’ll probably have to experiment a bit depending on the size of your artwork and the focal length of the lens on your camera. The neater the original version, the easier digitizing it will be. Web digitizing a drawing is a flexible process allowing you to create art on a computer, or if you prefer, creating it in the way you are used to and scanning the finished project into the digital landscape.
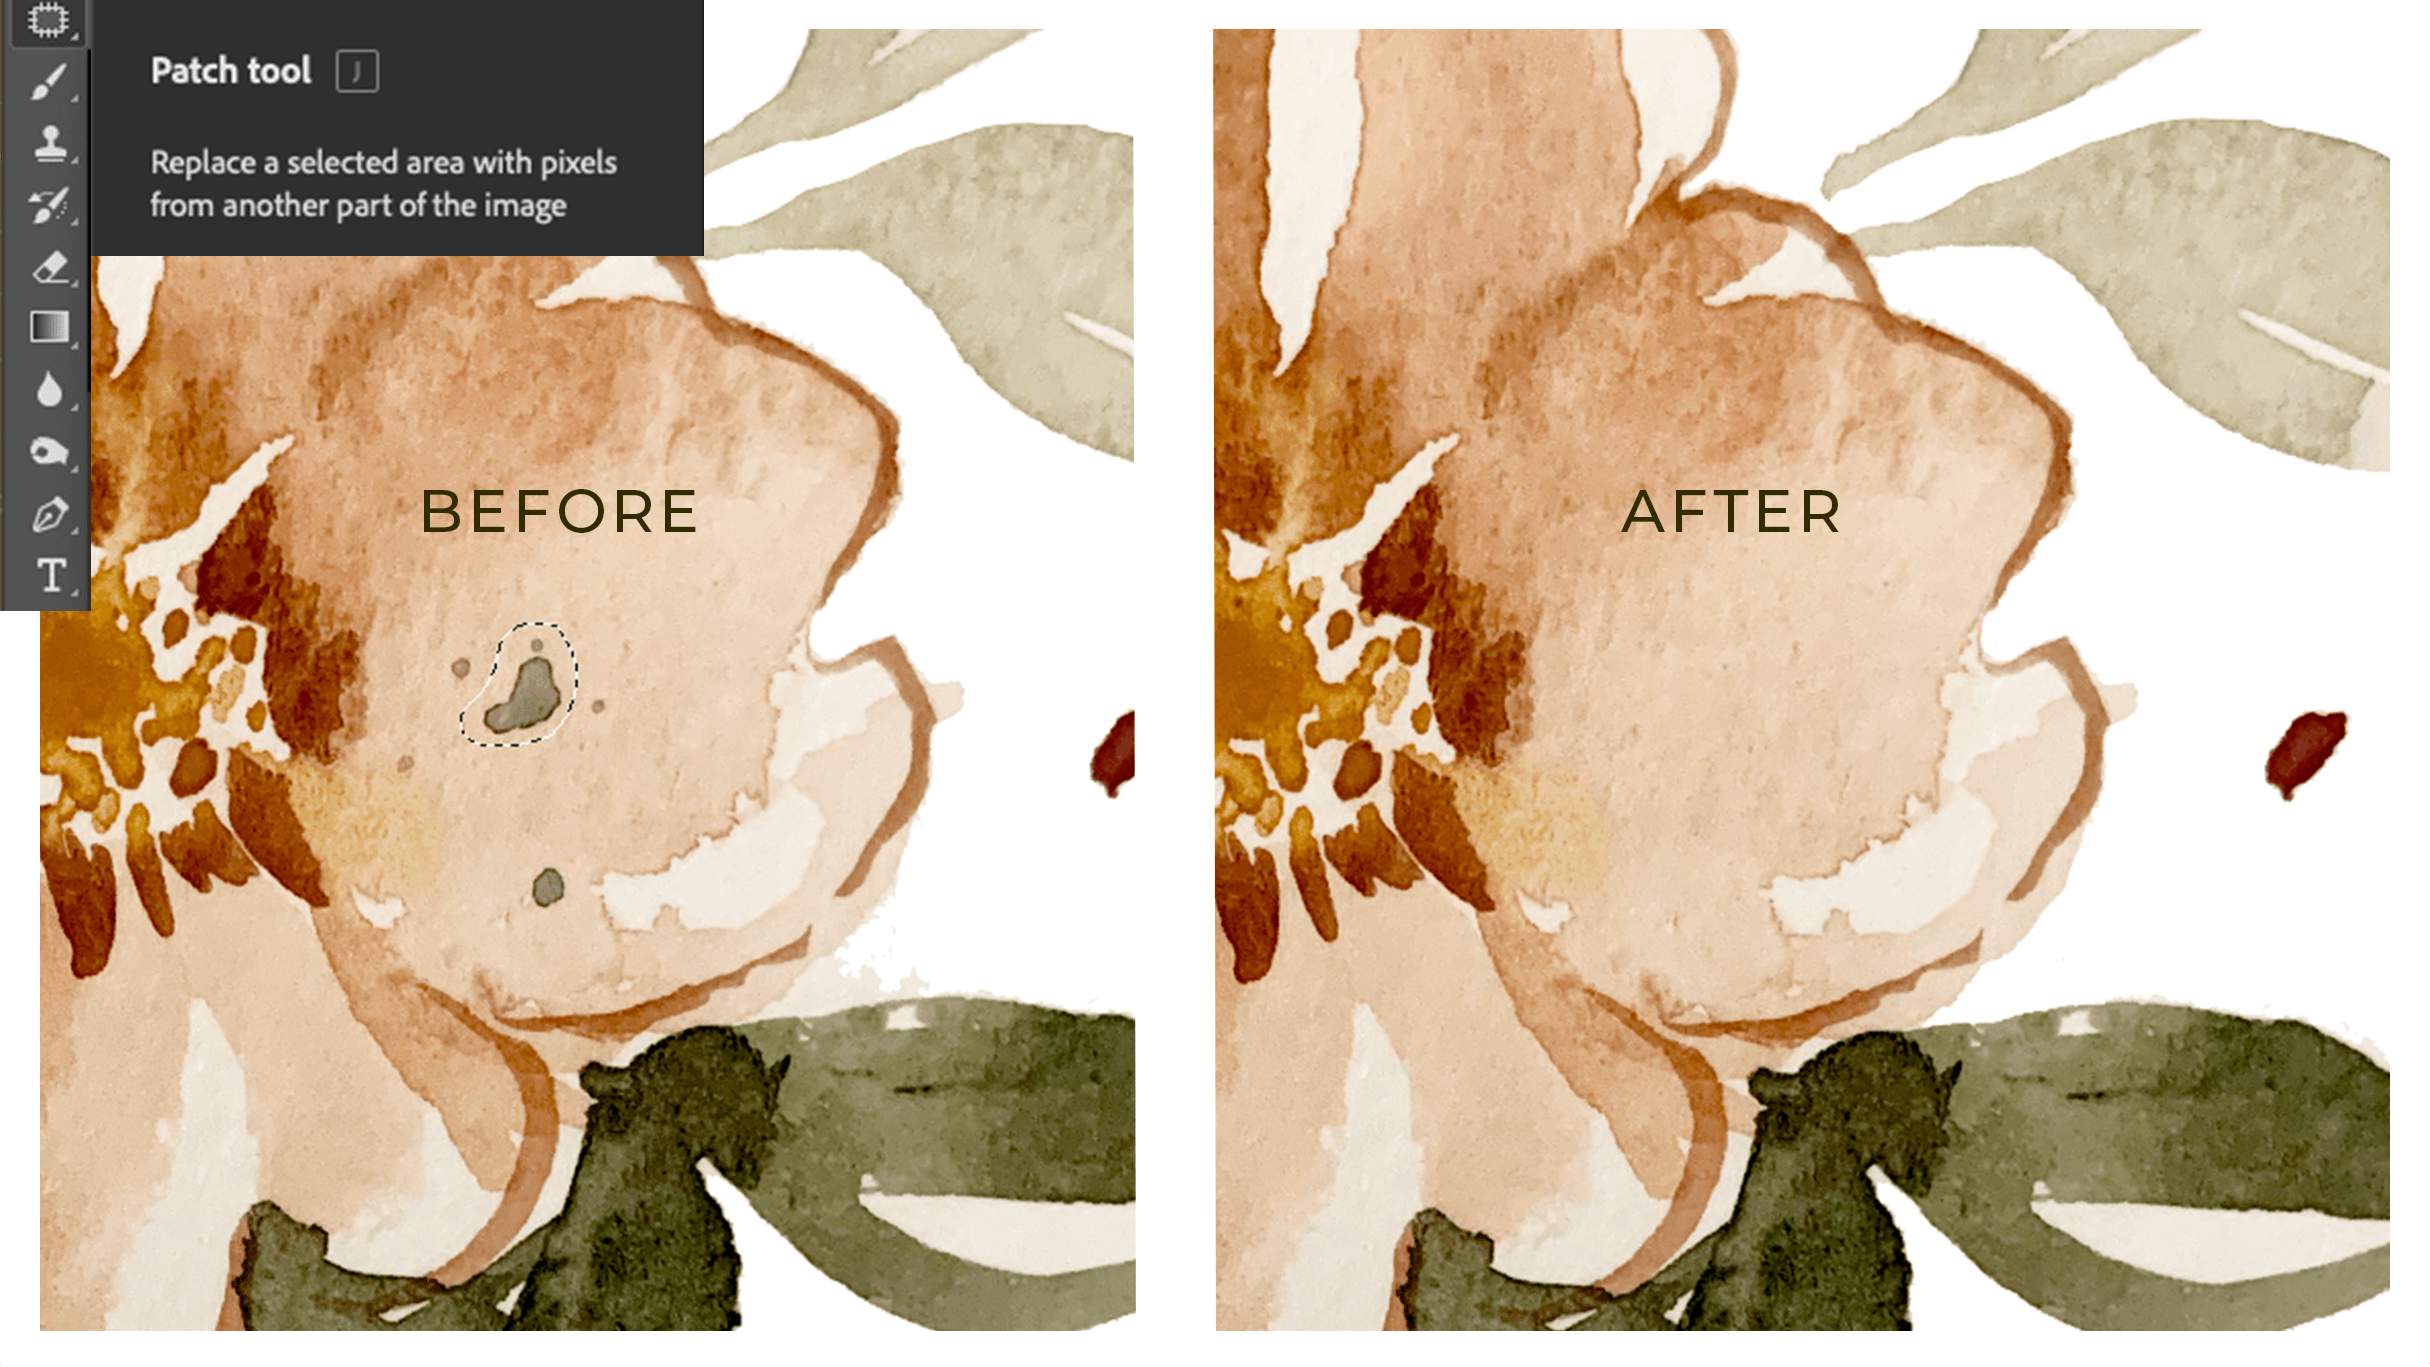
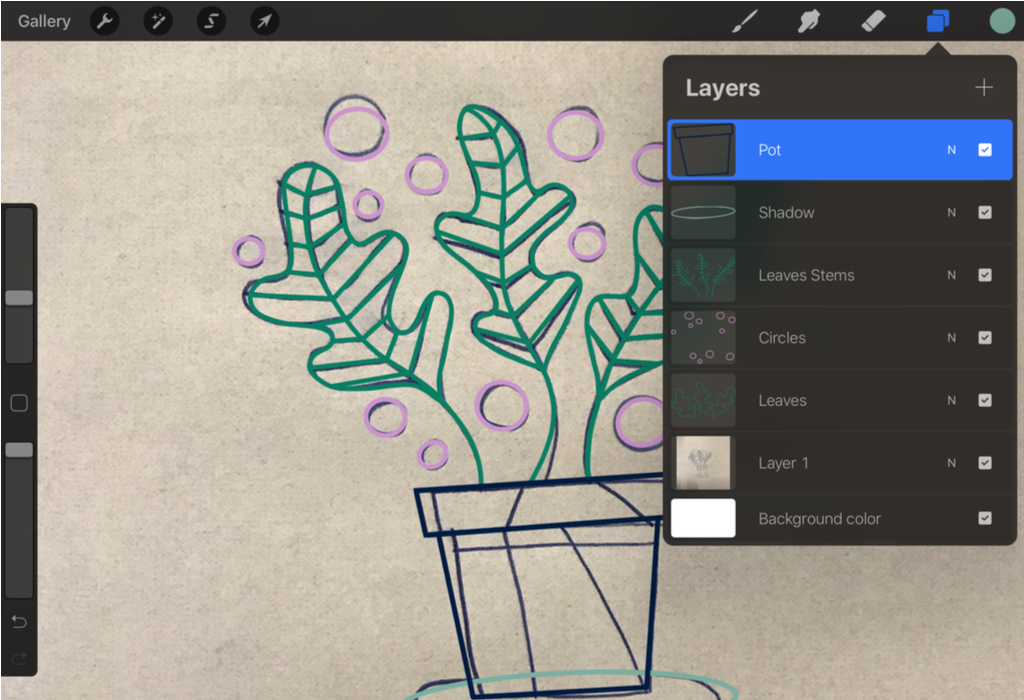
Whether you’re a surface pattern designer, stationery designer or branding/logo designer, you gotta know this stuff. Web cleaning up the paper background and any marks from your scanner, etc. Web be sure that the resolution is set at at a minimum of 300 dpi. Web lay your artwork down on a flat table (face up). 3) supply high res files on usb. If possible, use a scanner to scan your sketch (the original, as well as any disassembled versions). Next, select all the areas of your drawing that you’d like to digitize by pressing command + a on your keyboard. If your sketch has only two colors (black and white) select two colors, select remove background and set the option to grays. What we recommend and what you choose will largely depend on why you need the scanned file. Web with the selection tool (v), click on a shape, then choose from your color swatches to bring it into your design.
Whether you’re a surface pattern designer, stationery designer or branding/logo designer, you gotta know this stuff. Now press crtl + c or edit>copy to copy this image. Let’s move into photoshop to start digitizing! This saves time and prevents headaches as we move through the rest of the process. Web here are 4 methods which are sure to help you in your artistic endeavours. To get started, open up photoshop and click “open.”. Adobe capture is a mobile/tablet app which directly links up to desktop adobe programs like illustrator and photoshop. The big names in software. If you don’t have a scanner, you can take a photo of your sketch with a digital camera or smartphone. You don’t want to be tilting the camera at all, or you will end up with skewing (the top or bottom of the work appearing smaller than the other end!)
How to Digitize Artwork My 5 Step Process to Digitize Artwork in
You can use it to keep a portfolio of your work in the cloud, or you can manipulate the. We’ll go into a little more detail on this below. Next, select all the areas of your drawing that you’d like to digitize by pressing command + a on your keyboard. The neater the original version, the easier digitizing it will.

How To Digitize a Drawing R.K.C Southern
Web simultaneously, it aims to digitise and archive a comprehensive record of the city’s historic contemporary art scene, preserving crucial materials from closed spaces that risk being lost to time. If your sketch has only two colors (black and white) select two colors, select remove background and set the option to grays. Web you can now draw in canva. We’ll.

How to Digitize Pen Drawing Using
Even if a piece is already framed, it needs to be aligned correctly. It will also mark the area of the canvas that each object occupies. The higher the dpi, the more colored pixels will be captured within the image, creating more clarity and better image quality overall. Web after the artwork is scanned, we will apply colour adjustments to.

What You Should Know On How To Digitize A Drawing For Free
You will need photoshop to open your newly scanned image to begin the editing process. Our goal with digitizing these elements is to remove the paper background. If possible, use a scanner to scan your sketch (the original, as well as any disassembled versions). Web the next step in digitizing a drawing in photoshop is to bring the artwork into.
How to Digitise a Drawing in The Spreadshirt UK blog
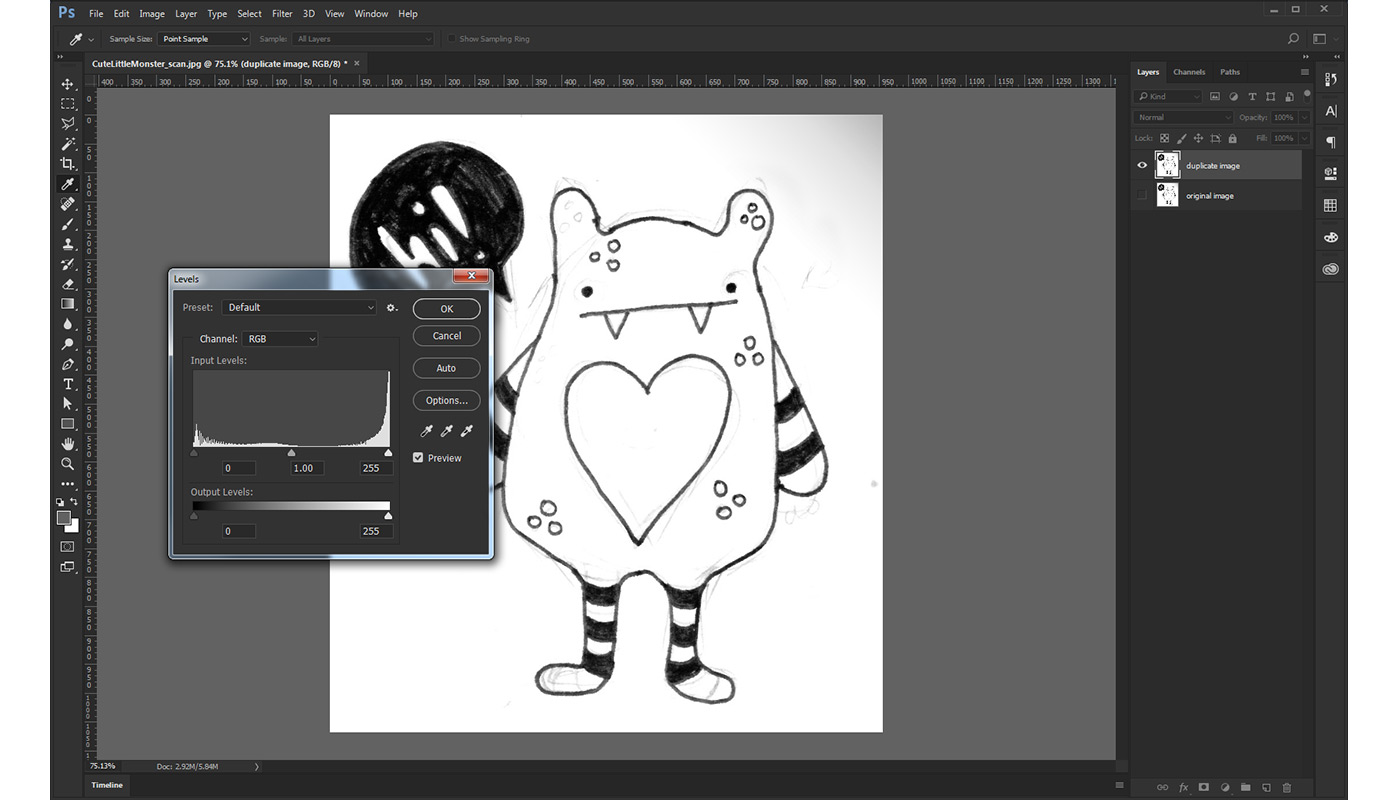
3) supply high res files on usb. Web if you use a computer, you might want a pen tablet. The options are limited, but using a huion pen and drawing tablet, i think you will be able to create some great drawings. Increase the contrast of the image. Open sketch file and generate vector drawing.

How to Digitize Pen Drawing Using
Web cleaning up the paper background and any marks from your scanner, etc. After the image gets open in photoshop, here are the few things that need to be taken care of: Select your scanned image to create a new photoshop file. Web be sure that the resolution is set at at a minimum of 300 dpi. What we recommend.

How to digitize a drawing. Techniques review and steps Logotypers
We’ll go into a little more detail on this below. Nicolette hamilton) raise or lower your camera so that the centre of your shot is as close to the centre of the artwork as possible. To get started, open up photoshop and click “open.”. Next, create a new image. If you’re thinking of starting digital art for the first time,.
Turn a Sketch into Digital Art with This Complete Guide
If your sketch is in pencil, draw over it with a pen to provide contrast. You can also press crtl + a to do the same thing. Clean the image by removing extra spots and messy bits. After the image gets open in photoshop, here are the few things that need to be taken care of: You don’t want to.

How To Digitize A Drawing Beautiful Type
Select entire image and copy. Open the scanned file in photoshop. As noted, create your sketch on white paper. The options are limited, but using a huion pen and drawing tablet, i think you will be able to create some great drawings. Web with the selection tool (v), click on a shape, then choose from your color swatches to bring.

How to Digitize Pen Drawing Using
Web you can now draw in canva. The neater the original version, the easier digitizing it will be. It allows you to take a photo of a drawing with your device, then adjust the settings and turn it into a vectorised digital artwork. Web here are 4 methods which are sure to help you in your artistic endeavours. Two magic.
Position The Camera Mount Directly Above Your Artwork.
To get started, open up photoshop and click “open.”. Rename and save the file. Increase the contrast of the image. Web really basic tutorial thingy.note that my screen capture program was set to only capture the gimp's main window, which means menus and popup windows don't sh.
With All Your Scans “Flattened” Onto One Layer, Use The Marquee Tool To Select The Entire Image.
If your sketch is black and white: All the single outlines that touch will not have jump stitches. It is essential that you set up your tripod parallel to your work, at 90 degrees, with the height of the camera in line with the centre of the work. You will need photoshop to open your newly scanned image to begin the editing process.
Web Simultaneously, It Aims To Digitise And Archive A Comprehensive Record Of The City’s Historic Contemporary Art Scene, Preserving Crucial Materials From Closed Spaces That Risk Being Lost To Time.
Web be sure that the resolution is set at at a minimum of 300 dpi. Web just pop it on the easel and use the same following steps to capture it on your camera. Web you can now draw in canva. The higher the dpi, the more colored pixels will be captured within the image, creating more clarity and better image quality overall.
What We Recommend And What You Choose Will Largely Depend On Why You Need The Scanned File.
Dpi stands for dots per inch. Web the next step in digitizing a drawing in photoshop is to bring the artwork into the software. Web cleaning up the paper background and any marks from your scanner, etc. Nicolette hamilton) raise or lower your camera so that the centre of your shot is as close to the centre of the artwork as possible.