How To Draw A Four Leaf Clover Easy
How To Draw A Four Leaf Clover Easy - The first is making outlines that are not just one width all around, but kind of thick and thin. Draw two intersecting lines to divide the circle into four equal parts. This will be the starting point for your sketch. Web so, why wait? Repeat the previous step and draw. How to draw a four leaf clover step 3. It’s easy to do, as you can start with a regular tracing of something, but then add just a little bit to the line in a few places. How to draw a simple four leaf clover: 11k views 3 years ago drawing tutorials. How to draw a four leaf clover step 2.
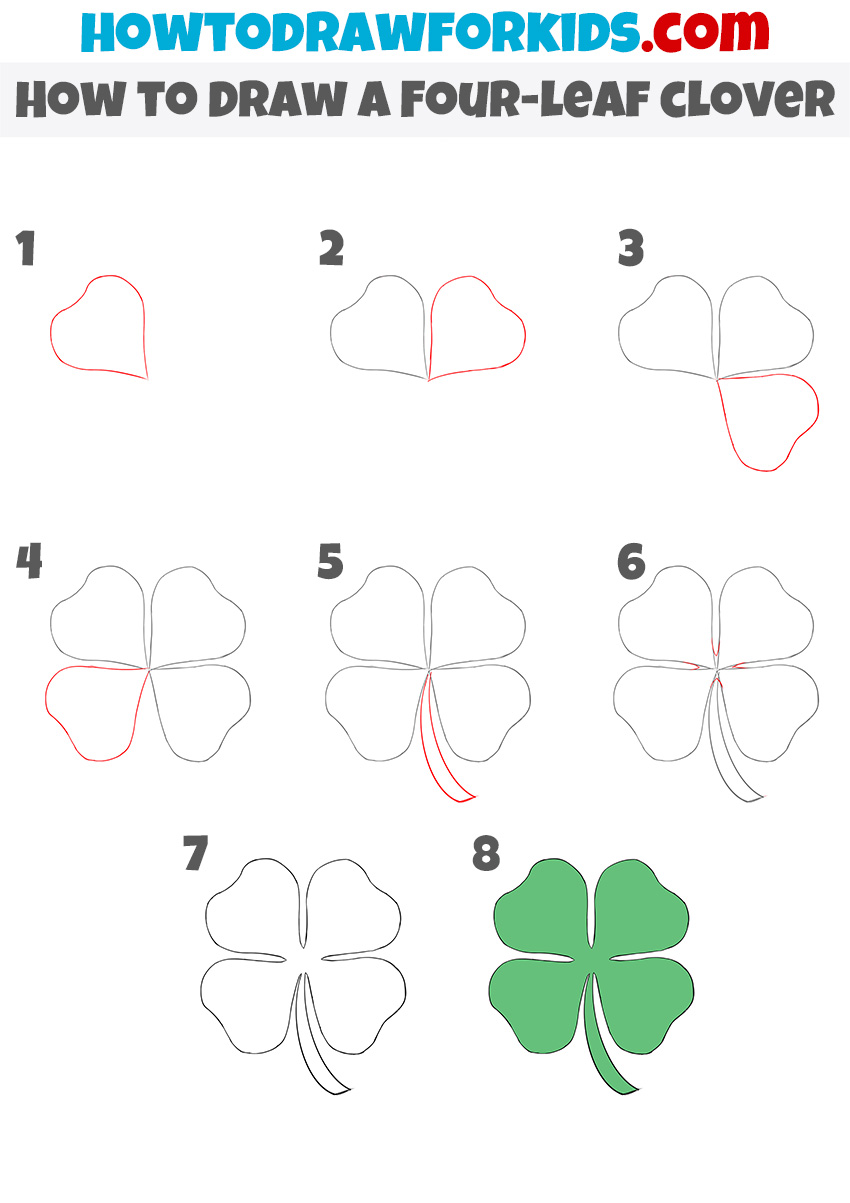
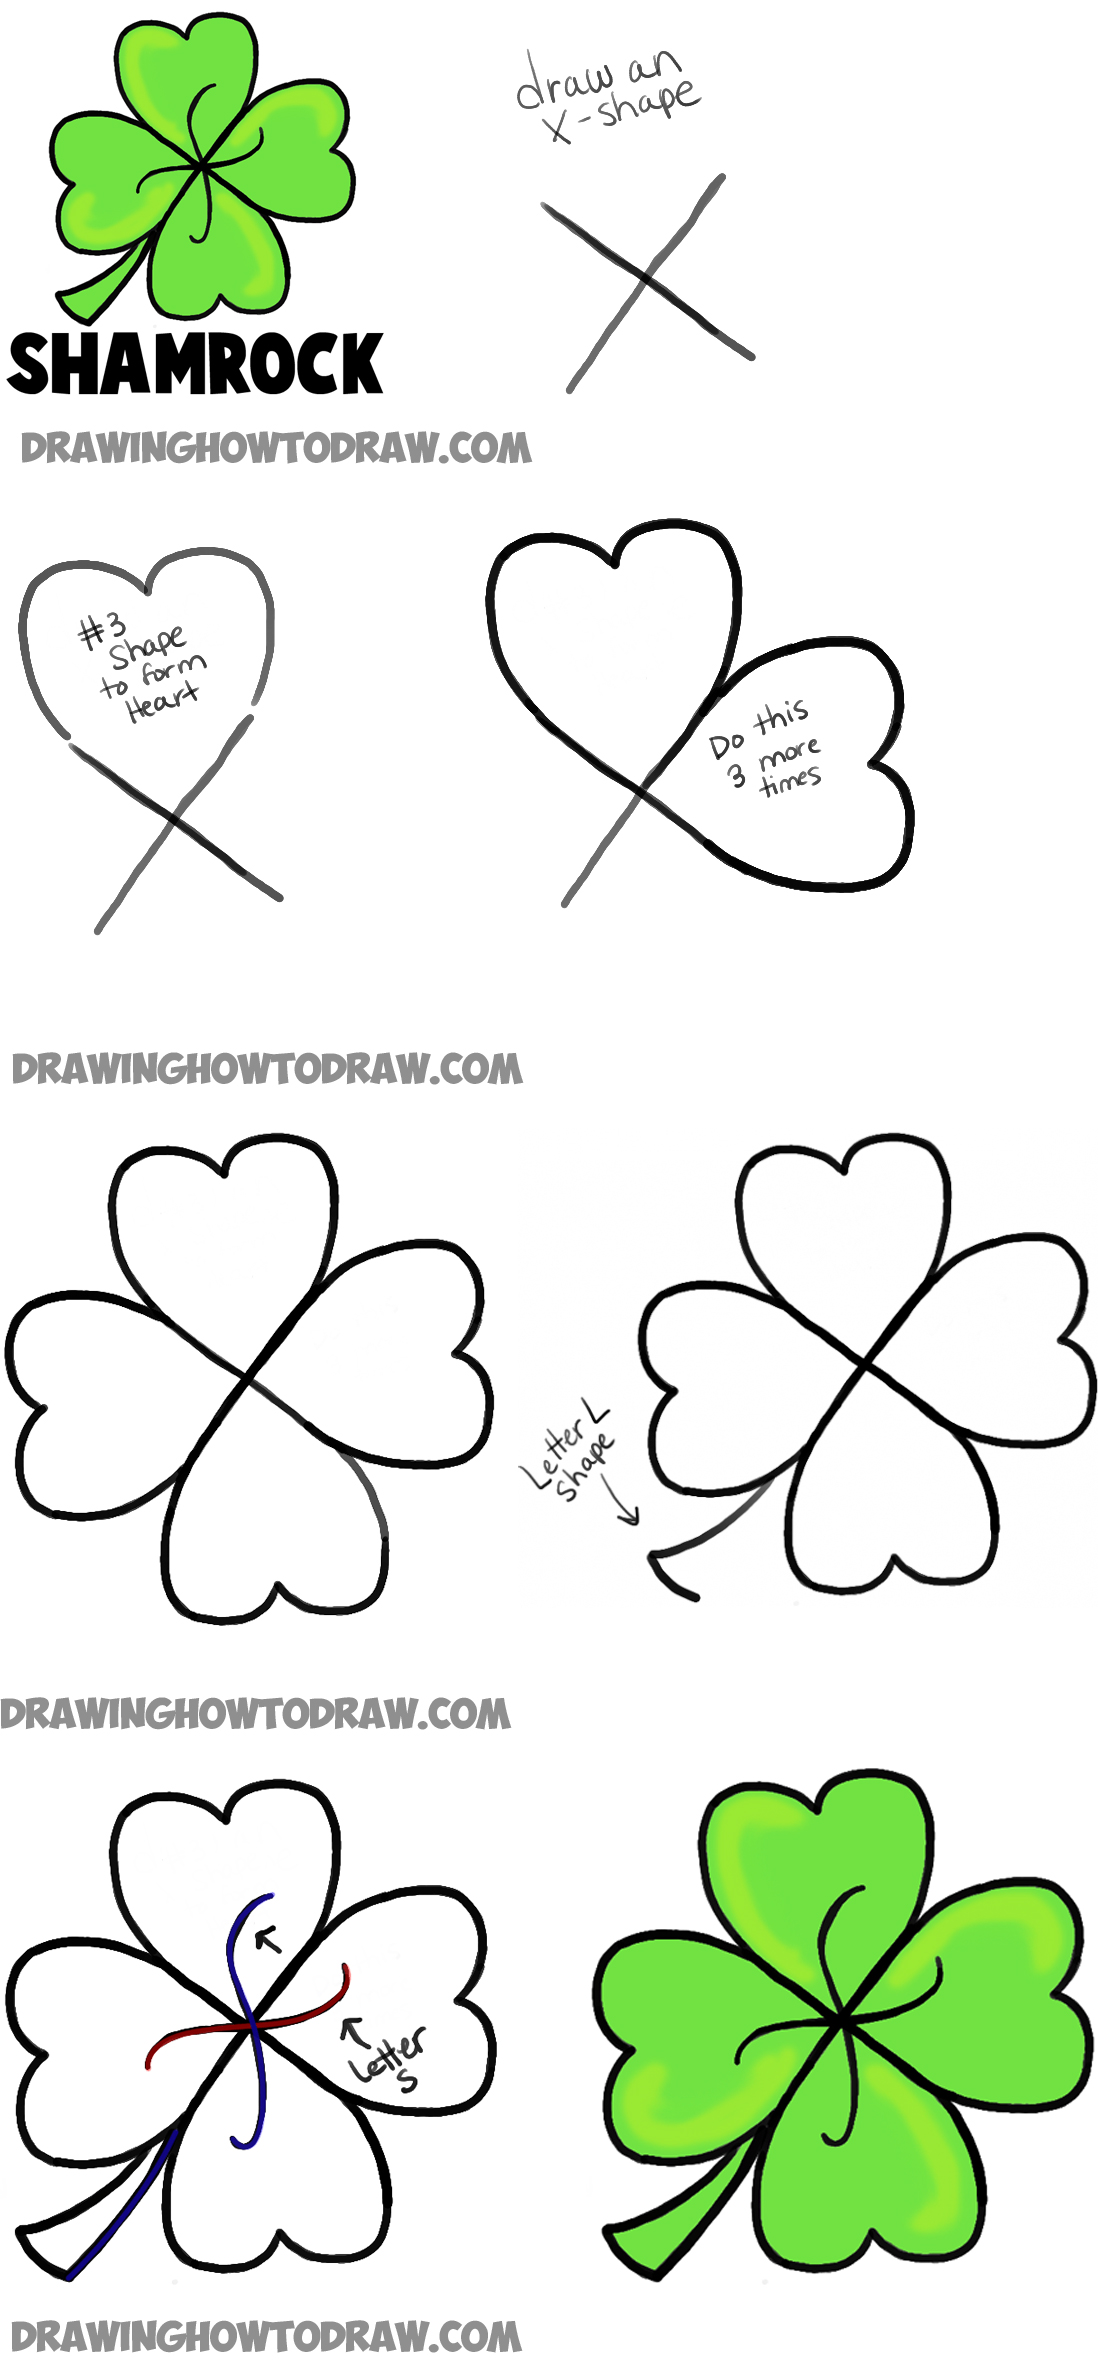
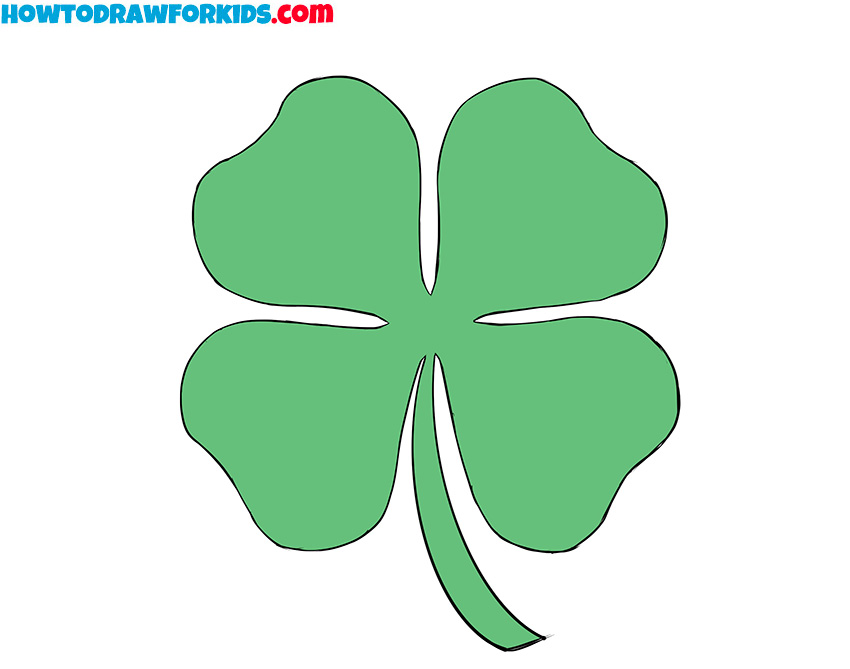
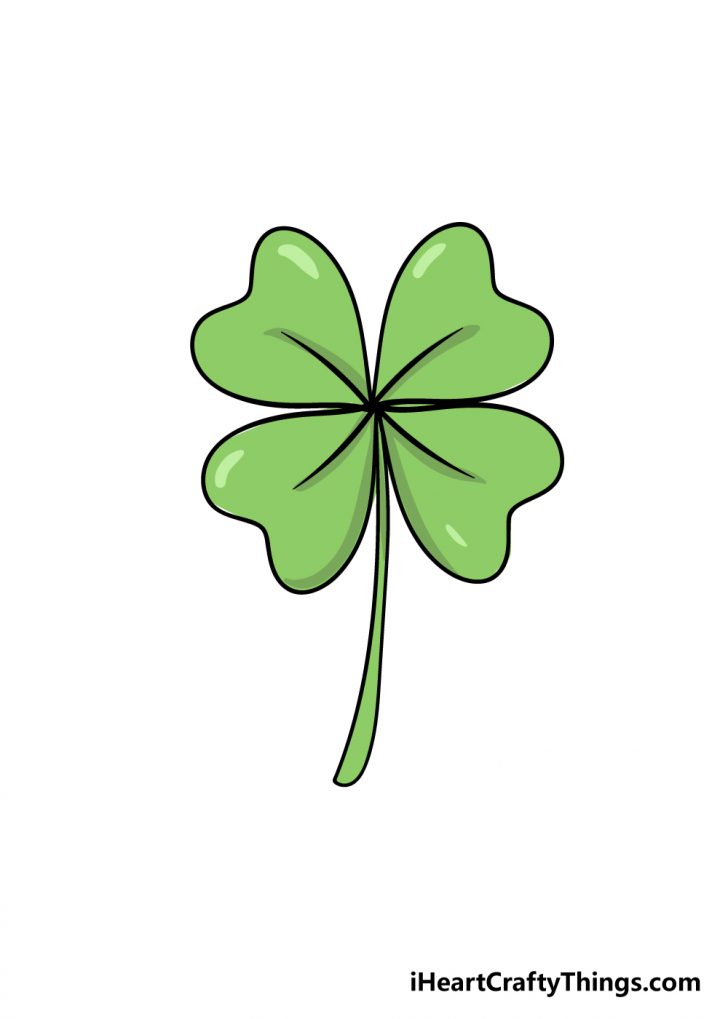
We don’t create the basic shapes or layouts first, but draw the individual parts of the clover. Draw a circle that will serve as your clover base and draw a line to show the direction of the stalk. Web so, why wait? Now you’ll sketch in center vein marks on each petal starting from the center. Each leaf is shaped like a heart, so we are going to draw four of these, with the points meeting at the center. After they complete their clover cutout, let your young artists finish their drawing any way they want. Notice how they taper on the. Draw the first pair of leaves. These lines should be evenly spaced and form a complete circle. Black marker (optional) how to draw a four leaf clover printable pdf (see bottom of lesson) in this step by step lesson, we are going to learn how to draw a four leaf clover with your drawing materials.
How to draw a four leaf clover step 3. Start drawing all the hearts from the center point of the circle. Using straight lines, intersecting at the straight angle, show the clove leaf. This is another easy step. This how to draw a four leaf clover lesson is especially for young artists. Pay attention to the different sizes and shapes of each part of the four leaf clover. Sharpen your pencils and switch to sketching mode. Next draw in the other 3 leaflet shapes, joining the points in the middle. Start by drawing a circle on a piece of paper. 11k views 3 years ago drawing tutorials.
How to Draw a FourLeaf Clover Easy Drawing Tutorial For Kids
After they complete their clover cutout, let your young artists finish their drawing any way they want. Thank you for watching! 𝐃𝐨𝐧’𝐭. Each heart’s point meets in the middle. Using straight lines, intersecting at the straight angle, show the clove leaf. It’s easy to do, as you can start with a regular tracing of something, but then add just a.
How to Draw a Four Leaf Clover or Shamrocks for Saint Patricks Day
The first step is the easiest. Set the object limits on the sheet of paper. This how to draw a four leaf clover lesson is especially for young artists. It’s easy to do, as you can start with a regular tracing of something, but then add just a little bit to the line in a few places. Web 4 leaf.
How to Draw a FourLeaf Clover Easy Drawing Tutorial For Kids
Divide it into four parts by drawing intersecting lines. Web so, why wait? Web 4 leaf clover drawing step 1. How to draw a four leaf clover step 2. Each heart’s point meets in the middle.

How to Draw a Clover 11 Steps (with Pictures) wikiHow
This how to draw a four leaf clover lesson is especially for young artists. Start by drawing a circle on a piece of paper. Black marker (optional) how to draw a four leaf clover printable pdf (see bottom of lesson) in this step by step lesson, we are going to learn how to draw a four leaf clover with your.

How to Draw a Four Leaf Clover (Step by Step Pictures)
It’s easy to do, as you can start with a regular tracing of something, but then add just a little bit to the line in a few places. Web 4 leaf clover drawing step 1. Start by drawing a circle on a piece of paper. Learn how to draw hub. Thank you for watching! 𝐃𝐨𝐧’𝐭.
How to Draw a Four Leaf Clover Step by Step Easy for Beginners/Kids
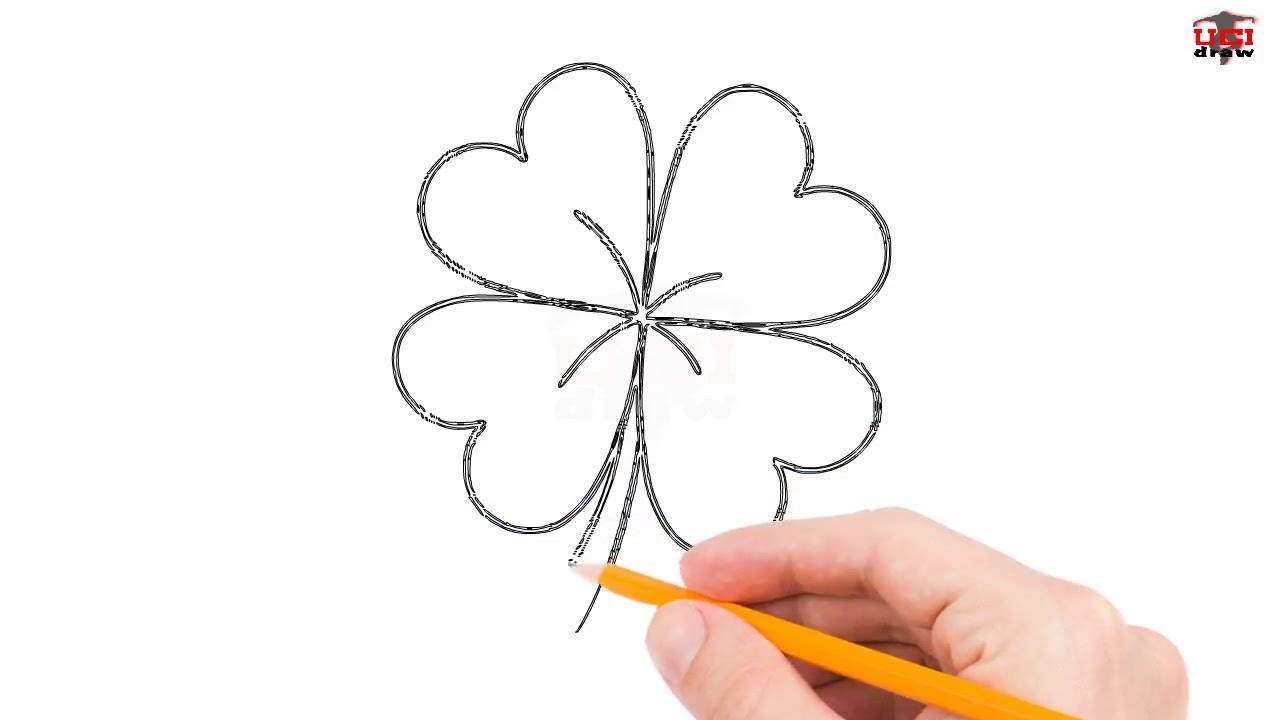
Let’s draw one of the leaves. This is another easy step. Draw the first pair of leaves. We don’t create the basic shapes or layouts first, but draw the individual parts of the clover. Thank you for watching! 𝐃𝐨𝐧’𝐭.

4 Leaf Clover Drawing {4 Easy Steps}! The Graphics Fairy
This will be the starting point for your sketch. How to draw a four leaf clover: Each leaf is shaped like a heart, so we are going to draw four of these, with the points meeting at the center. Ready to take your drawing to the next level!? Draw yourself a circle, however big you want to make it.

How to Draw a Four Leaf Clover YouTube
Divide it into four parts by drawing intersecting lines. Each heart’s point meets in the middle. Web first, take a pencil and lightly draw a small circle in the center of your paper. How to draw a simple four leaf clover: Four leaf clover drawing steps.

How to Draw a Four Leaf Clover HelloArtsy
Now you’ll sketch in center vein marks on each petal starting from the center. The design is somewhere between being super simple and a bit detailed, and you can change it up a bit if you need to. Each heart’s point meets in the middle. Draw a circle that will serve as your clover base and draw a line to.
FourLeaf Clover Drawing How To Draw A FourLeaf Clover Step By Step
209 views 1 year ago drawing tutorials. Now you’ll sketch in center vein marks on each petal starting from the center. Pay attention to the different sizes and shapes of each part of the four leaf clover. Subscribe for regular drawing and art lessons: Let’s draw one of the leaves.
The First Step Is The Easiest.
Subscribe for regular drawing and art lessons: The first is making outlines that are not just one width all around, but kind of thick and thin. Divide it into four parts by drawing intersecting lines. Four leaf clover drawing steps.
How To Draw A Four Leaf Clover Step 2.
Draw the first pair of leaves. Repeat the previous step and draw. Each leaf is shaped like a heart, so we are going to draw four of these, with the points meeting at the center. Pay attention to the different sizes and shapes of each part of the four leaf clover.
Patrick's Day Crafts And Diy Projects!
Start drawing all the hearts from the center point of the circle. So, first draw the first clover petal. Create the four clover leaves. Draw the second pair of leaves.
The Design Is Somewhere Between Being Super Simple And A Bit Detailed, And You Can Change It Up A Bit If You Need To.
Set the object limits on the sheet of paper. Ready to take your drawing to the next level!? Now you’ll sketch in center vein marks on each petal starting from the center. Next draw in the other 3 leaflet shapes, joining the points in the middle.