How To Draw A Graduation Cap Easy
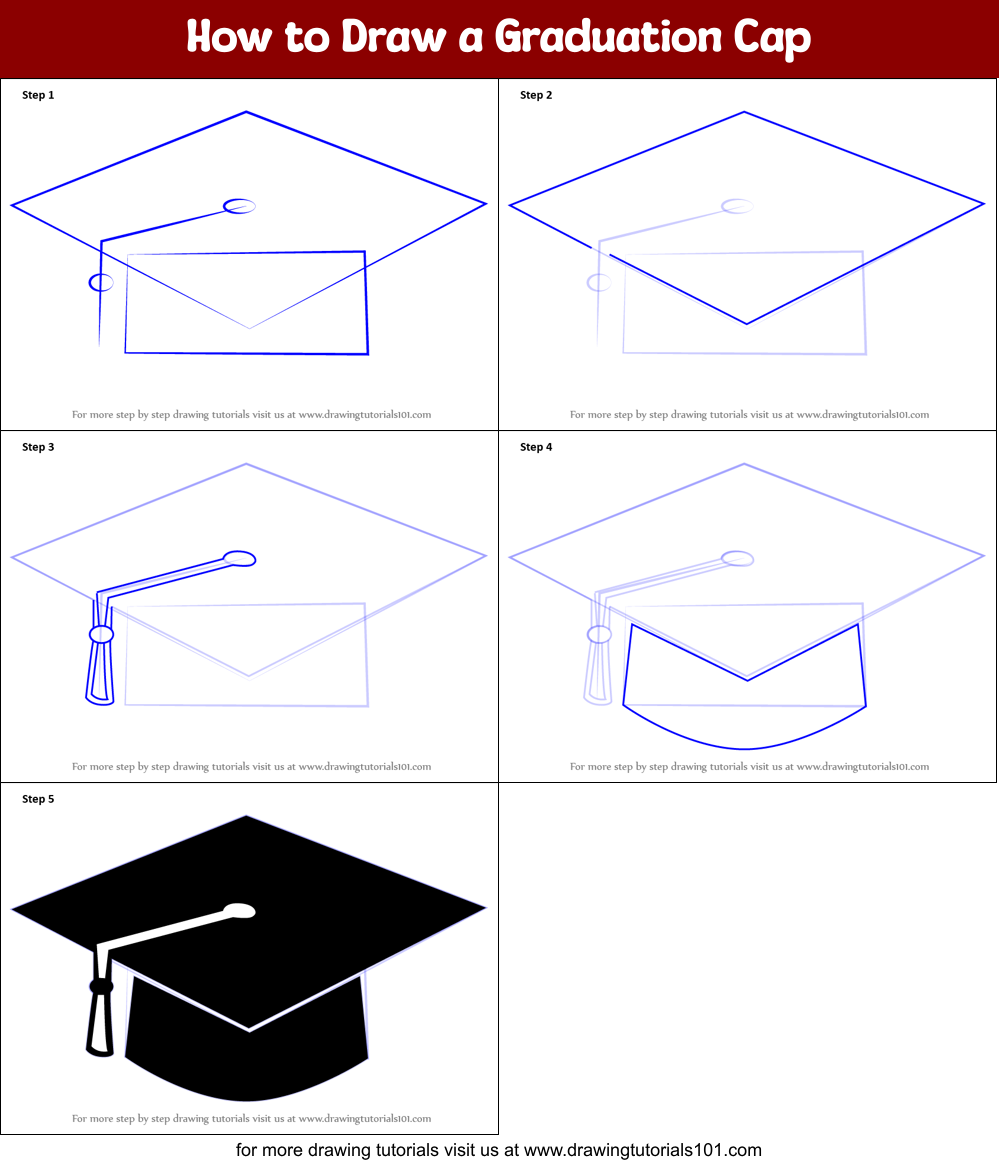
How To Draw A Graduation Cap Easy - Web learn how to draw a simple graduation cap! Now it’s time to add depth and character to your graduation cap drawing. The size of each of the drawn parts will be considered in each step of the tutorial. Web this is a step by step video about how to draw a girl wearing graduation cap using pencil drawing sketching technique. It has a flat look, but is also somewhat dimensional in its own way. Take notice that the blue lines are used to indicate the new components being drawn in each step. You have the flat top of the hat, so now you can draw the underside, which will be the part that goes over your head. Sabine in this easy tutorial, we'll show you how to draw a graduation cap, using basic shapes and easy strokes. To start the shading process, employ a soft brush along with a lighter gray paint, and create a subtle framework of highlights. Draw a symmetrical cap shape.
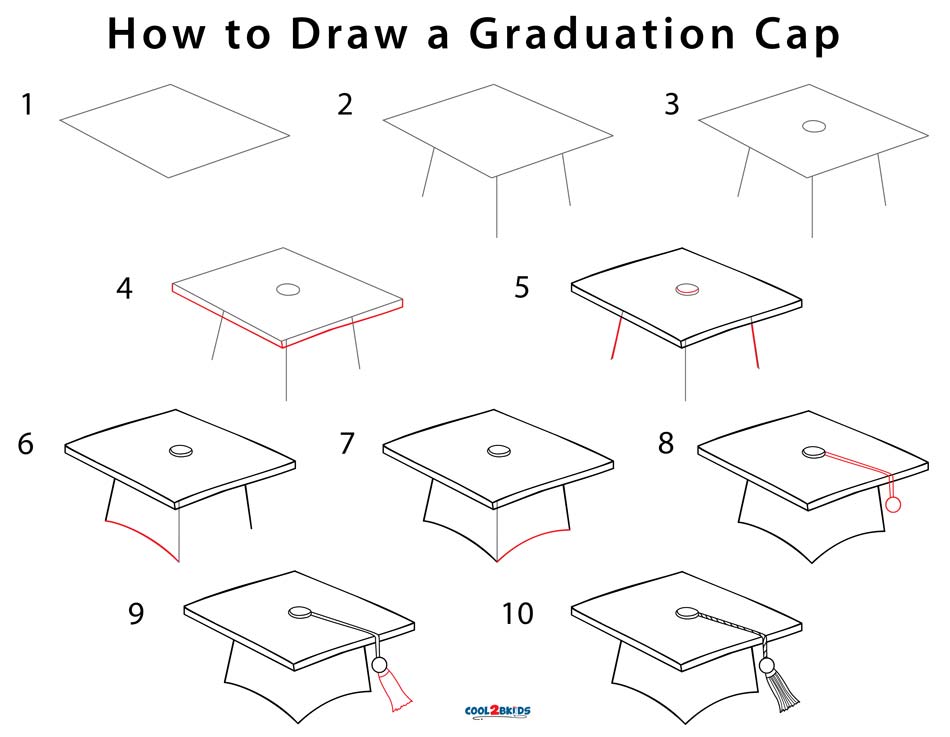
Start in the middle of your paper so you have room to draw the top of the cap later on. The size of each of the drawn parts will be considered in each step of the tutorial. Web ready to take your drawing to the next level!? Add an edge to the mortarboard. Draw an oval at the center of the rhombus. Add the tassel to the end of the ribbon. To start the shading process, employ a soft brush along with a lighter gray paint, and create a subtle framework of highlights. Web start by sketching a rectangle in the center of a blank sheet of paper. Darken the lines only when you get the shape right. Picture the tassel on the graduation cap with thick and thin curved lines.
These two lines should be. Web how to draw a graduation cap designed by: How to draw a graduation cap step 1. Please like comment subscribe to my channel to see more interesting videos ! We have tried to show you the drawing. The oval will be the bottom of the skullcap where you put your head. Darken the lines only when you get the shape right. Web learn how to draw a simple graduation cap! Use some straight lines down from the base of the flat top for the side of this portion, and then use a curved line underneath that connects the two vertical lines. This will help you to mold the cap for a more lifelike shaded effect beneath the brim.

How to Draw a Graduation Cap Easy Step By Step Tutorial Made with HAPPY
Draw an oval at the center of the rhombus. Shade and highlight the cap. Use an eraser to remove auxiliary lines that appeared during the drawing process. Draw a tassel on one side. Using the image below as a visual guide, draw the tassel of your graduation cap.

How to Draw a Graduation Cap Really Easy Drawing Tutorial
We'll make it super easy for you how to draw a graduation cap in (7) easy steps Web draw a symmetrical cap shape. Observe that the blue lines are used to show the new shapes being drawn in each step. Take notice that the blue lines are used to indicate the new components being drawn in each step. Web draw.

How To Draw A Graduation Cap at Drawing Tutorials
The first step is to draw the skull cap portion of the graduation cap. We sketched the tassel so it hangs over the left side of the cap. Please like comment subscribe to my channel to see more interesting videos ! Then draw two vertical lines from each end of the curved line. Then, draw a small square shape on.

Learn how to draw a graduation cap step by step. Free printable
Next, draw two straight lines, one at each side of the rectangle. The rectangle represents the top part of the cap. There are five lines in this step. Draw a symmetrical cap shape below. This will help you to mold the cap for a more lifelike shaded effect beneath the brim.
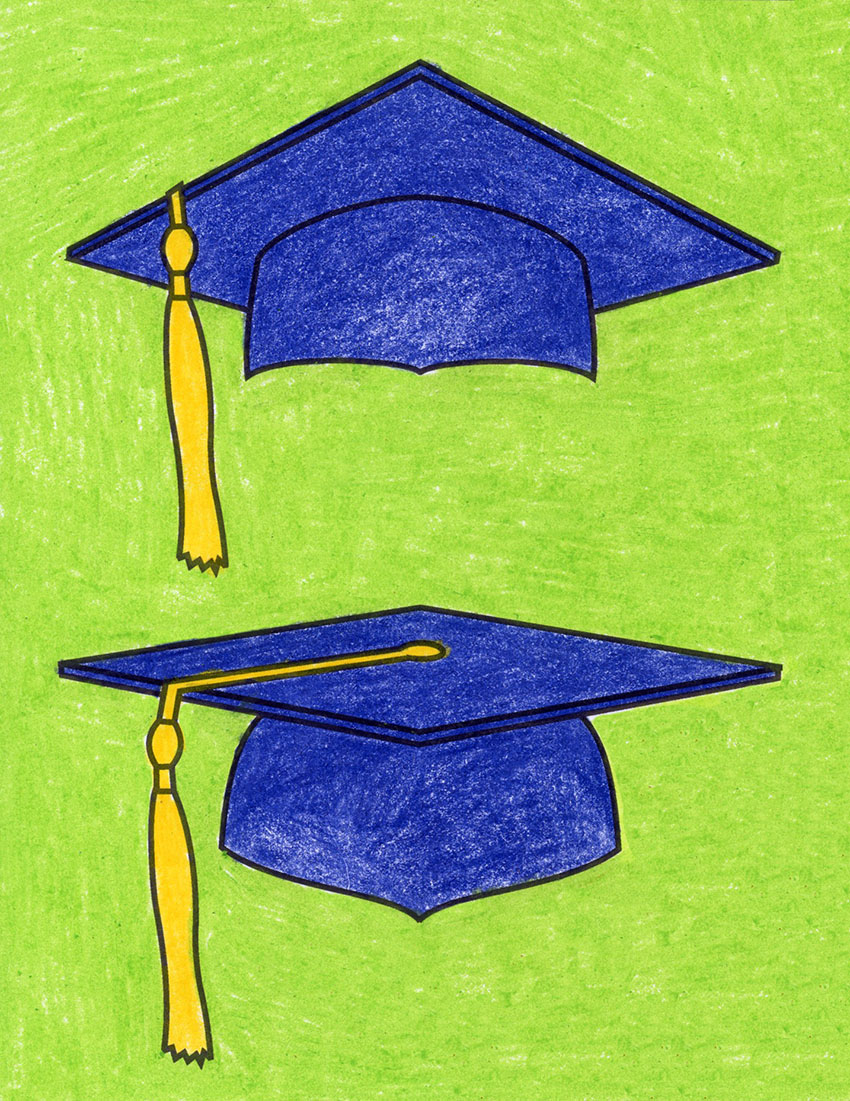
Graduation Cap Drawing Simple
Draw an oval at the center of the rhombus. Darken the lines only when you get the shape right. The first step is to draw the skull cap portion of the graduation cap. Web draw with me graduation cap and diploma scroll and learn how to draw simple stuff drawings. Make a horizontal oval near the bottom of your paper.

How to Draw Graduation Cap and Diploma
Make a horizontal oval near the bottom of your paper. Employ a blending brush to refine and soften the layers. Web add the tassel and details. Use some straight lines down from the base of the flat top for the side of this portion, and then use a curved line underneath that connects the two vertical lines. ️learn how to.

How to draw a graduation cap step by step for beginners
How to draw a graduation cap step 2. Draw a tassel on one side. These two lines should be. Add an edge to the mortarboard. These lines will serve as guides for the cap’s sides.
How to Draw a Graduation Cap (Hats) Step by Step
Draw a tassel on one side. Begin by drawing a horizontal line across the middle of the rectangle. Web ready to take your drawing to the next level!? Then draw two vertical lines from each end of the curved line. The rectangle represents the top part of the cap.
How to Draw a Graduation Cap (Step by Step Pictures) Cool2bKids
️learn how to draw a cute girl graduate in cap and gown holding a diploma and star balloon ea. Web the head gear is symbolic to the graduation tradition through ages and is rooted in british culture. Web ready to take your drawing to the next level!? Draw a narrow, horizontal oval so the center of the page lines up.
How to Draw a Graduation Cap Easy Drawing Tutorial For Kids
The rectangle represents the top part of the cap. Draw a symmetrical cap shape below. Start in the middle of your paper so you have room to draw the top of the cap later on. Web draw a symmetrical cap shape. Web start by sketching a rectangle in the center of a blank sheet of paper.
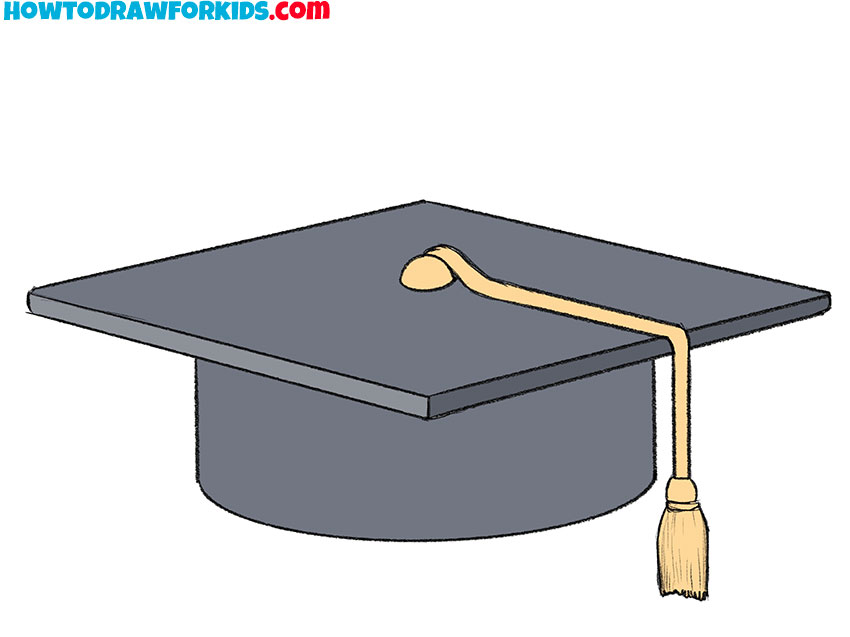
As You Can See, Only The Top And End Of The Tassel Are Visible.
Draw a symmetrical cap shape below. Draw a symmetrical cap shape. We added the button that holds the tassel in. Then draw two vertical lines from each end of the curved line.
Web Next, Connect The Top Part Of The Cap With The Rectangle By Drawing Two Vertical Lines On Each Side Of The Rectangle.
Draw an oval at the center of the rhombus. The first line is one curved line or arch at the top. Sketch lightly at first so you can easily erase if you make a mistake. Make a horizontal oval near the bottom of your paper.
Draw A Narrow, Horizontal Oval So The Center Of The Page Lines Up With The Center Of The Shape.
Use some straight lines down from the base of the flat top for the side of this portion, and then use a curved line underneath that connects the two vertical lines. Web add the decorative element. Web how to draw a graduation cap designed by: Take notice that the blue lines are used to indicate the new components being drawn in each step.
This Square Represents The Button On The Cap.
Web in today’s lesson, we are going to learn how to draw an easy graduation cap drawing on paper. You have the flat top of the hat, so now you can draw the underside, which will be the part that goes over your head. Add an edge to the mortarboard. Use an eraser to remove auxiliary lines that appeared during the drawing process.