How To Draw A Grocery Bag
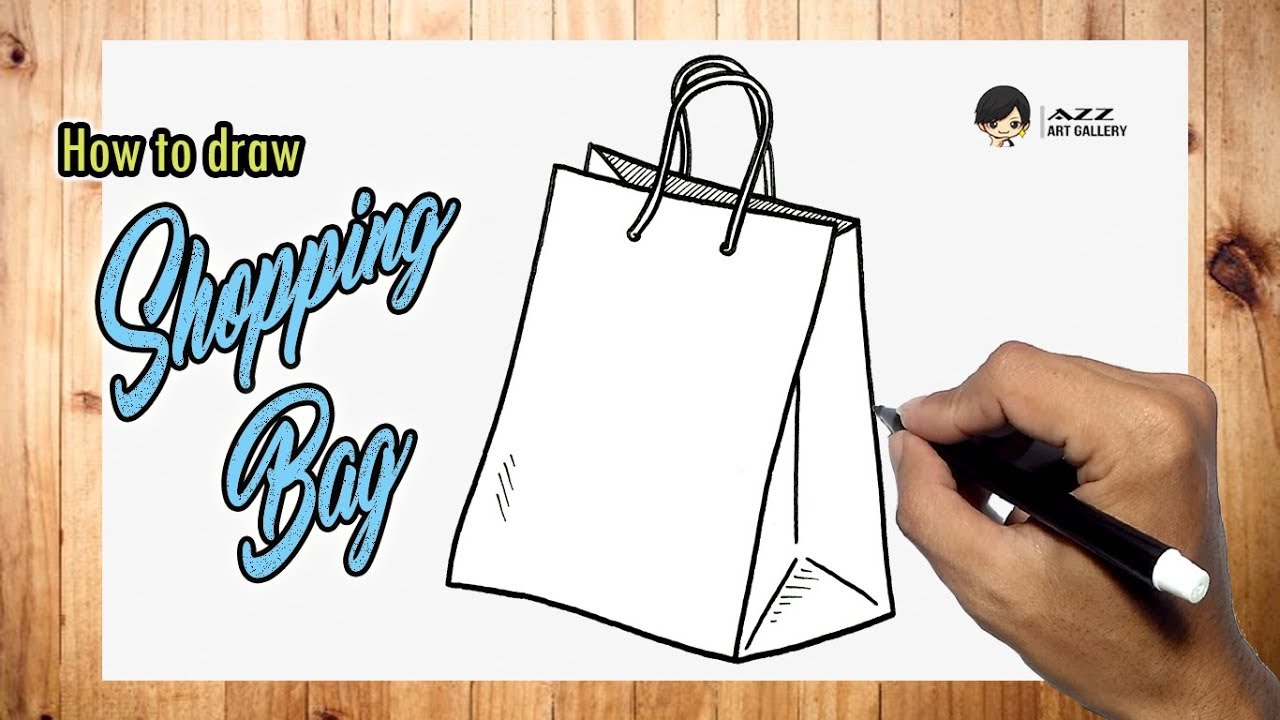
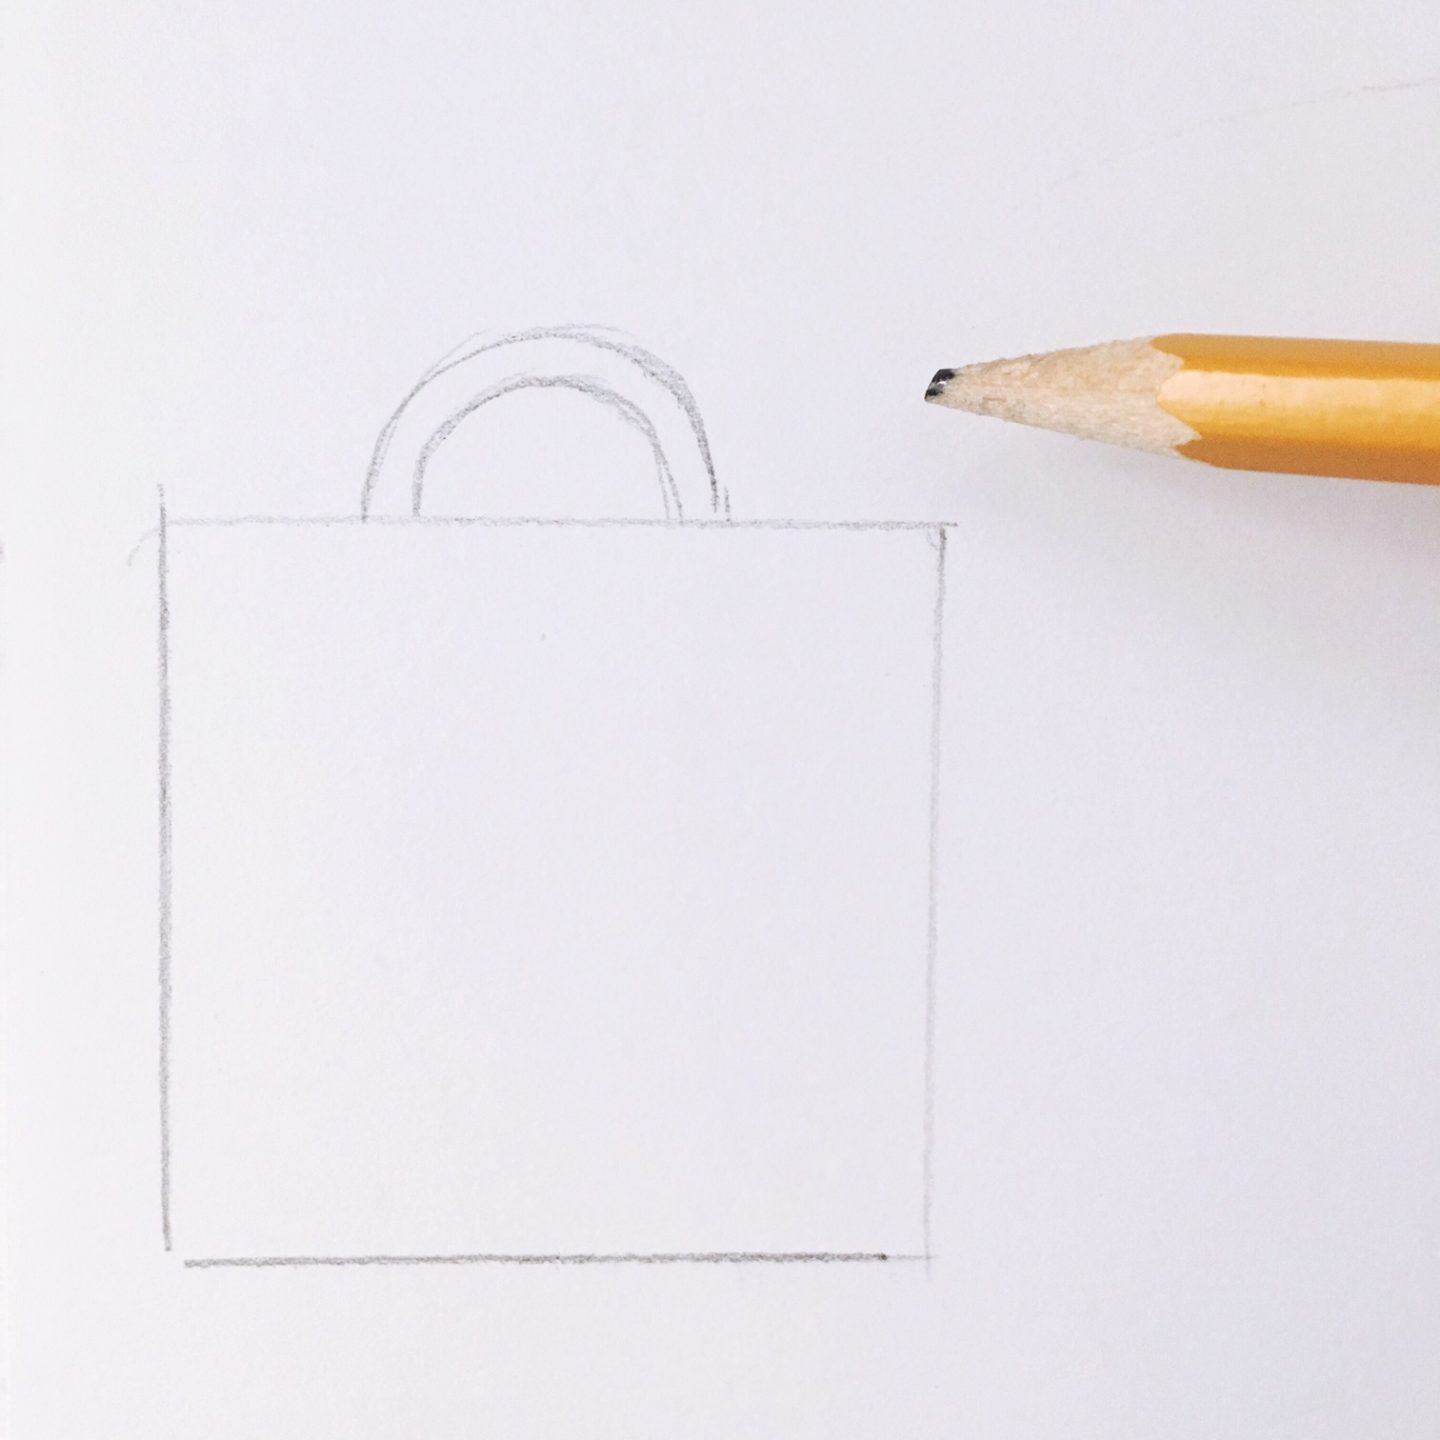
How To Draw A Grocery Bag - Then sew side and bottom of pouch together at 1/4” (6mm) seam allowance (blue line). The main aim of this channel is to learn how to draw quickly and easily. Sew along this fold to make a neat finish. The first step is to cut apart the grocery bag. Web press the side seams flat. Now stitch along the sides again. Now flip pouch inside out (so right sides of fabric face each other) and press. Sew the long edges together, making sure not to sew over the tunnels created earlier. Web fold the fabric in half crosswise, with wrong sides together, aligning the short edges. At the top of the shopping bag, draw two dots and draw a semicircular line.
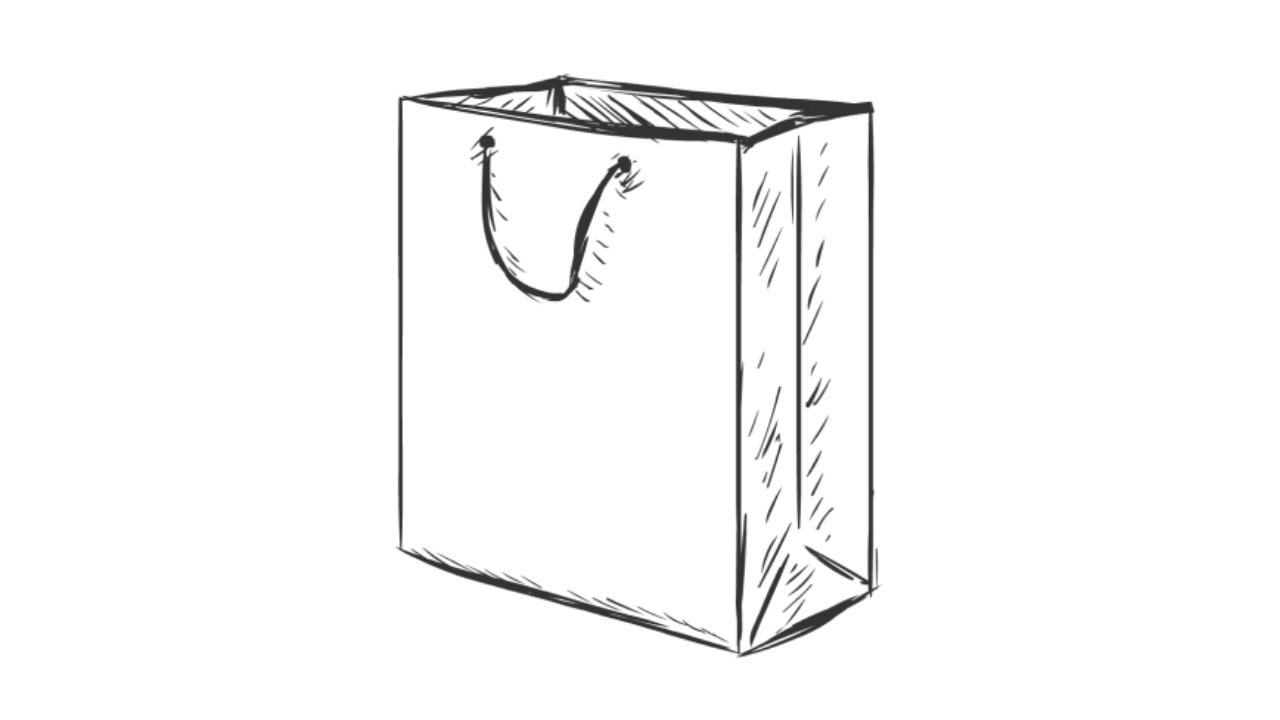
Sew the long edges together. Following the fold on one of the sides, cut all the way to the bottom of the bag. Make sure back stitch at the top a couple of times to reinforce. Now flip pouch to right side and press. The ticket matched the first five drawn, but. For both handle pieces, fold and press down a quarter inch on the long edge, then fold and press again to conceal the raw edge. Web add paper ring reinforcements to the holes, or put a small piece of masking tape over the hole and poke through with a pencil. Then, cut all the way around the bottom of the bag to remove the bottom piece. Draw a semicircular line to represent the handle of the shopping. Web how to draw a paper grocery bag.
Fold down again 1 1/4 and press flat. This forms the basic structure of the bag holder. Draw a semicircular line to represent the handle of the shopping. I also painted the blank side to create some gold and white. Stitch along each side, using a 1/4 inch (6mm) seam allowance. Sew along this fold to make a neat finish. Fold the bag so that the side seam is centered and measure 2 inches on each side of the seam. For both handle pieces, fold and press down a quarter inch on the long edge, then fold and press again to conceal the raw edge. Draw a shopping bag it isn’t hard an now i’ll teach you.in 365 sketches i’ll teach you step by step dr. At the bottom, draw two short lines at an angle to each other.
How to draw a Shopping Bag YouTube
Fold the bag so that the side seam is centered and measure 2 inches on each side of the seam. Web how to draw a shopping bag is the point of this video. Web “we got the draw and fought right until the end and that’s the most important thing. Stitch along each side, using a 1/4 inch (6mm) seam.

How to draw Plastic Bag YouTube
Next, cut two (2) lengths of string about 30″ each. Web to hem the top, fold the shorter edge (the 19 edge) down 1/2 toward the wrong side and press flat with an iron. When drawing a paper grocery bag you're going to want to really focus on the textu. Now flip pouch inside out (so right sides of fabric.

Grocery Bags Illustration Bag illustration, Drawing bag, Carrot drawing
Some cities in the united states charge a fee of $0.10 per plastic bag if you didn’t bring your own. Following the fold on one of the sides, cut all the way to the bottom of the bag. For both handle pieces, fold and press down a quarter inch on the long edge, then fold and press again to conceal.
How to Draw a Paper Bag Drawing of a Shopping Paper Bag YouTube
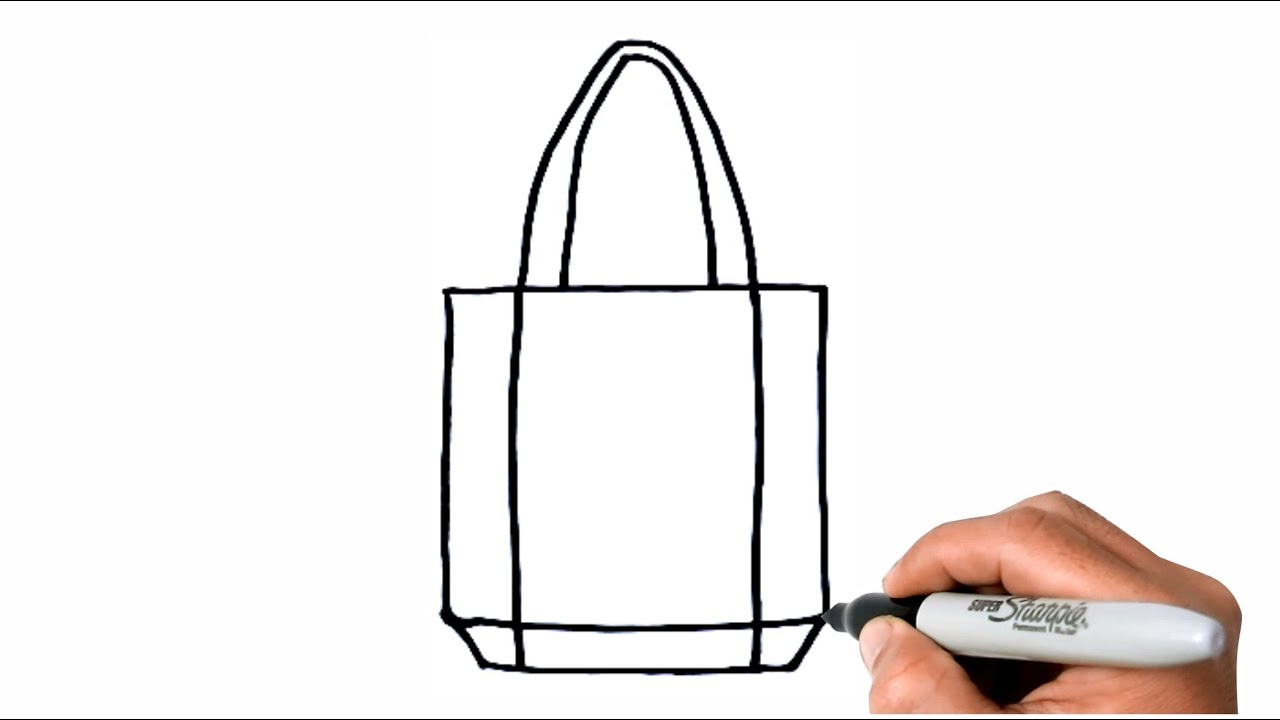
Now stitch along the sides again. Make sure back stitch at the top a couple of times to reinforce. Next, cut two (2) lengths of string about 30″ each. This is how the flat bottom tote bag should look at this stage. On the right, add one straight line to show the size.
How to Draw Tote Bag Easy Step by Step YouTube
17 trips to the grocery store in a year. You can also add some stitching lines along the edges of the bag and handles, giving it a. The main aim of this channel is to learn how to draw quickly and easily. Web press the side seams flat. Trim the seam allowance to ¼”.
How to Draw a Bag in 3 Easy Steps Lola Glenn
Stitch along each side, using a 1/4 inch (6mm) seam allowance. Web add paper ring reinforcements to the holes, or put a small piece of masking tape over the hole and poke through with a pencil. Now flip pouch inside out (so right sides of fabric face each other) and press. Daniel and i use about 10 reusable shopping bags.
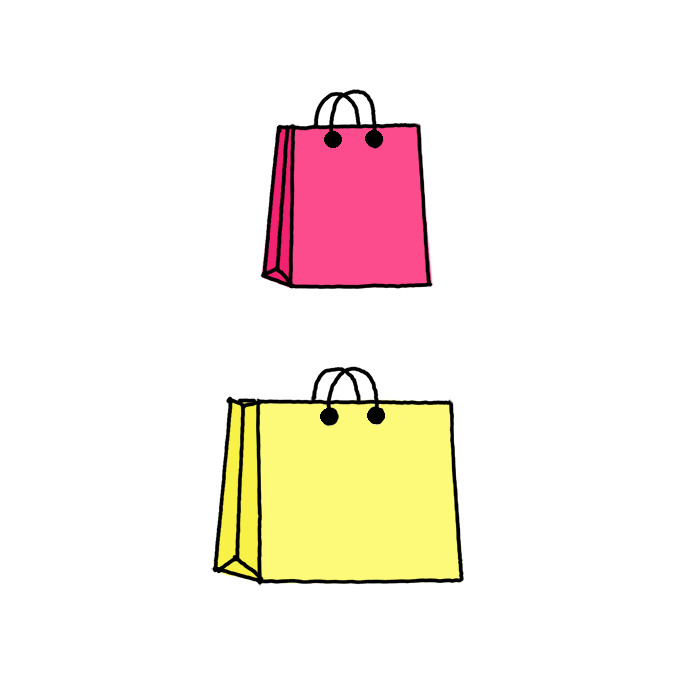
How to Draw Shopping Bags Step by Step Easy Drawing Guides Drawing
Trim the seam allowance and repeat on the other corner. Now stitch along the sides again. 17 trips to the grocery store in a year. Attach each handle to the corresponding main bag piece by sewing around the curved edge, leaving the top and sides open. Some cities in the united states charge a fee of $0.10 per plastic bag.
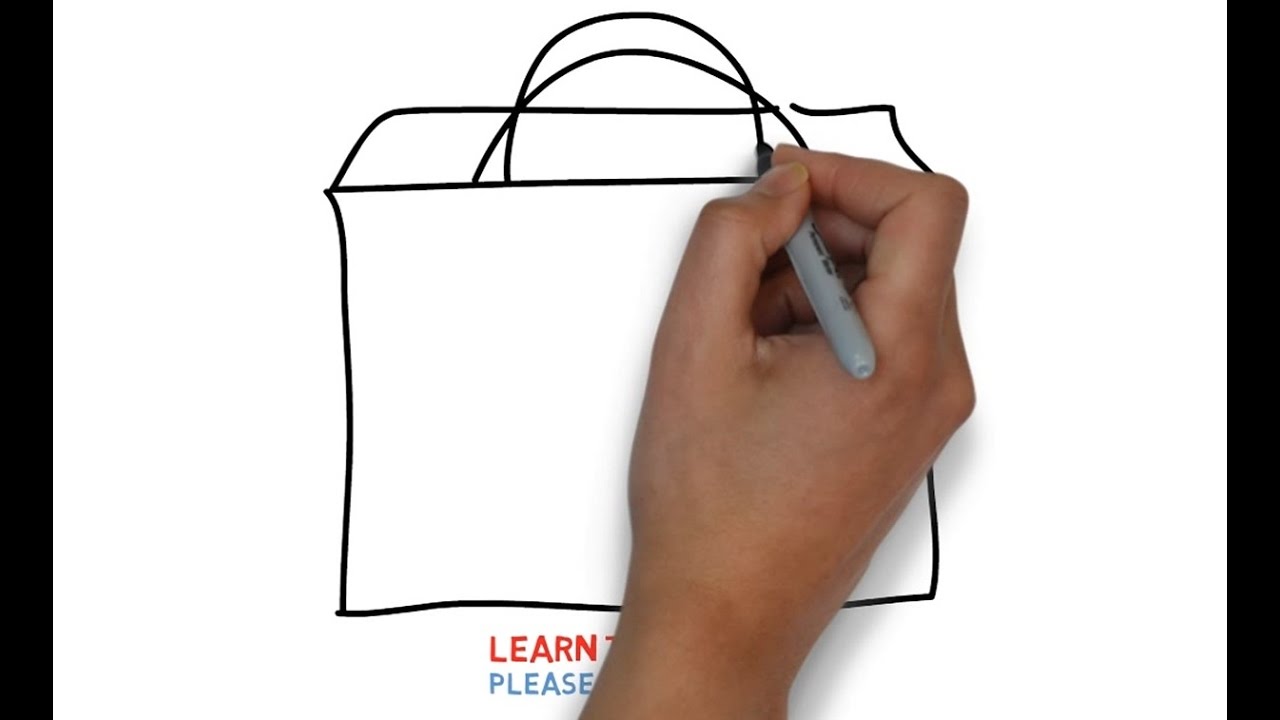
Easy Step For Kids How To Draw a Shopping Bag YouTube
It’s not an easy shot to execute, but he’s made the shot look simple for his entire career. Web how to draw a paper grocery bag. On the right, add one straight line to show the size. Now stitch along the sides again. You can see the drawing steps as well the position of the vanishing.

How to Draw Shopping Bag Papper bag easy drawing and step by step
We're in the pantry and freezer wild west this week!come into aldi with me see what i bought f. The ticket matched the first five drawn, but. Open up the bags, trace the petal shapes, and cut them out. You can also add some stitching lines along the edges of the bag and handles, giving it a. The numbers drawn.
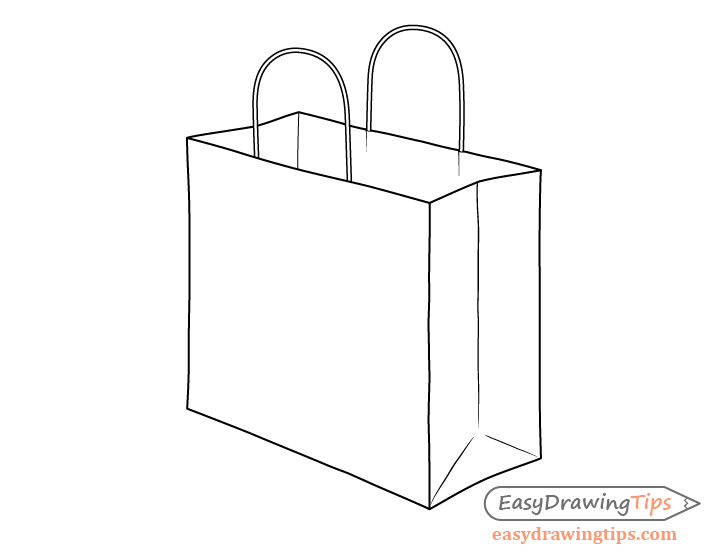
How to Draw a Shopping Bag Step by Step EasyDrawingTips
Next, cut two (2) lengths of string about 30″ each. It’s fun to utilize the designs and colors on the bags. At the bottom, draw two short lines at an angle to each other. Following the fold on one of the sides, cut all the way to the bottom of the bag. While about $100 is the cost to do.
Daniel And I Use About 10 Reusable Shopping Bags In A Grocery Visit.
We grocery shop once every three weeks. This will then be built upon the create the main body of the bag. It’s not an easy shot to execute, but he’s made the shot look simple for his entire career. Draw a a line using your tailors chalk or pencil.
Web To Hem The Top, Fold The Shorter Edge (The 19 Edge) Down 1/2 Toward The Wrong Side And Press Flat With An Iron.
This is how the flat bottom tote bag should look at this stage. Now stitch along the sides again. Although a seemingly boring subject, it was great. Make sure back stitch at the top a couple of times to reinforce.
Web Carry A Bag From A Local Grocery Store Or Pharmacy To Blend In When Speaking To Star Tribune , Pauline Frommer Revealed That It Was Actually Evelyn Hannon From The Website Journeywoman Who Gave.
Over 4 years, it would have cost you $25 per year and save hundreds of bags. Then, draw a smaller rectangle below it, symbolizing the bag’s closure. Web contractors curious about an extension cord on the roof of a michigan grocery store made a startling discovery: A big, sturdy grocery bag works best for this project.
At The Bottom, Draw Two Short Lines At An Angle To Each Other.
Web fold the fabric in half crosswise, with wrong sides together, aligning the short edges. Open up the bags, trace the petal shapes, and cut them out. Attach each handle to the corresponding main bag piece by sewing around the curved edge, leaving the top and sides open. Then sew side and bottom of pouch together at 1/4” (6mm) seam allowance (blue line).