How To Draw A Pretty Bow
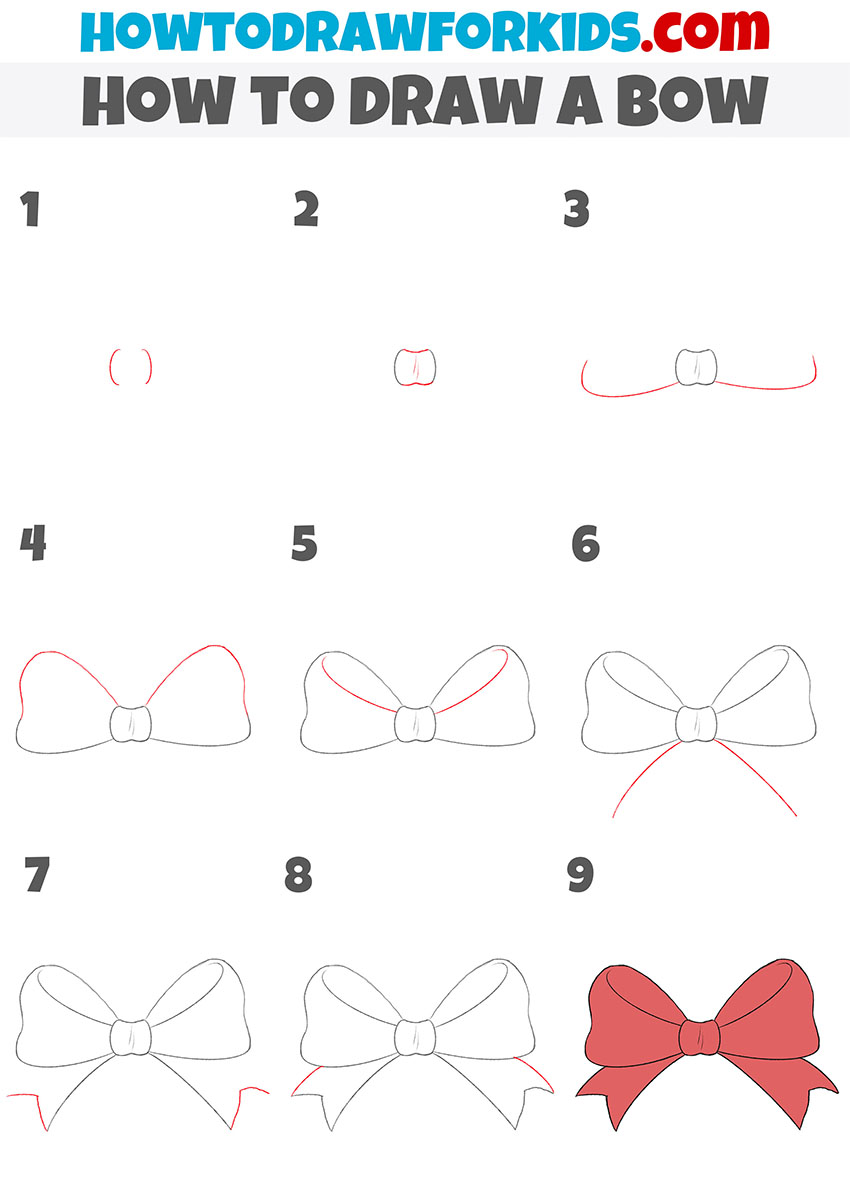
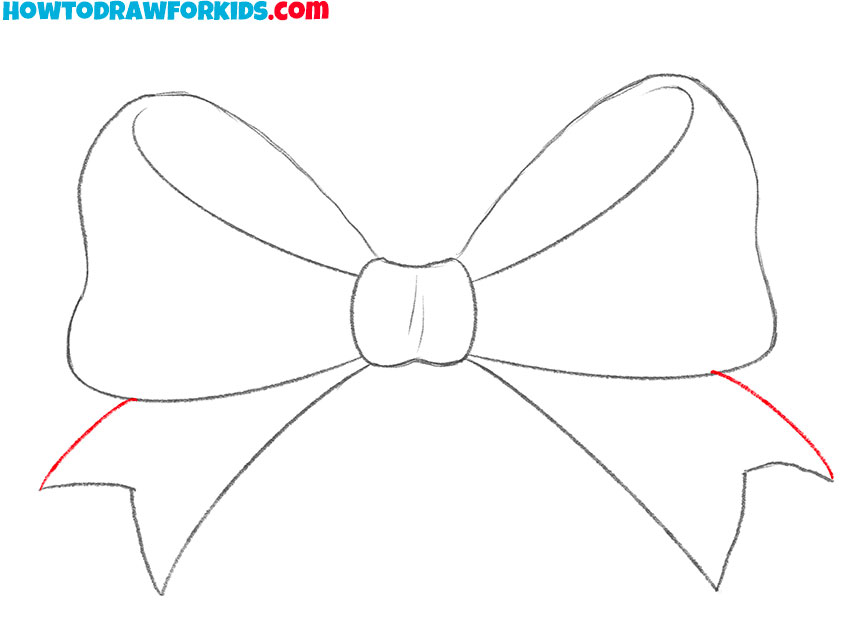
How To Draw A Pretty Bow - Draw the center of the bow. Moreover, you will always be informed about my new drawings, art plans and challenges!. Web to draw the bow, you start pulling the bow towards your anchor point. If you stand correctly, you will be doing this automatically. You can do so by drawing two curved lines on either side of the shapes from before. Show, with light lines, the general proportions of it. “someone told me that sky showed a picture they said was proof it was offside. You want the bow’s grip to sit outside your hand’s lifeline in the palm swell area. This will create a layered appearance and a double bow tie. Draw a rounded rectangle & an oval.
All drawing bow is ready; In this video, we show you how you can start your first rea. Make two lines go down from the loops to make the tails of the bow. Mark off the width and height of the picture. Cut a 2 inch piece of ribbon and fold the left and right edges into the center. Web step by step directions. Go ahead and add a bit more detail to make your bow look pretty. Next, draw two loops on either side of the rectangle, which will serve as the main body of the bow. Web how to draw a bow in stages (1 option) we draw the middle part, which overtills the ribbon, then draw on both sides of the bow. On the right, connect both lines with a single outwardly rounded line.
Then go ahead and outline the other side of the bow by doing the same thing you had just done. On the right, connect both lines with a single outwardly rounded line. The test is in clinical trials at ou’s. Continue the lines you drew in the previous step with slightly longer curved lines. Go ahead and add a bit more detail to make your bow look pretty. I recommend everyone have a look on the scouting feed, where you have a proper line. All drawing bow is ready; “i’m still pretty annoyed with the offside situation,” he said. Web push the folded centers against the middle of the bow. Start by sketching a rectangle shape for the center knot of the bow.
How to draw a Bow In Pencil, Simple and three options
Donald trump's 2024 rally in wildwood, n.j. Now practice setting your grip hand properly into place. Web learn how to draw this cute bow step by step. From above on each side we draw a curve, from the core we show folds. Draw a rounded rectangle & an oval.
How To Draw A Bow In 5 Steps Easy Drawing Tutorial Craftsonfire
Repeat the above instructions on the left side. Start by sketching a rectangle shape for the center knot of the bow. Draw the bottom of the loop on the right. Web this first bow is going to be the easiest. From that point, you can start aiming and fire the bow.

How to draw a bow Step by step Drawing tutorials
In this video, we show you how you can start your first rea. Go ahead and add a bit more detail to make your bow look pretty. The drawing of a bow requires you to be careful with its symmetry and curves. It’s up to you if you want them to be symmetrical or not. Biden, meanwhile, held a private.
How to Draw a Bow Easy Drawing Tutorial For Kids
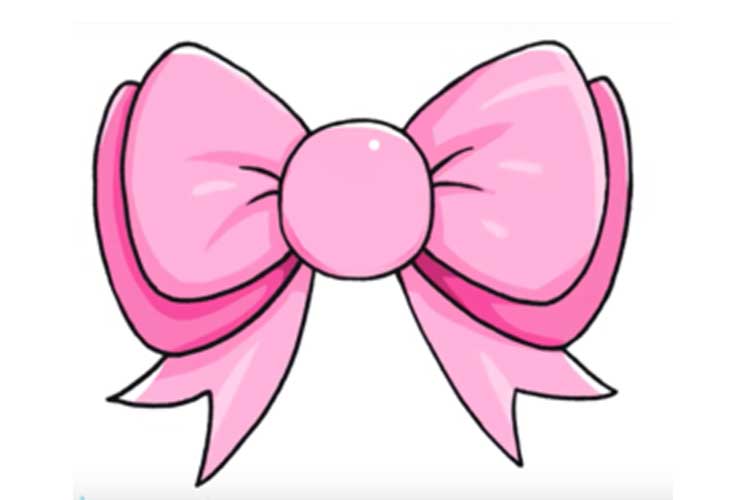
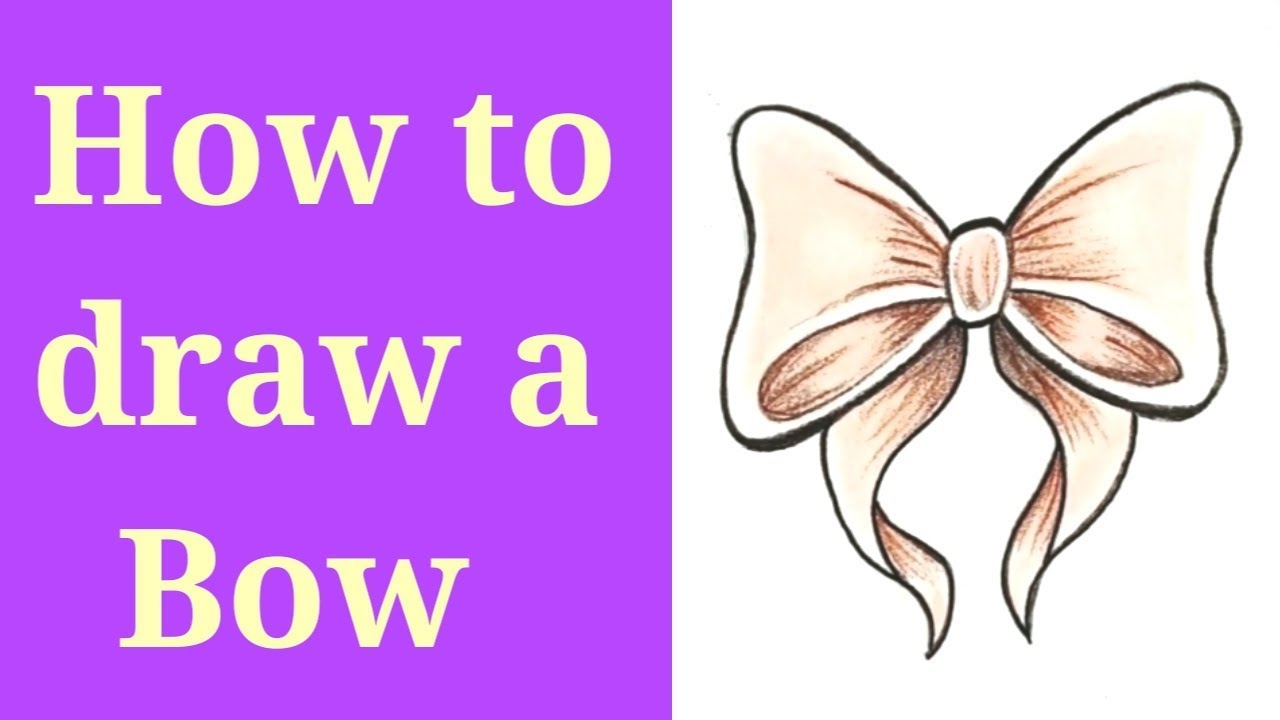
In this video, we show you how you can start your first rea. How to draw a bow in pencil. Next, draw the main part of your bow. Web this is an easy step by step tutorial on how to draw and how to sketch a pretty bow or ribbon for beginners. So, grab your pencils and let’s get started!
How to Draw a Bow Cool2bKids
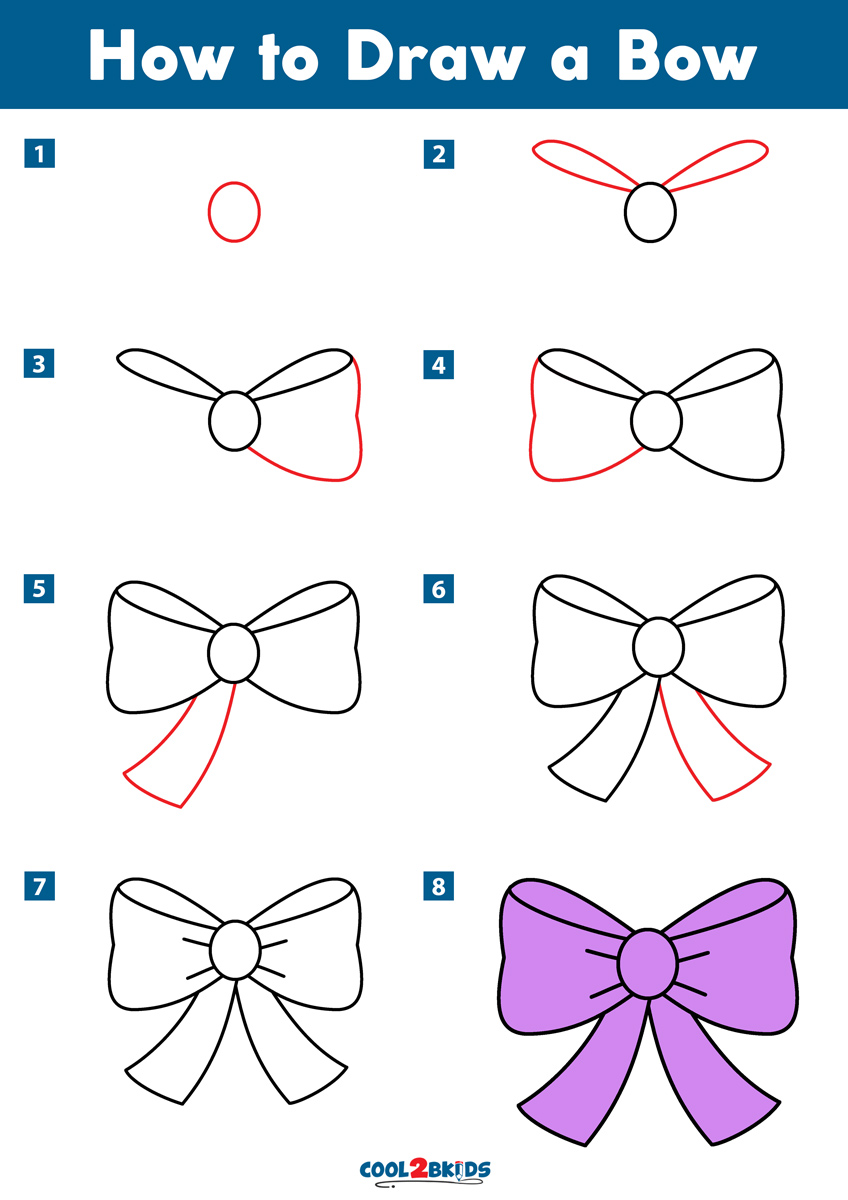
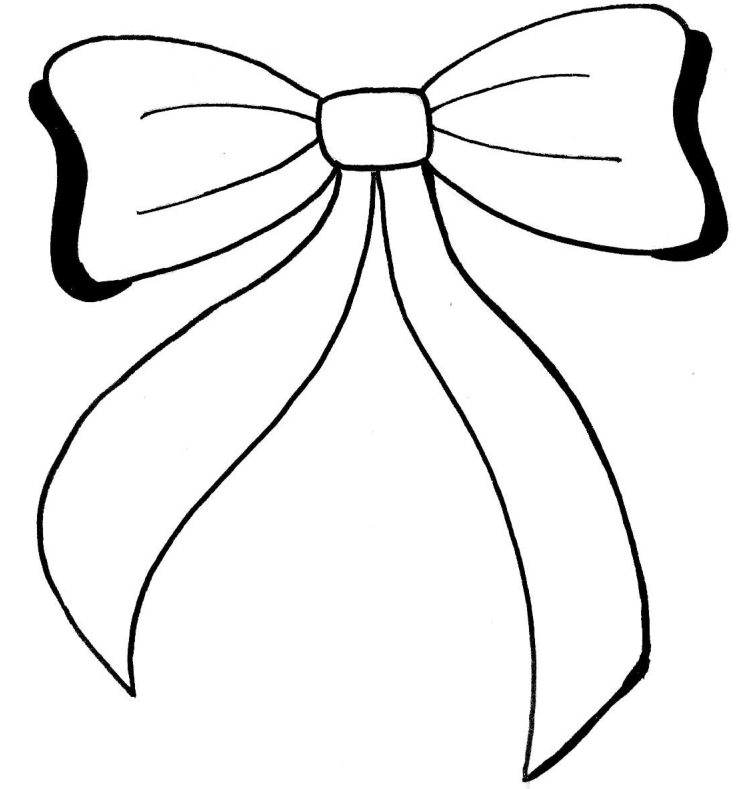
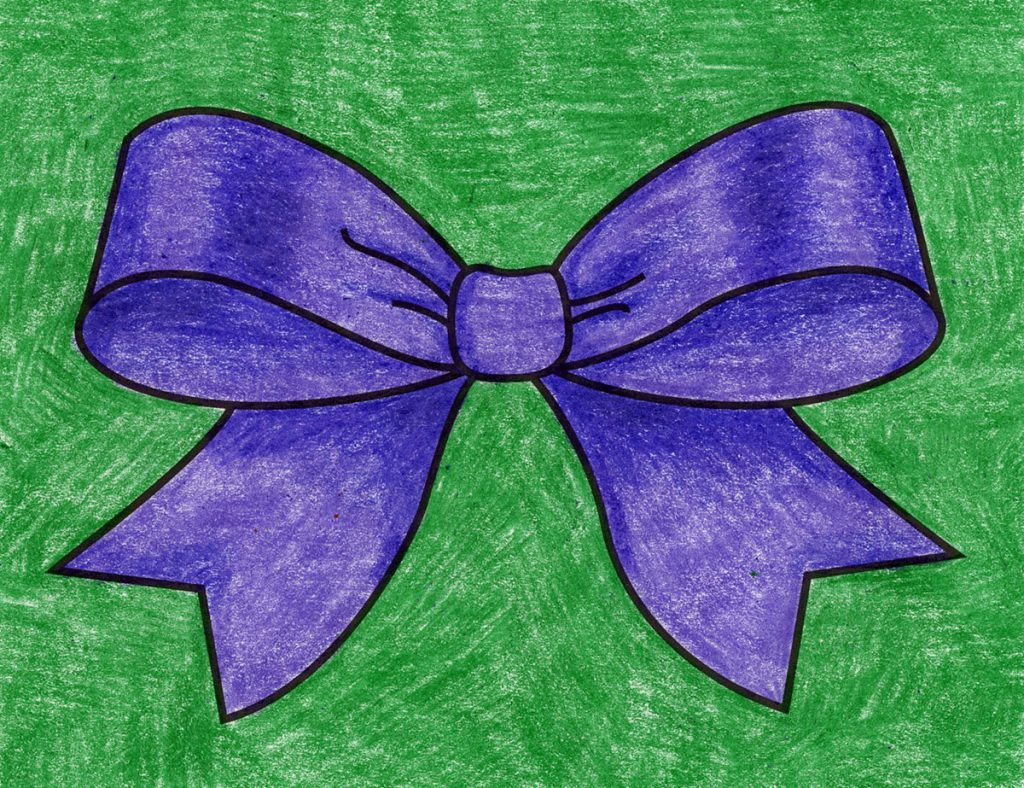
Make sure the loops are symmetrical and of equal size. So, grab your pencils and let’s get started! Bow is a popular item when you wear a suit. From below we draw the ends of the ribbon. The test is in clinical trials at ou’s.

How to Draw a Bow Design School
And there are several different ways you could draw the sides of your bow. Draw the bottom outline of the bow loops. In this video, we show you how you can start your first rea. Then go ahead and outline the other side of the bow by doing the same thing you had just done. To start the arrow, simply.
How to draw a Bow (Step by Step) YouTube
Add the top outline of the bow loops. If you stand correctly, you will be doing this automatically. The drawing of a bow requires you to be careful with its symmetry and curves. In the same way that a bow is useless without a string, it also doesn’t serve much of a purpose without an arrow to shoot, so we.
How To Draw A Bow Step By Step
Add the top outline of the bow loops. Start by drawing a square for the knot of your bow. Make sure the loops look the same on both sides and are all nice and even! Then one side of the bow, outline the sideways heart shape by drawing another line. And there are several different ways you could draw the.
How to Draw a Bow Easy Drawing Tutorial For Kids
To start the arrow, simply use a thick line coming from the center of the bow until it touches the point of the string. Drawing a hair bow requires a combination of basic shapes and attention to detail. Start by drawing a square for the knot of your bow. You want the bow’s grip to sit outside your hand’s lifeline.
How to Draw a Bow · Art Projects for Kids
Cut a 2 inch piece of ribbon and fold the left and right edges into the center. Web make the loops of the bow by drawing two curvy shapes that cross each other in the middle. Show, with light lines, the general proportions of it. As noted above, hitting the ball like the. It’s not an easy shot to execute,.
The Loops Can Be Big Or Small, Depending On How Fancy The Bow Is!
This super easy drawing lesson is perfect for kids. Start by drawing a square for the knot of your bow. Next, draw two loops on either side of the rectangle, which will serve as the main body of the bow. Follow me on other social.
Draw The Bottom Outline Of The Bow Loops.
Web how to draw a bow in stages (1 option) we draw the middle part, which overtills the ribbon, then draw on both sides of the bow. Web to draw the bow, you start pulling the bow towards your anchor point. From that point, you can start aiming and fire the bow. Draw the bottom of the loop on the left.
Draw A Rounded Rectangle & An Oval.
Show, with light lines, the general proportions of it. Bow is a popular item when you wear a suit. Match with same shape on the left. Add another layer by with a rounded rectangle that starts slightly below the points of your previous line.
Web This Is An Easy Step By Step Tutorial On How To Draw And How To Sketch A Pretty Bow Or Ribbon For Beginners.
Add ribbon end on the left and the wrinkles. In this video, we show you how you can start your first rea. You can do so by drawing two curved lines on either side of the shapes from before. “someone told me that sky showed a picture they said was proof it was offside.