How To Draw Anime Noses Front View
How To Draw Anime Noses Front View - Basic nose side view drawing; You can use simple shapes like circles or ovals to outline the head and face. Erase the line at the bottom of the circle. Pay attention to the angle and curvature to create a more realistic. Next, draw the lower part of the head starting with the front of the face. Draw the bridge of the nose, connecting it to the forehead area. More than any other feature on the face, the nose can be distorted almost beyond recognition, and. This is koko, japanese illustrator mom ! An anime girl's nose is likely to be smaller, rounder, and simpler than an anime boy's nose. Drawing an anime or manga nose using light and shadow.
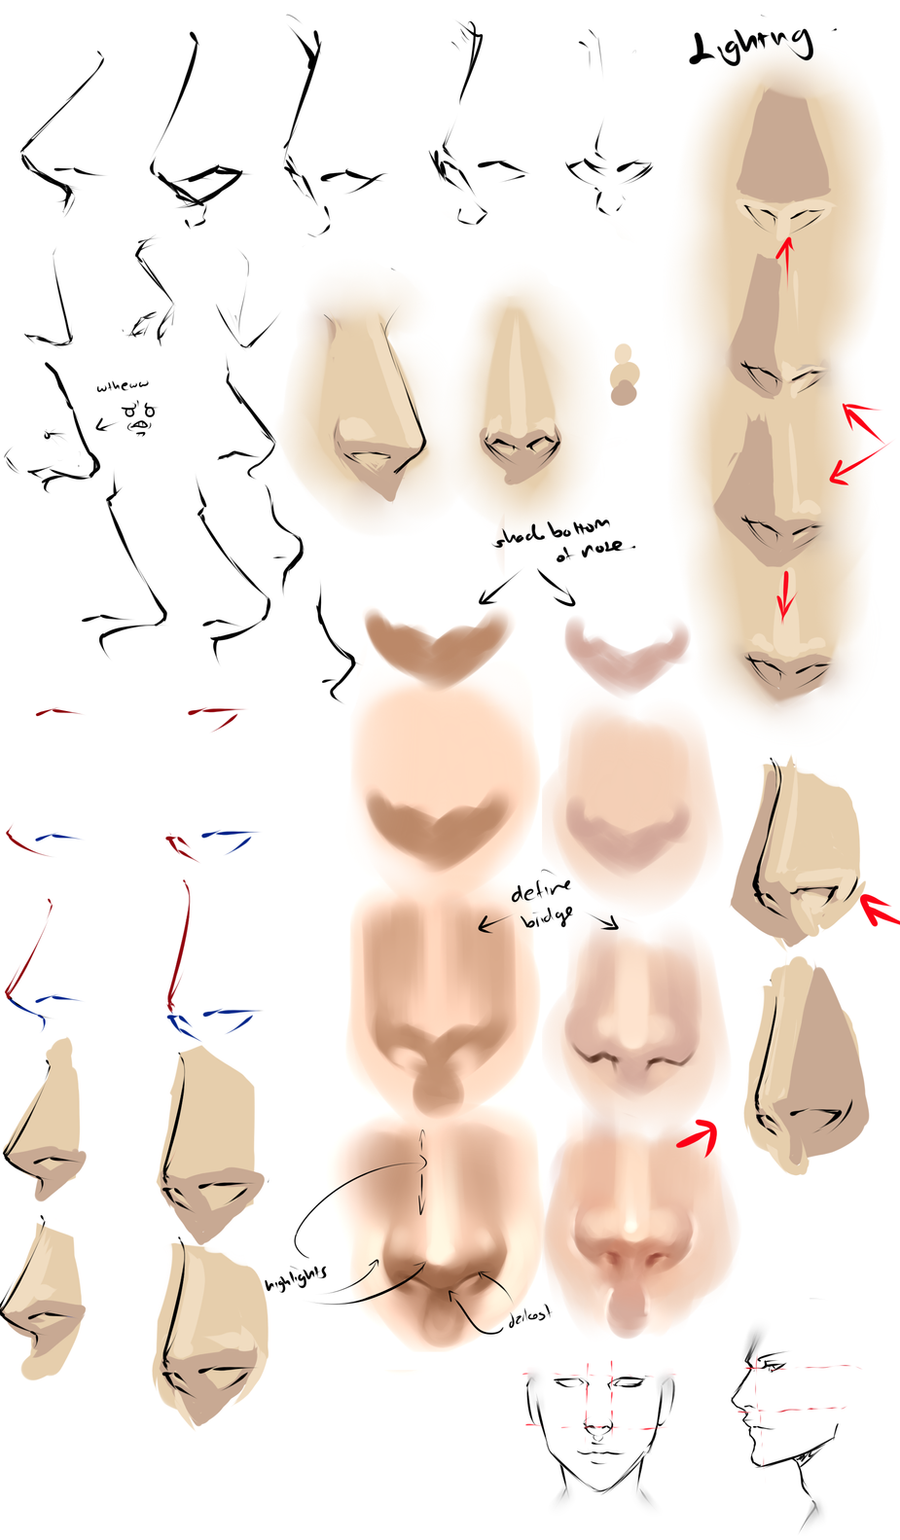
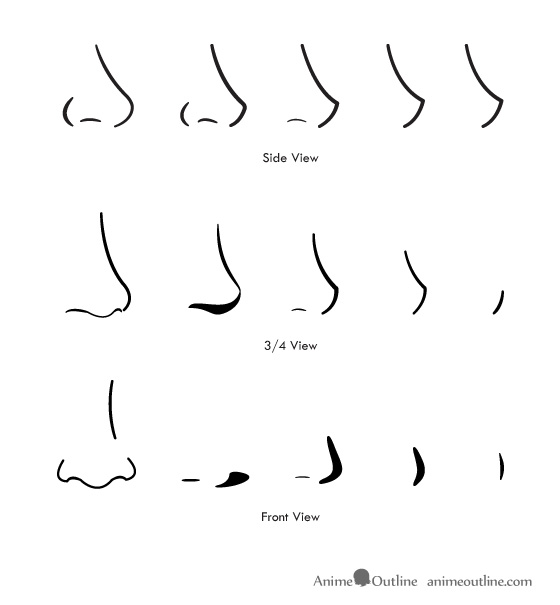
Below is a diag r a m of a nose br oken down i nto 3 se pa r a te p a r ts: The shape of the line will depend on the style of nose you’re attempting to draw. Shade the lower part of the nose with a broad shadow under the nose and be thinner at the end. Begin by sketching the basic outline of the face. Add the bridge and cartilage. A wedge for the nose, a long, thin line for the mouth, and a shorter line to define the lower lip (this lower line is not always included, though). This will serve as a guide for placing the nose in the correct position. Basic nose side view drawing; From the side, use an “l” and a “u”. Web place it horizontally between the center point of the head and under the chin with a straight line based on the line drawn from the forehead to the chin.
As this is an anime character (they tend to have large foreheads) you can make it quite tall. Drawing an anime or manga nose using light and shadow. How long or short the chin depends on your preferences or the style you want to achieve. In frontal views like this, you can get away with using very few lines to define the nose and. Follow these simple steps to draw an anime nose: Shaded nose 3/4 view drawing; Add a horizontal line in the middle of the head. Just choose one of the three, position it in the right place, and you’re done. The shape of the line will depend on the style of nose you’re attempting to draw. (my son was making noises in this.
How To Draw Anime Nose Front View
First draw an oval for the upper part of the head. Start with the face outline. Web as we mentioned earlier, we’re going to draw the nose in two different views. Draw the nose shadow to one side of the vertical line with it’s horizontal placement between the chin and the horizontal halfway point of the face. Web starting with.
How To Draw Anime Nose Easy 10 illustrated nose drawing ideas and
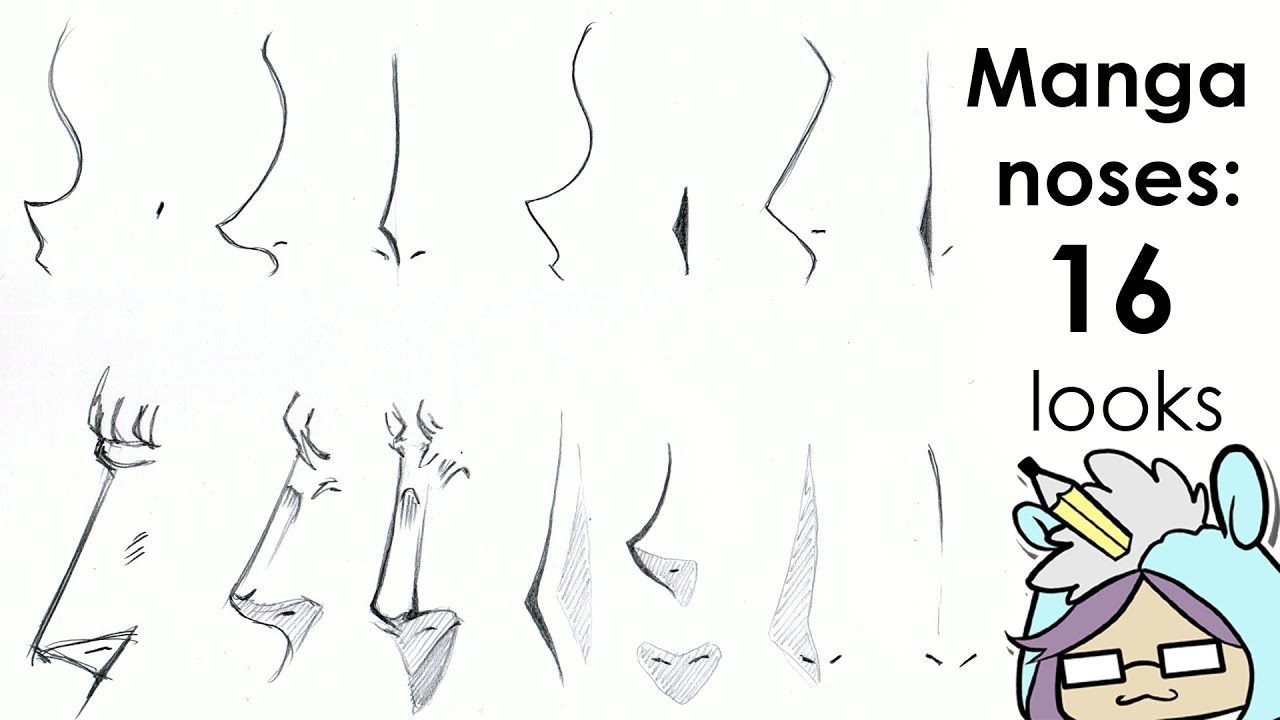
Create sharp, angled lines for the eyelids and position the eyebrows closer to the eyes. This is koko, japanese illustrator mom ! Put a horizontal line across the bottom of the circle for the nose line. Web starting with the basics is the best way to draw an anime nose. Drawing of 12 different noses styles you can use a.
Anime Nose Drawing at GetDrawings Free download
How long or short the chin depends on your preferences or the style you want to achieve. From the side, use an “l” and a “u”. Basic nose 3/4 view drawing; Draw the nose shadow to one side of the vertical line with it’s horizontal placement between the chin and the horizontal halfway point of the face. Begin by sketching.

How to Draw an Anime Nose Easy Step by Step Tutorial
As this is an anime character (they tend to have large foreheads) you can make it quite tall. Web when you draw the nose 3/4 view, you'll be combining aspects of the front and side view. In frontal views like this, you can get away with using very few lines to define the nose and. Draw the bridge of the.

How To Draw An Anime Nose Front View This means that many elements of
Just choose one of the three, position it in the right place, and you’re done. Start by drawing a single line in the middle of the face that extends down to the lips. Br ea ki ng thi ngs d ow n i nt o se ct i ons w i l l make drawing noses a br eeze! Web.
How To Draw Anime Noses Step By Step Anime eyes step by step tutorial.
Older male characters are likely to have the largest and. A wedge for the nose, a long, thin line for the mouth, and a shorter line to define the lower lip (this lower line is not always included, though). Draw a light, straight line along the bottom of the circle so it extends past the circle’s widest point. Position the.
How to Draw Anime and Manga Noses Anime Outline
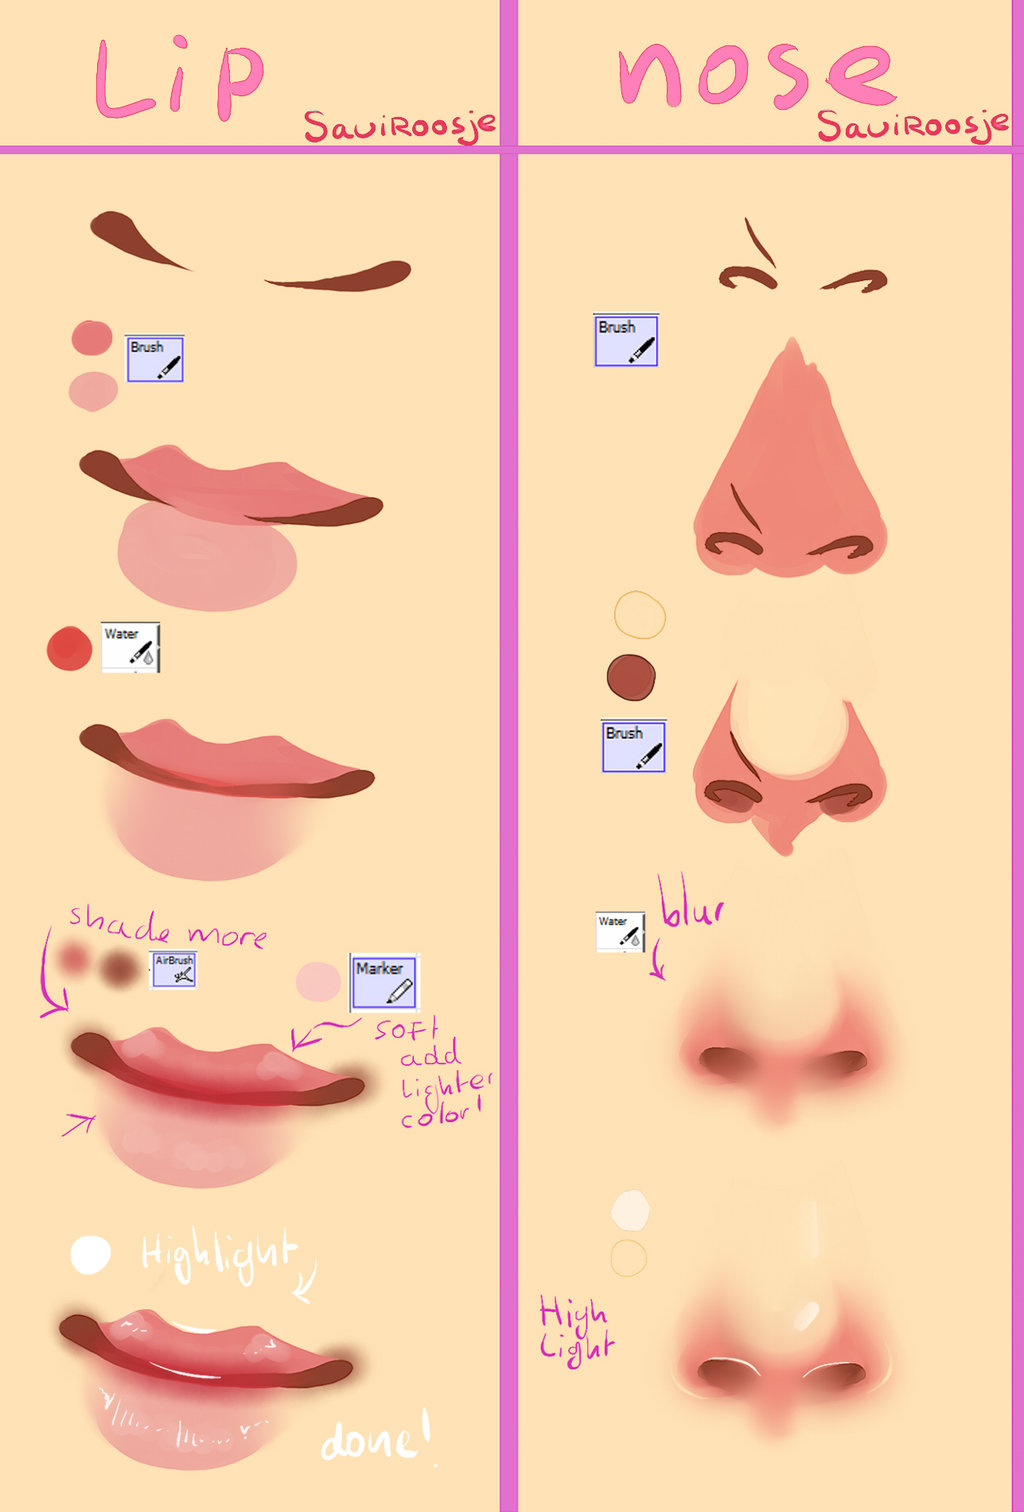
Web learn how to draw & shade noses from the side and front view : Create sharp, angled lines for the eyelids and position the eyebrows closer to the eyes. Use gentle curves for the eyelids, making the eyes appear slightly smaller. Put a horizontal line across the bottom of the circle for the nose line. Drawing a basic anime.

Anime nose, Nose drawing, Anime art tutorial
Web 𝗩𝗶𝗱𝗲𝗼 𝗱𝗲𝘀𝗰𝗿𝗶𝗽𝘁𝗶𝗼𝗻:the theory of human nose structure. Erase the line at the bottom of the circle. Then, outline the cartilage, which gives the nose its structure. Drawing of 12 different noses styles you can use a reference for your anime drawings! A wedge for the nose, a long, thin line for the mouth, and a shorter line to define.

How To Draw Anime Nose Female Front View 25++ Images Result Koltelo
Pay attention to the angle and curvature to create a more realistic. More than any other feature on the face, the nose can be distorted almost beyond recognition, and. Web now, draw a vertical line down the middle of the circle, this is the centre line and your nose will be placed somewhere on that line. This outlines the cheeks.

How To Draw Anime Nose Front View
In frontal views like this, you can get away with using very few lines to define the nose and. Next, draw the lower part of the head starting with the front of the face. Drawing a basic anime or manga nose. Web noses are the most sculptural feature of the face, and as such offer a wealth of variation possibilities..
This Is Koko, Japanese Illustrator Mom !
Create sharp, angled lines for the eyelids and position the eyebrows closer to the eyes. Web anime face proportions & facial feature placement when drawing. Draw the nose shadow to one side of the vertical line with it’s horizontal placement between the chin and the horizontal halfway point of the face. Follow these simple steps to draw an anime nose:
T He Bridge, The Nostrils A Nd The Ba L L Or Ti P.
Draw the bridge of the nose, connecting it to the forehead area. Find the lowest point on the circle you drew and set a straightedge horizontally across it. Shade the lower part of the nose with a broad shadow under the nose and be thinner at the end. Then, outline the cartilage, which gives the nose its structure.
Begin By Sketching The Basic Outline Of The Face.
Position the eyebrows higher and add a tear or two for added effect. Web here is a very simple step by step tutorial on how to d r a w a nose fr om t he fr ont view. Pay attention to the angle and curvature to create a more realistic. Web place it horizontally between the center point of the head and under the chin with a straight line based on the line drawn from the forehead to the chin.
Drawing And Shading Noses Tutorial.
Web 𝗩𝗶𝗱𝗲𝗼 𝗱𝗲𝘀𝗰𝗿𝗶𝗽𝘁𝗶𝗼𝗻:the theory of human nose structure. Web noses are the most sculptural feature of the face, and as such offer a wealth of variation possibilities. Use curved lines to enclose the ears, attached to the head below the midline. Position the different parts of the face as follows: