How To Install A Sliding Drawer
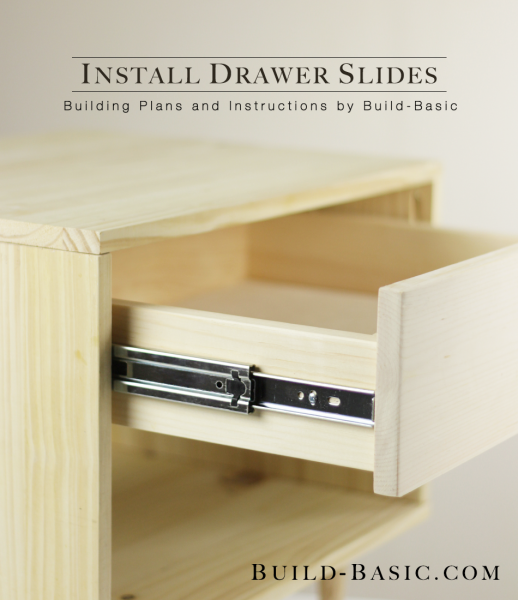
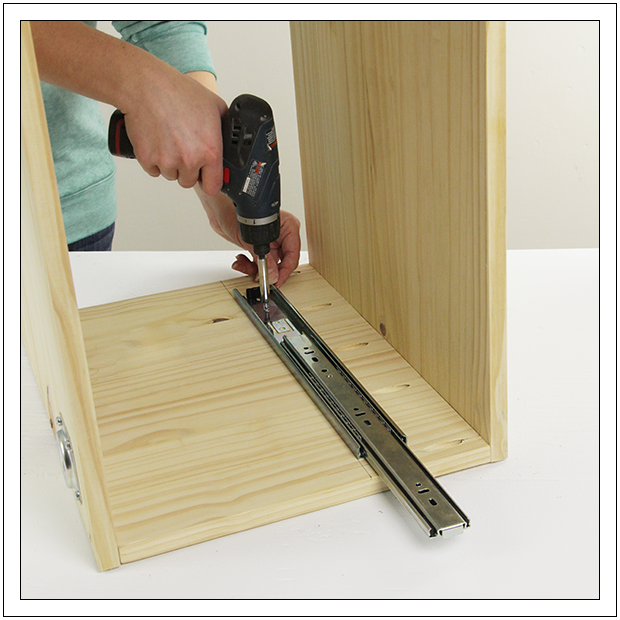
How To Install A Sliding Drawer - Insert the drawer slides into the metal brackets. For this step, you may want to use a level to ensure the slide is installed correctly. Secure them in place using screws and a screwdriver or drill. Slide in the support wall. Web preparing the drawer and cabinet: Lets you pick the size and. If your basement is big enough, create a wall to divide the space into multiple rooms. Ensure that the box is square and fix for square as needed. Web in your kitchen, there's a space between the bottom drawer and the floor. Mark this on the cupboard base.
Now repeat with 2 more screws (one in the. Adjust it until it’s in the perfect position that the drawer will be snug and straight. Web drill a pilot hole in the hole in the front tab of the drawer slide. Measure the dimensions for the new slides and mark the placement on the drawer and cabinet. Easy steps to install sliding drawers in your kitchen cabinets. Web install the inner (drawer) members onto the outside drawer surfaces. Web drawer slide installation in 11 steps. Slide in the support wall. Then secure it with one of the screws that came with your drawer slides. Easy method for all skills.
Ensure that the box is square and fix for square as needed. Web with the drawer closed, position the drawer face with equal gaps along the top and side edges. Install the second drawer slide on the opposite side of the cabinet in the same manner. Not only is it a terrific. Use the same process referenced in the step above. If you're replacing old slides, remove them from both the drawer and the cabinet. Web when you’re building projects with drawers, installing the slides can be one of the most challenging tasks. If your basement is big enough, create a wall to divide the space into multiple rooms. Adjust it until it’s in the perfect position that the drawer will be snug and straight. Attaching the face of the drawer.
How to Install Drawer Slides Build Basic
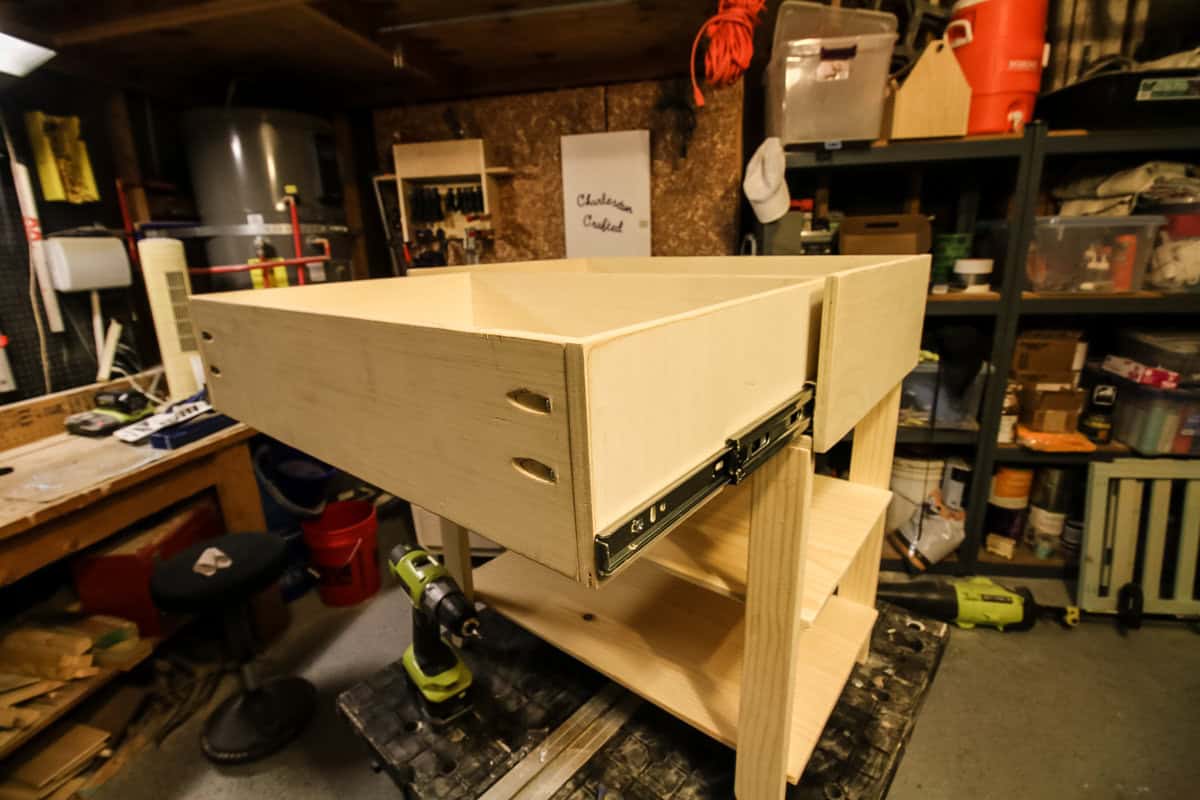
You need to attach one side of the slide inside t. Insert the drawer in the cabinet and screw the slides to the sides of the drawer. Web in this video i walk you through step by step on how to install drawer slides, drawers, and drawer faces. Ensure that the box is square and fix for square as needed..
How to Install Drawer Slides The simple and easy way!
Place the slide rails inside the cabinet, aligning them with the markings you made. Tilt the front of the drawer upward and carefully slide it into place, ensuring that the wheels or rollers on the drawer fit securely into the tracks. Align the drawer slide on top of the line and drill holes at the start and end of the.
How to install soft close drawer slides YouTube
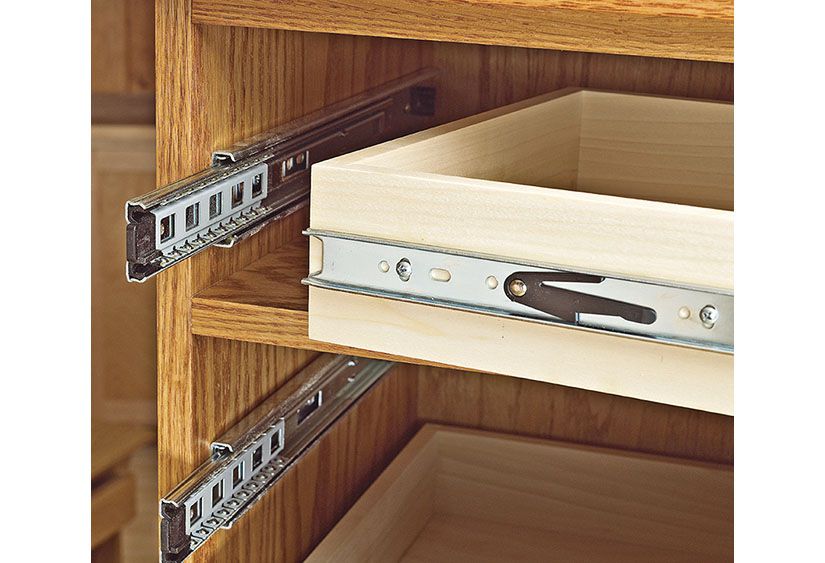
Web to reinstall a sliding drawer, align the tracks on both sides of the drawer with the corresponding grooves in the cabinet. Use the same process referenced in the step above. Web with the drawer closed, position the drawer face with equal gaps along the top and side edges. Make sure they are level and secure before moving on to.
How to Install Drawer Slides ‹ Build Basic
Web in this video i walk you through step by step on how to install drawer slides, drawers, and drawer faces. Gently push the drawer in until it fully engages with the cabinet. Measure the size of the cabinet. Using the screws provided, mount the slide to the inside of the cabinet. Web install the inner (drawer) members onto the.
How to Install Drawer Slides Build Basic
Dry fit the drawer by placing the drawer inside the cupboard, even though it won’t be attached to the other side. Repeat steps 2 and 3 to mount the second. For this step, you may want to use a level to ensure the slide is installed correctly. Then secure it with one of the screws that came with your drawer.
Drawer Slides Demystified Wood
For this step, you may want to use a level to ensure the slide is installed correctly. Web install a wall of ikea pax storage. Holding the slide firmly in place, push the extension forward until both sets of screw holes are visible. Using the screws provided, mount the slide to the inside of the cabinet. How to install drawer.

How To Install Drawer Slides Easily and Accurately YouTube
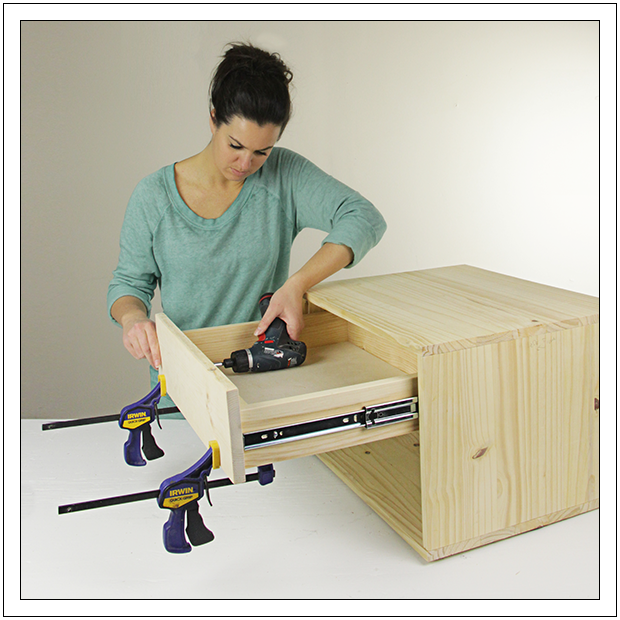
Web with the drawer closed, position the drawer face with equal gaps along the top and side edges. Place the slide rails inside the cabinet, aligning them with the markings you made. Insert a screw through the cam adjuster and through a hole or slot at the rear. Using clamps, secure the drawer face against the drawer box. Gently push.
How to Install Drawer Slides The simple and easy way!
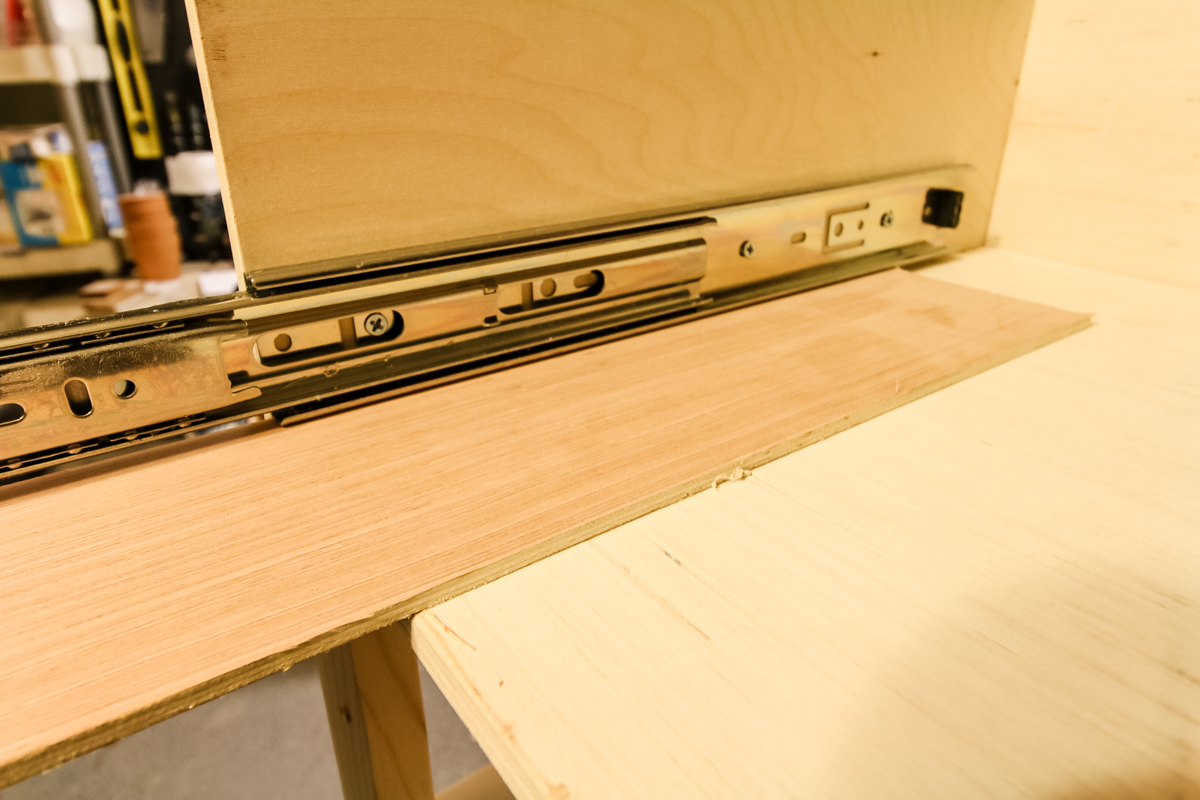
Mark this on the cupboard base. Make sure the intermediate slide member ball retainers are fully forward before you install. Using clamps, secure the drawer face against the drawer box. Remove old drawers and drawer slides from inside the cabinet. Web install the inner (drawer) members onto the outside drawer surfaces.

How to Install Drawer Slides 11 Diy slides, Installing drawer slides
Web in this video i walk you through step by step on how to install drawer slides, drawers, and drawer faces. Install the second drawer slide on the opposite side of the cabinet in the same manner. Glue and nail a ¼” plywood base cut to the size of the drawer box. Insert the drawer in the cabinet and screw.
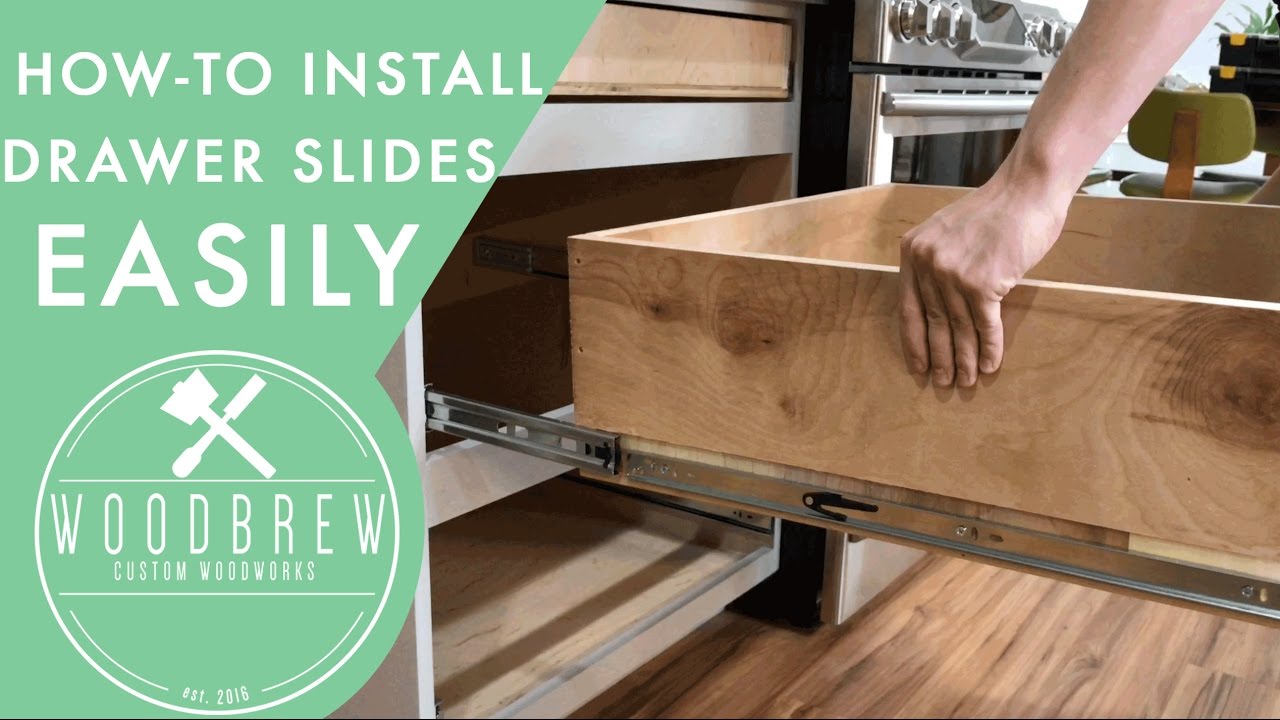
How To Install Drawers Slides Woodbrew YouTube
Install the drawer in the cabinet and close it. Now repeat with 2 more screws (one in the. Web preparing the drawer and cabinet: Tilt the front of the drawer upward and carefully slide it into place, ensuring that the wheels or rollers on the drawer fit securely into the tracks. Attach the slides to the drawer and install them.
Insert A Screw Through The Cam Adjuster And Through A Hole Or Slot At The Rear.
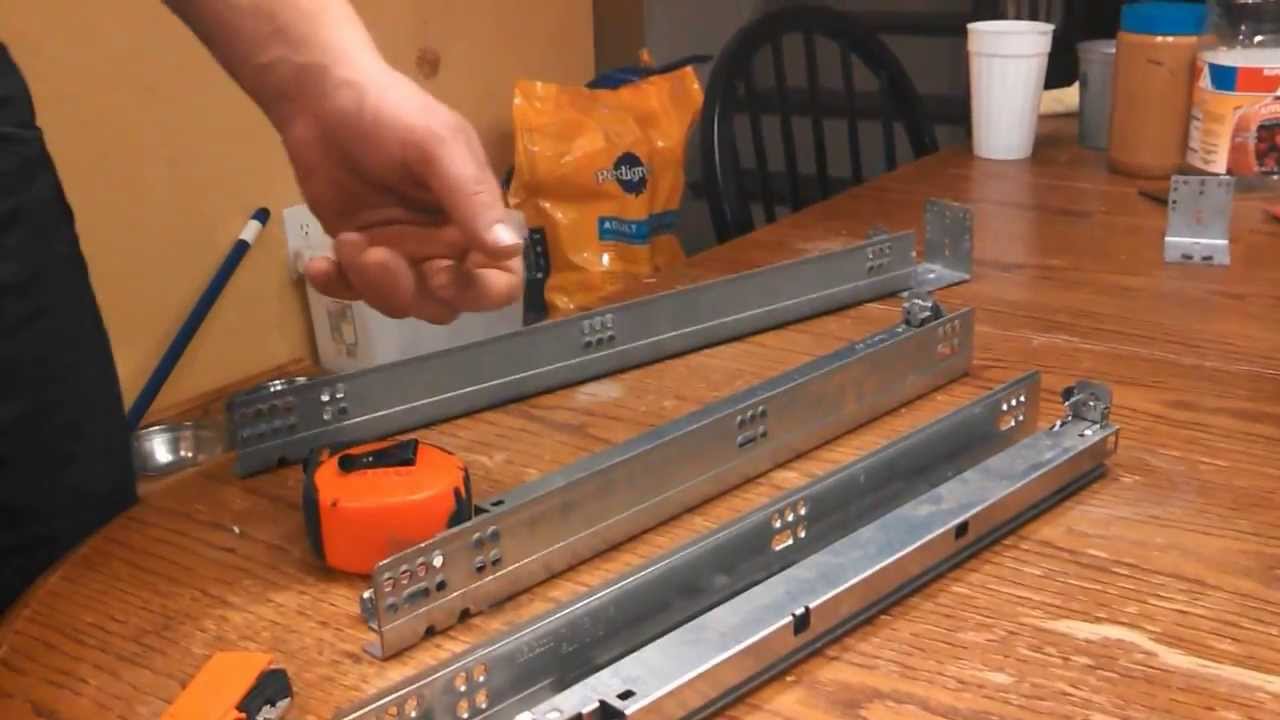
The kreg drawer slide jig eliminates the guesswork and makes the process easy by holding the slides—an. Set the retention clips in place against underside of drawer. Web now position the drawer slide on top of the shims and against the cleat, and secure it to the cleat with the screws provided. Insert the drawer slides into the metal brackets.
Make Sure The Intermediate Slide Member Ball Retainers Are Fully Forward Before You Install.
Use a tape measure to mark the center of the drawer height. Web drill a pilot hole in the hole in the front tab of the drawer slide. Build the drawer box using wood glue and 1 ¼” pocket screws keeping all the sides square. You need to attach one side of the slide inside t.
Web To Reinstall A Sliding Drawer, Align The Tracks On Both Sides Of The Drawer With The Corresponding Grooves In The Cabinet.
Insert the drawer in the cabinet and screw the slides to the sides of the drawer. Use a screwdriver to remove any screws holding the slides in place. If your basement is big enough, create a wall to divide the space into multiple rooms. For this step, you may want to use a level to ensure the slide is installed correctly.
If You're Replacing Old Slides, Remove Them From Both The Drawer And The Cabinet.
Using a drill/driver, drill shallow pilot holes in one screw hole near the front and back of the slide. Lets you pick the size and. Tilt the front of the drawer upward and carefully slide it into place, ensuring that the wheels or rollers on the drawer fit securely into the tracks. Using the screws provided, mount the slide to the inside of the cabinet.