Realistic Easy Pumpkin Drawing
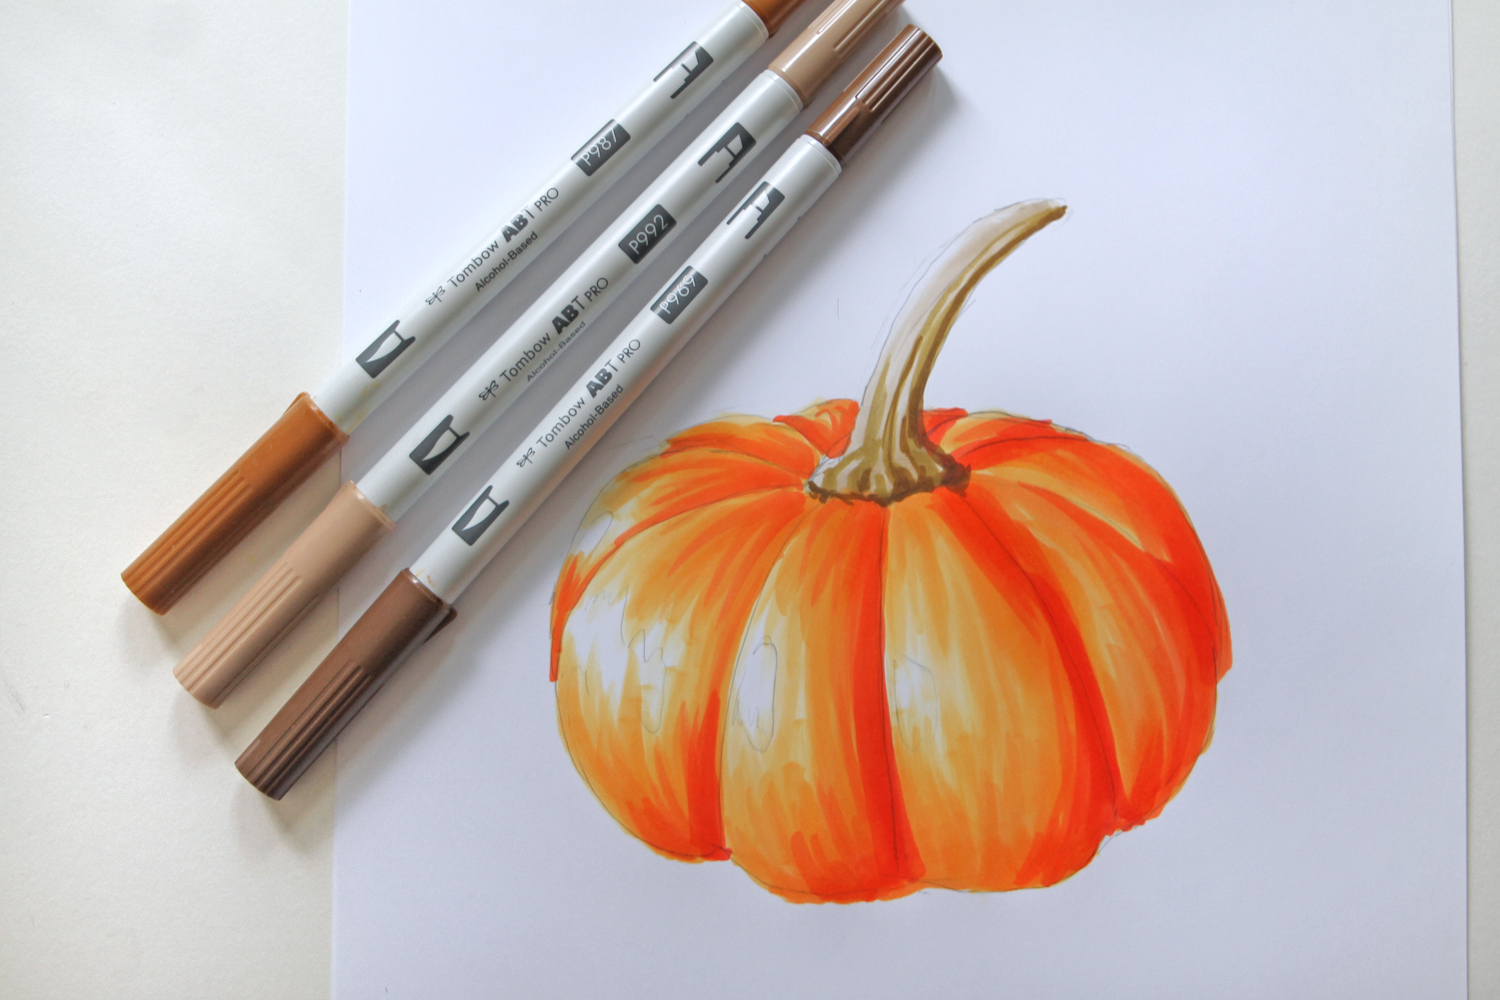
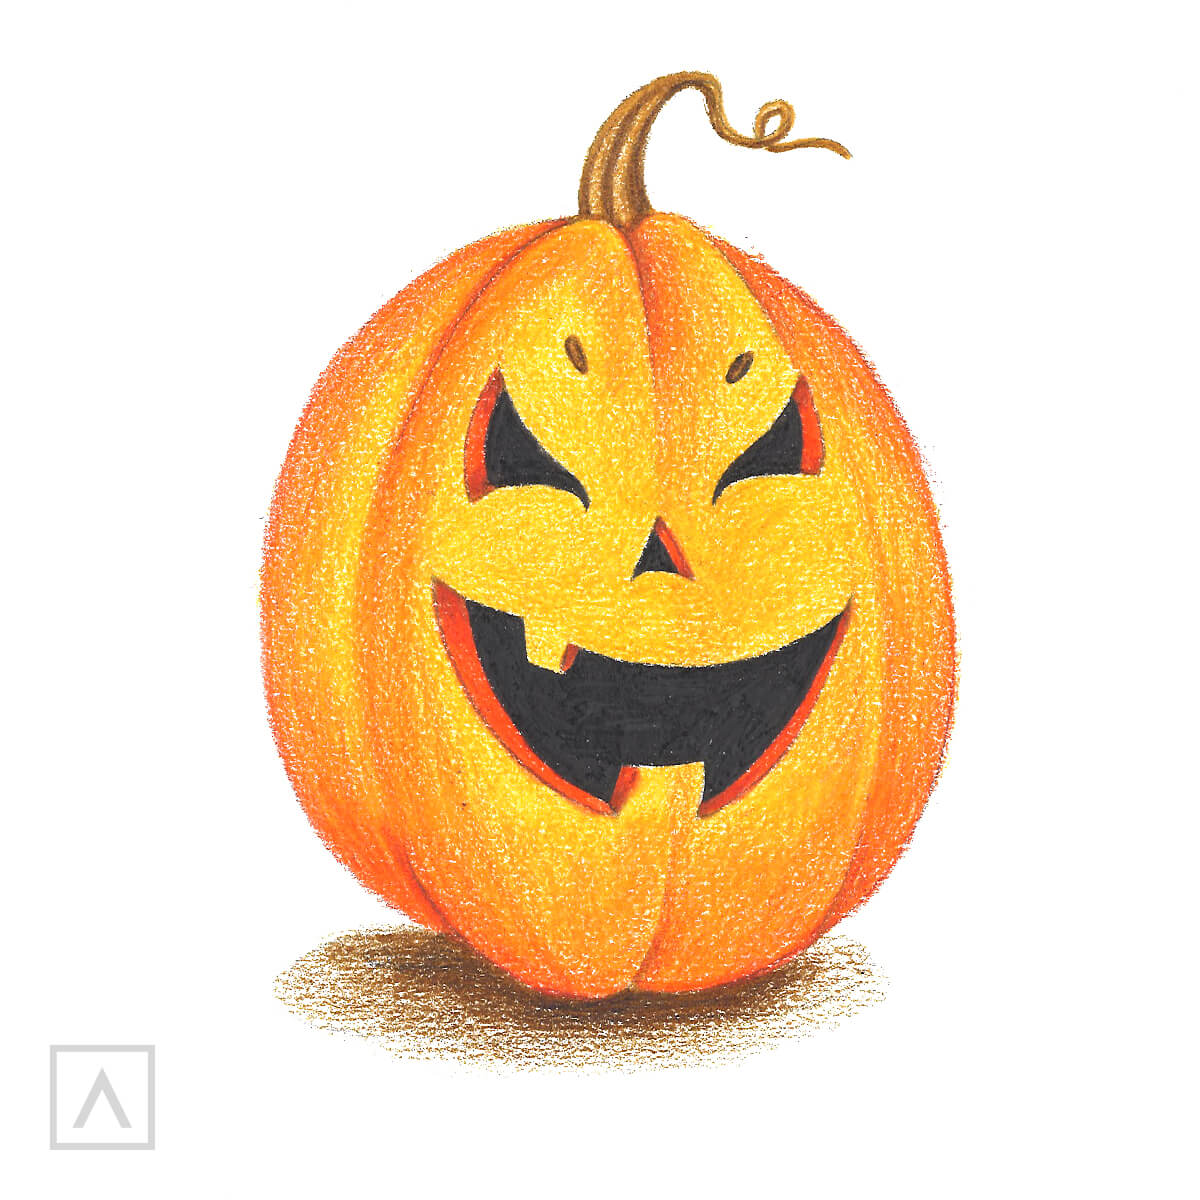
Realistic Easy Pumpkin Drawing - Go over the contour and lines of the pumpkin sections with this color. Sketch the remaining front ribs. Use raw umber a132 to represent the shadowed areas on the pumpkin stem and add the shadow created by the pumpkin. Go over the contour and lines of the pumpkin sections with this color. Add shadows on the bottom and around the facial features to make them look sunken. Our pumpkin drawing tutorial offers two distinct options to cater to all artists, from beginners to seasoned professionals. Web you might thing that they are tricky to draw, especially because of their ribs, but with our tutorial you will be drawing pumpkins in no time. Start small at the top and make it bigger as you go down. Draw a circle connecting the two lines. Web two ways to draw a pumpkin:
Draw an adjoining segment to build the pumpkin shell. Add shadows on the bottom and around the facial features to make them look sunken. Contents [ hide] 1 using basic oval shapes. I really hope this is helpful in some w. Web today i’ll show you the best way to do it and draw many different pumpkins based on a simple technique. Begin coloring your pumpkin sketch; Add some curved lines all around to add ridges to your pumpkin. Web two ways to draw a pumpkin: Start by drawing the overall shape of your pumpkin with a two curved lines. This will add some depth to your drawing and make it look more realistic.
Then draw some curved lines behind the stem to make your pumpkin look more dimensional. Draw 2 curved lines at the top. Web today i’ll show you the best way to do it and draw many different pumpkins based on a simple technique. Sketch the remaining front ribs. Go over the contour and lines of the pumpkin sections with this color. The simplest pumpkin drawing method uses just circles and basic curved lines. Draw a circle connecting the two lines. Web at the base of the stem create some more indentations. Start at our “stem base”, only just touch our pumpkin body at the bottom and finish on the previous rib. Web hey!welcome to my channel and if you have not already, please subscribe and also follow me on instagram.
How to Draw a Realistic Pumpkin Tombow USA Blog
Sketch the remaining front ribs. Connect the dots 3 times. Create a more realistic pumpkin shape; I really hope this is helpful in some w. Web how to draw pumpkin in easy steps for beginners lesson.tutorial of drawing technique.drawing tutorial,art tutorial youtube videoyou can watch the video at.

Art by Dea KIDS! How to Draw a Slightly Sophisticated Pumpkin for Fall
Web keep drawing lines that radiate generally toward the center of the stump under the pumpkin. Starting with the outline sketch for the pumpkin is important to keep the shape of the pumpkin. Here is a step by step tutorial on how to draw a pum. Pumpkin usually tend to be shaped like a sort of sphere with a squashed.

Art by Dea KIDS! How to Draw a Slightly Sophisticated Pumpkin for Fall
Connect the dots 3 times. 2 draw the pumpkin skin. Next, add in the ridges at the top and bottom of your pumpkin where the ribs end. Now we will add a little line at the top of the stem to give it some depth. At mimi panda, we understand that artistry comes in many forms.

How to Draw a Pumpkin Pumpkin drawing, Realistic pumpkins, Drawings
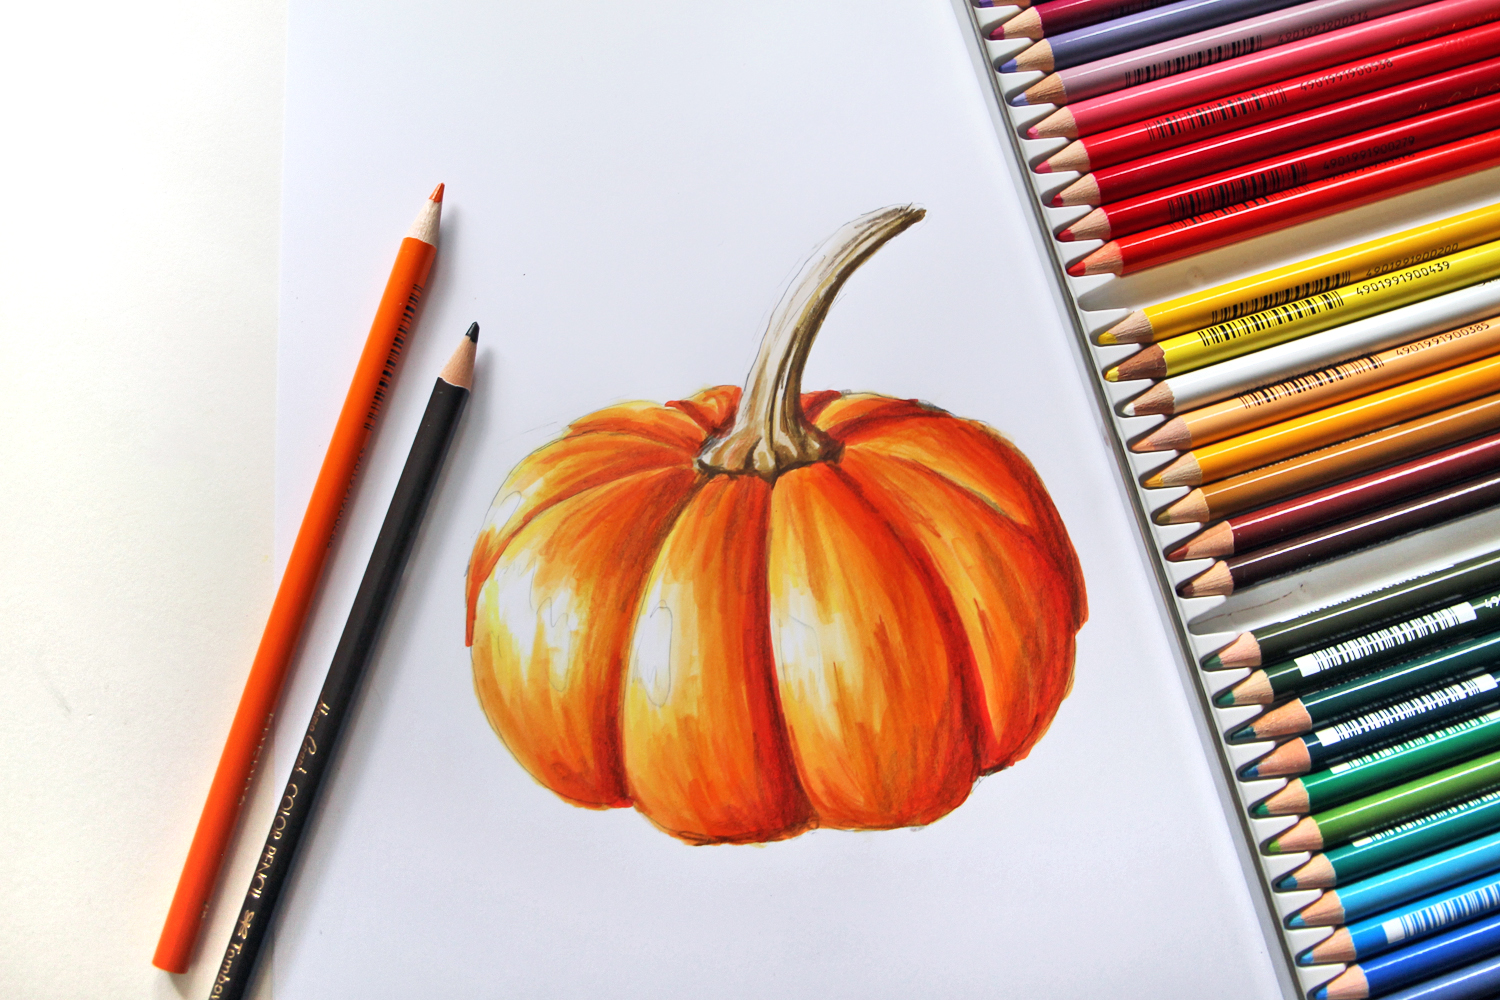
Add shadows on the bottom and around the facial features to make them look sunken. Sketch the remaining front ribs. Web add dimension with shadows and highlights. To make your pumpkin look more realistic, add shadows and highlights. Web a cute pumpkin drawing focuses on adding charming elements, such as bright eyes or a cheerful smile.
How to Draw a Realistic Pumpkin Tombow USA Blog
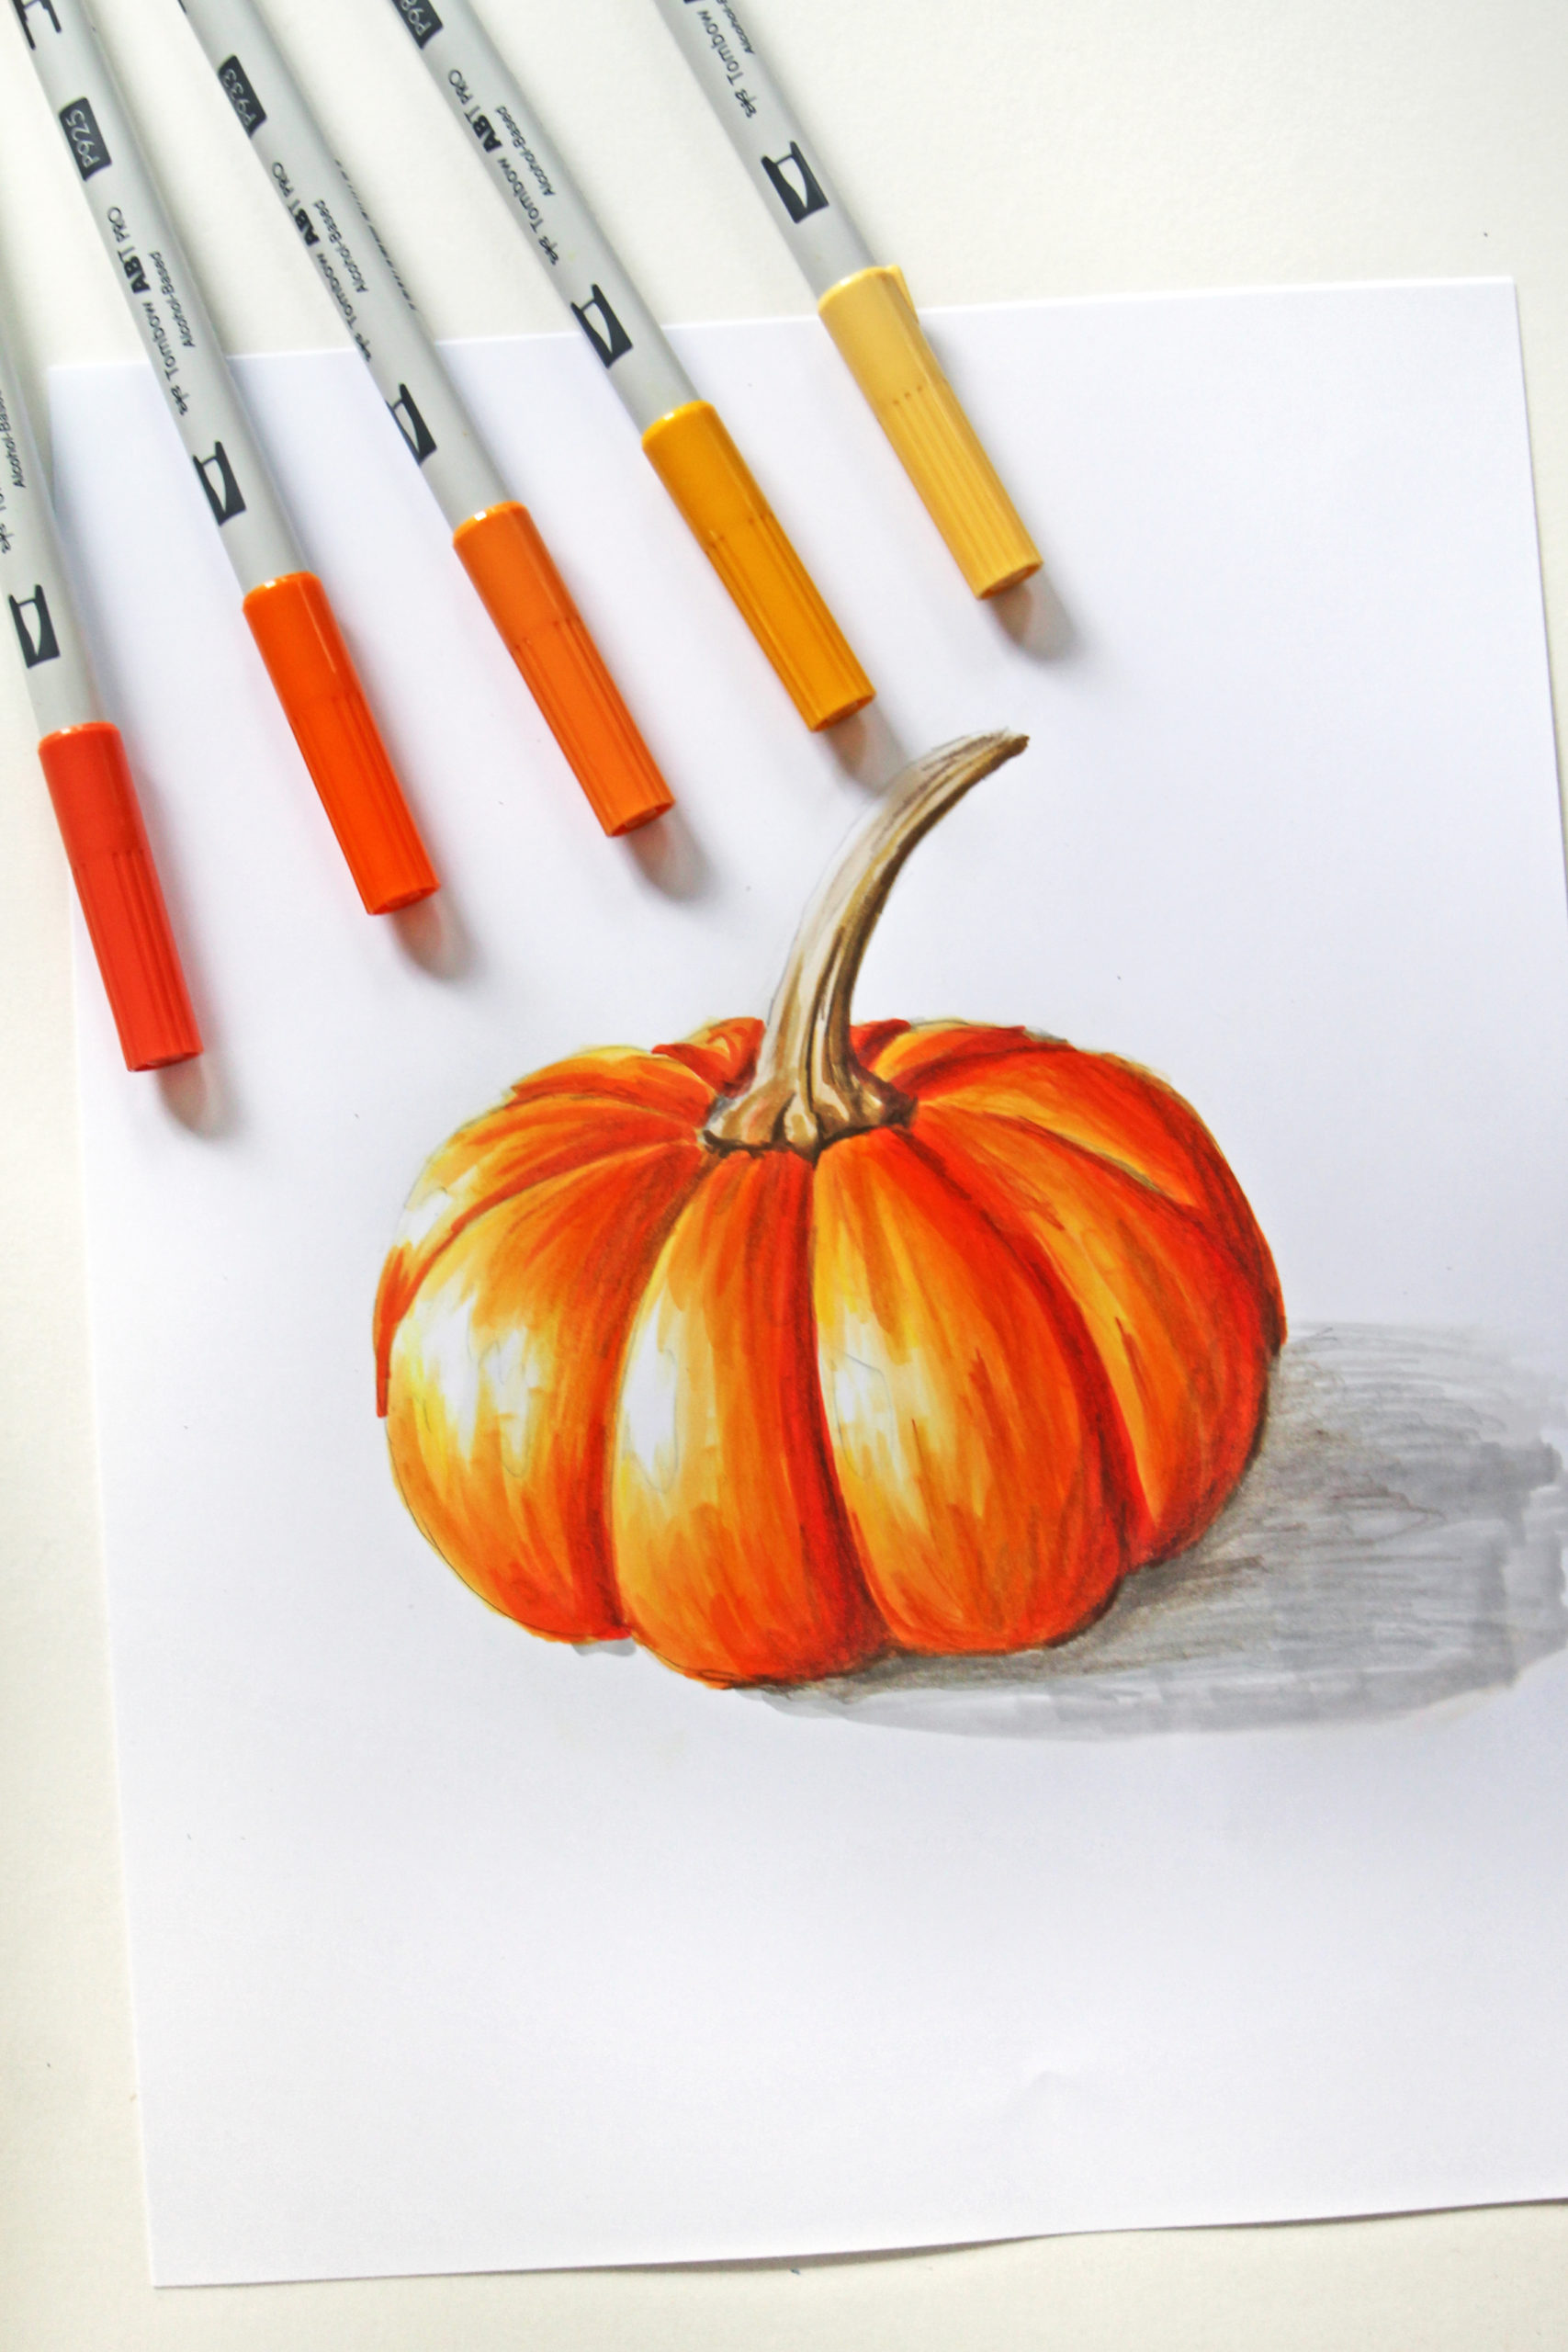
The simplest pumpkin drawing method uses just circles and basic curved lines. Markers are fun for kids to use and make for a vibrant finish. Here is a step by step tutorial on how to draw a pum. Shade the bottom of the pumpkin with darker orange, and use a lighter shade for the top. Contents [ hide] 1 using.

pumpkin drawing easy realistic Dong Hallman
Web hey!welcome to my channel and if you have not already, please subscribe and also follow me on instagram. Next, add in the ridges at the top and bottom of your pumpkin where the ribs end. Connect the dots 3 times. Add some curved lines all around to add ridges to your pumpkin. Color the mouth and space behind the.

DRAWING A REALISTIC PUMPKIN 🎃 YouTube
Begin coloring your pumpkin sketch; 2 draw the pumpkin skin. Next, add in the ridges at the top and bottom of your pumpkin where the ribs end. Web easy pumpkin drawing. Add shadows on the bottom and around the facial features to make them look sunken.
How to Draw a Realistic Pumpkin Step by Step ArtBeek
Just a few more details. Draw 2 curved lines at the top. Web make sure your lines follow the curve of your pumpkin. Starting with the outline sketch for the pumpkin is important to keep the shape of the pumpkin. Begin the pumpkin drawing by first getting it’s major shapes.
How to Draw a Realistic Pumpkin Tombow USA Blog
Web today i’ll show you the best way to do it and draw many different pumpkins based on a simple technique. You want to draw curved lines connecting your rib lines to the ones adjacent to it. This will add some depth to your drawing and make it look more realistic. Here is a step by step tutorial on how.
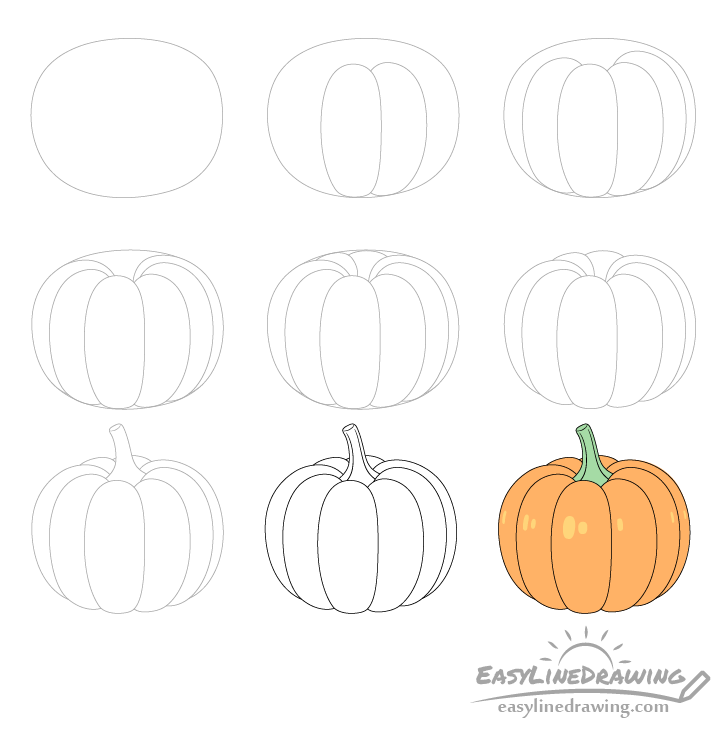
How to Draw a Pumpkin Step by Step EasyLineDrawing
Go over the contour and lines of the pumpkin sections with this color. Start at our “stem base”, only just touch our pumpkin body at the bottom and finish on the previous rib. Start coloring from the edge of the sketch and fill in. Next, add in the ridges at the top and bottom of your pumpkin where the ribs.
Start Coloring From The Edge Of The Sketch And Fill In.
Sketch the remaining front ribs. This will add some depth to your drawing and make it look more realistic. Then, draw a matching curved line on the right side of the pumpkin to make it round. Web today i’ll show you the best way to do it and draw many different pumpkins based on a simple technique.
I Really Hope This Is Helpful In Some W.
To make your pumpkin look more realistic, add shadows and highlights. Starting with the outline sketch for the pumpkin is important to keep the shape of the pumpkin. Go over the contour and lines of the pumpkin sections with this color. Go over the contour and lines of the pumpkin sections with this color.
Draw A Circle Connecting The Two Lines.
Using orange a003, color over the inner areas of the eye, nose and mouth. The simplest pumpkin drawing method uses just circles and basic curved lines. In this case the pumpkin itself and the stem. Use a loose touch with your pencil and follow the general curvature of the stump’s edges.
Connect The Dots 3 Times.
Web easy pumpkin drawing. Using orange a003, color over the inner areas of the eye, nose and mouth. Shade the bottom of the pumpkin with darker orange, and use a lighter shade for the top. Start by drawing the overall shape of your pumpkin with a two curved lines.