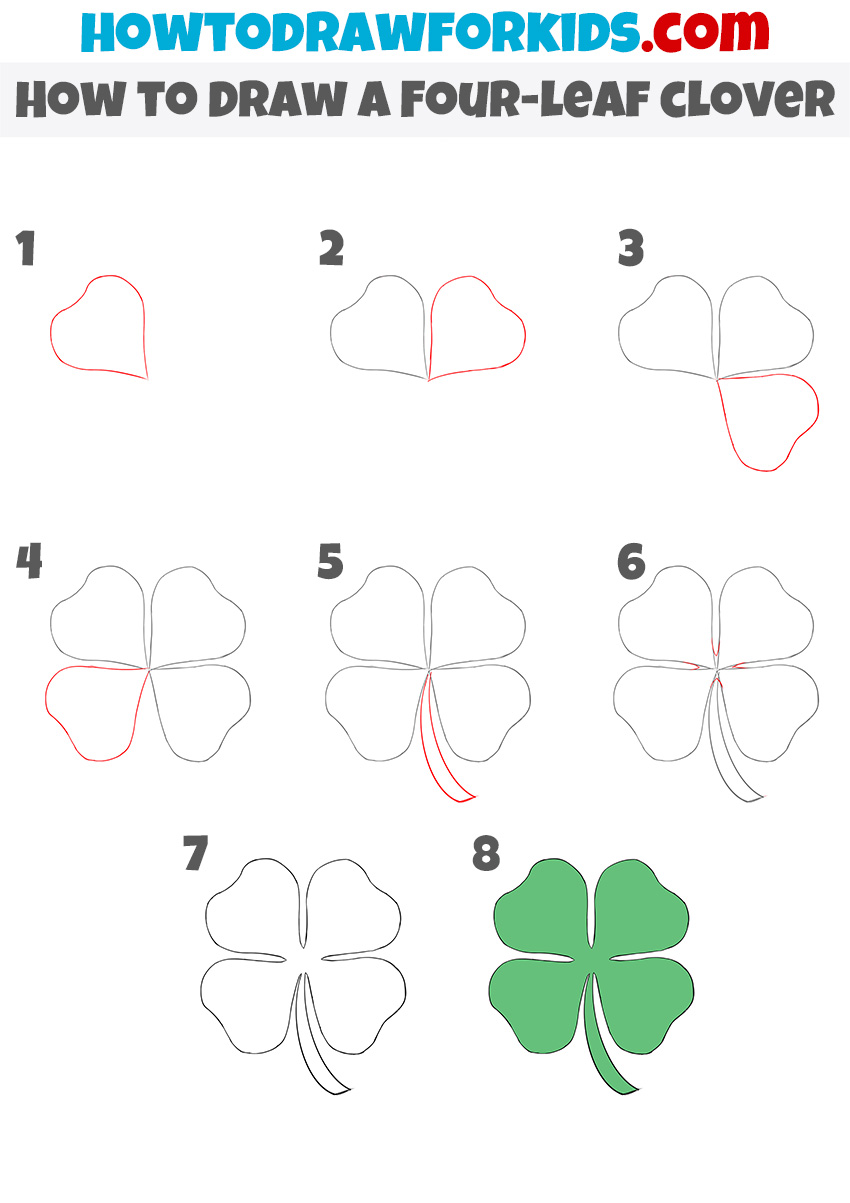
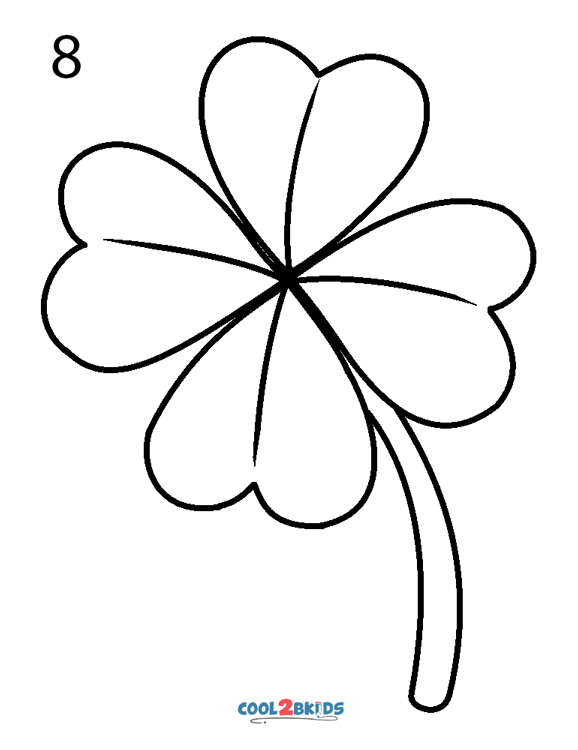
Simple Four Leaf Clover Drawing
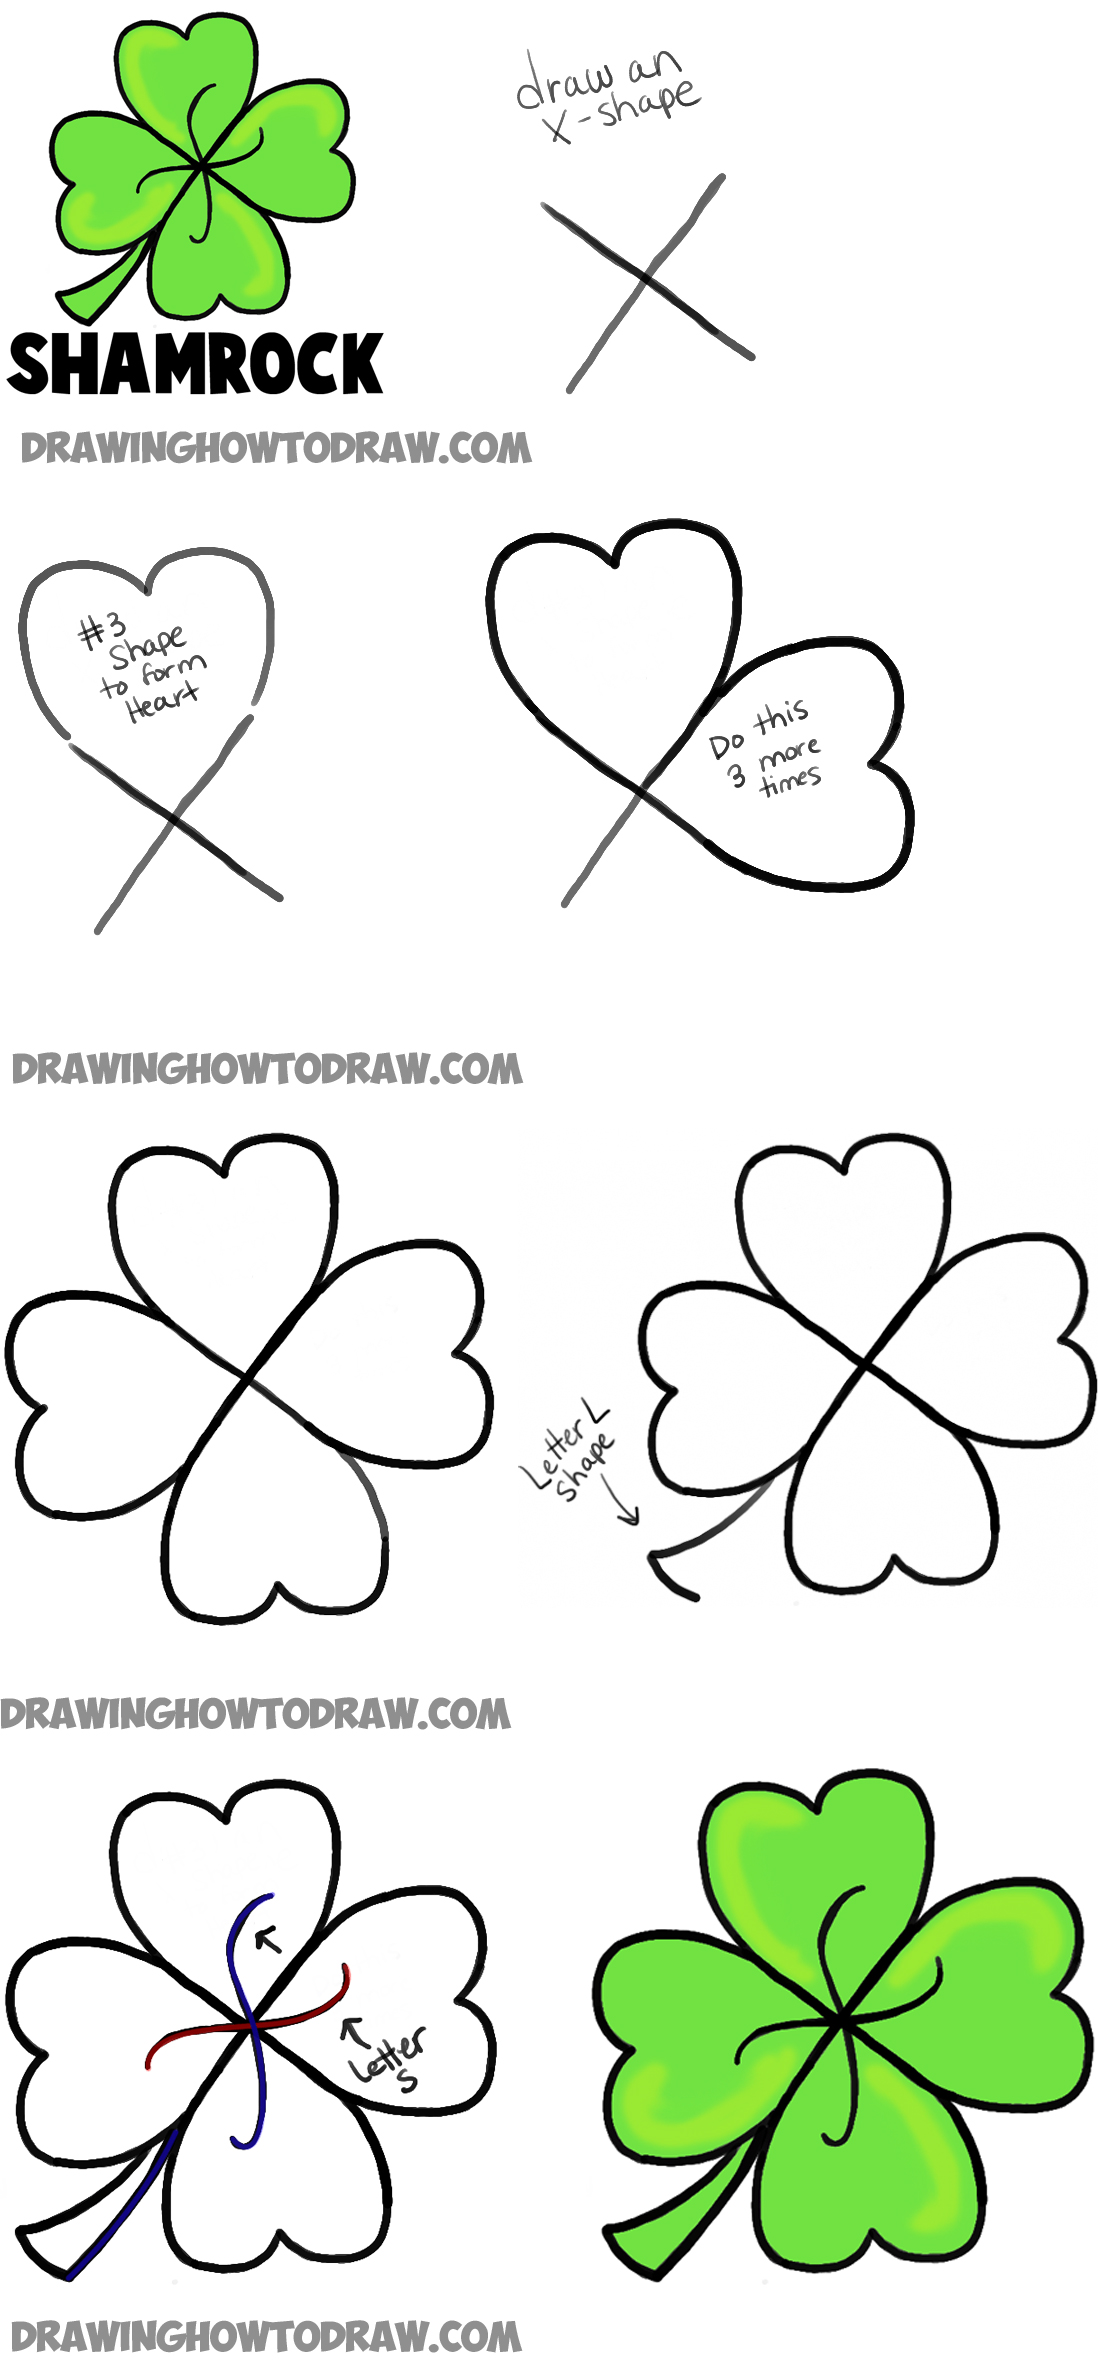
Simple Four Leaf Clover Drawing - Do the same on the next spine. Next, draw two straight lines from the. The first step is to draw a heart. Web step by step directions for a clover drawing. After they complete their clover cutout, let your young artists finish their drawing any way they want. I would recommend creating your drawing with a. We begin constructing the leaves of your clover drawing. We used green and blue construction paper, a black marker, oil pastels, scissors, and glue. Perfect for art teachers and homeschoolers looking to teach kids how to draw a four leaf clover. To create the fourth leaf, draw an additional oval leaf that overlaps with the other leaves.
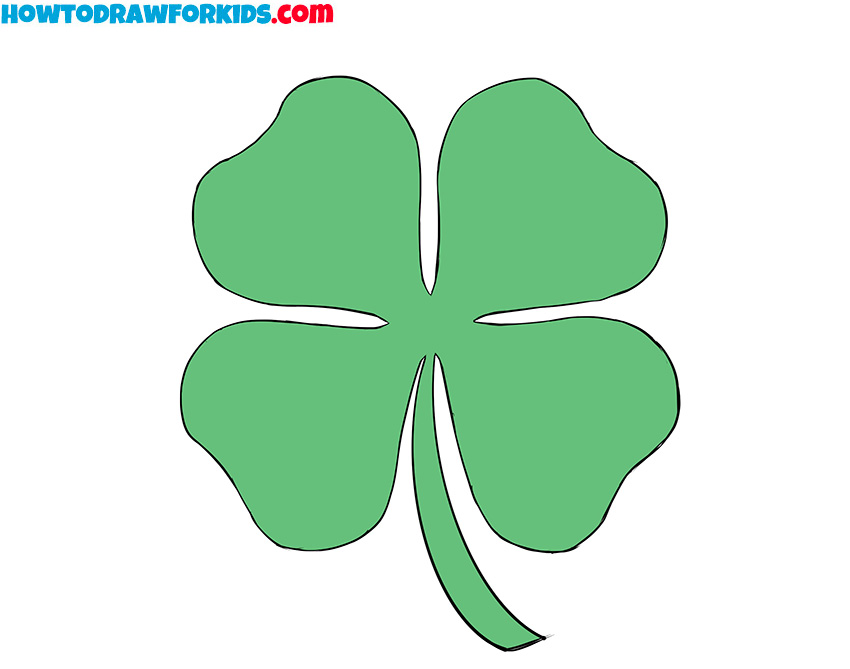
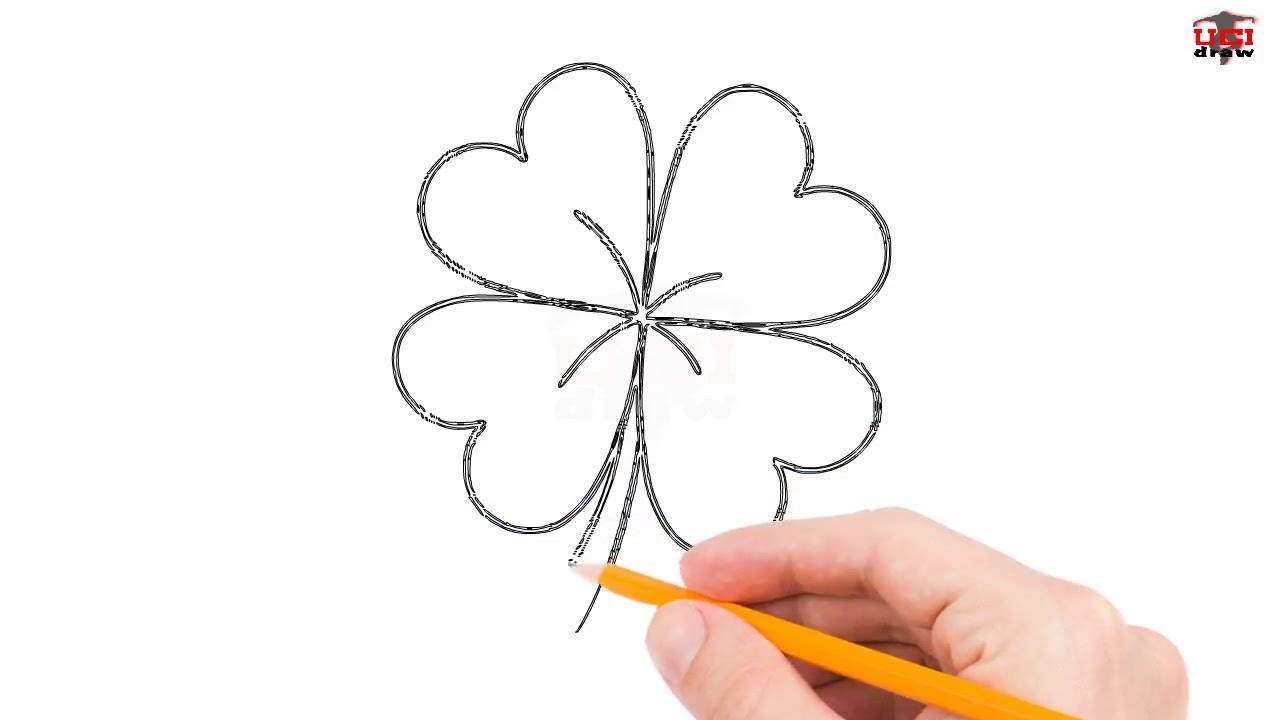
We used green and blue construction paper, a black marker, oil pastels, scissors, and glue. Once all four leaves are drawn, you can erase the pencil dot at the center if you drew one to help you. Add four curved spine lines as shown. Next, draw another heart upside down from the first heart where the tips meet in the middle. Using smooth short lines, connect all the leaves to each other. Draw a heart around one of the spines. Using straight lines, intersecting at the straight angle, show the clove leaf veins growth direction. Divide your circle into 4 sections. To create the fourth leaf, draw an additional oval leaf that overlaps with the other leaves. How to draw a four leaf clover:
Make the third leaf in the lower part. Using straight lines, intersecting at the straight angle, show the clove leaf veins growth direction. How to draw a simple four leaf clover: We used green and blue construction paper, a black marker, oil pastels, scissors, and glue. This can be done by drawing two intersecting. The base of the clover’s stem should also be curved. To create the fourth leaf, draw an additional oval leaf that overlaps with the other leaves. Then you can outline the clover drawing with darker and sharper lines. Perfect for art teachers and homeschoolers looking to teach kids how to draw a four leaf clover. Draw an easy four leaf clover.
4 Leaf Clover Drawing {4 Easy Steps}! The Graphics Fairy
Divide your circle into 4 sections. Next, draw two straight lines from the. Draw yourself a circle, however big you want to make it. You may notice that most of our activities don. We used green and blue construction paper, a black marker, oil pastels, scissors, and glue.

4 Leaf Clover Drawing {4 Easy Steps}! The Graphics Fairy
The heart form of the clover leaves inspires awe in young minds. Do the same on the next spine. Next, draw two straight lines from the. 🍀 join us and learn how to draw a four leaf clover easy. To create the fourth leaf, draw an additional oval leaf that overlaps with the other leaves.
How to Draw a Four Leaf Clover or Shamrocks for Saint Patricks Day
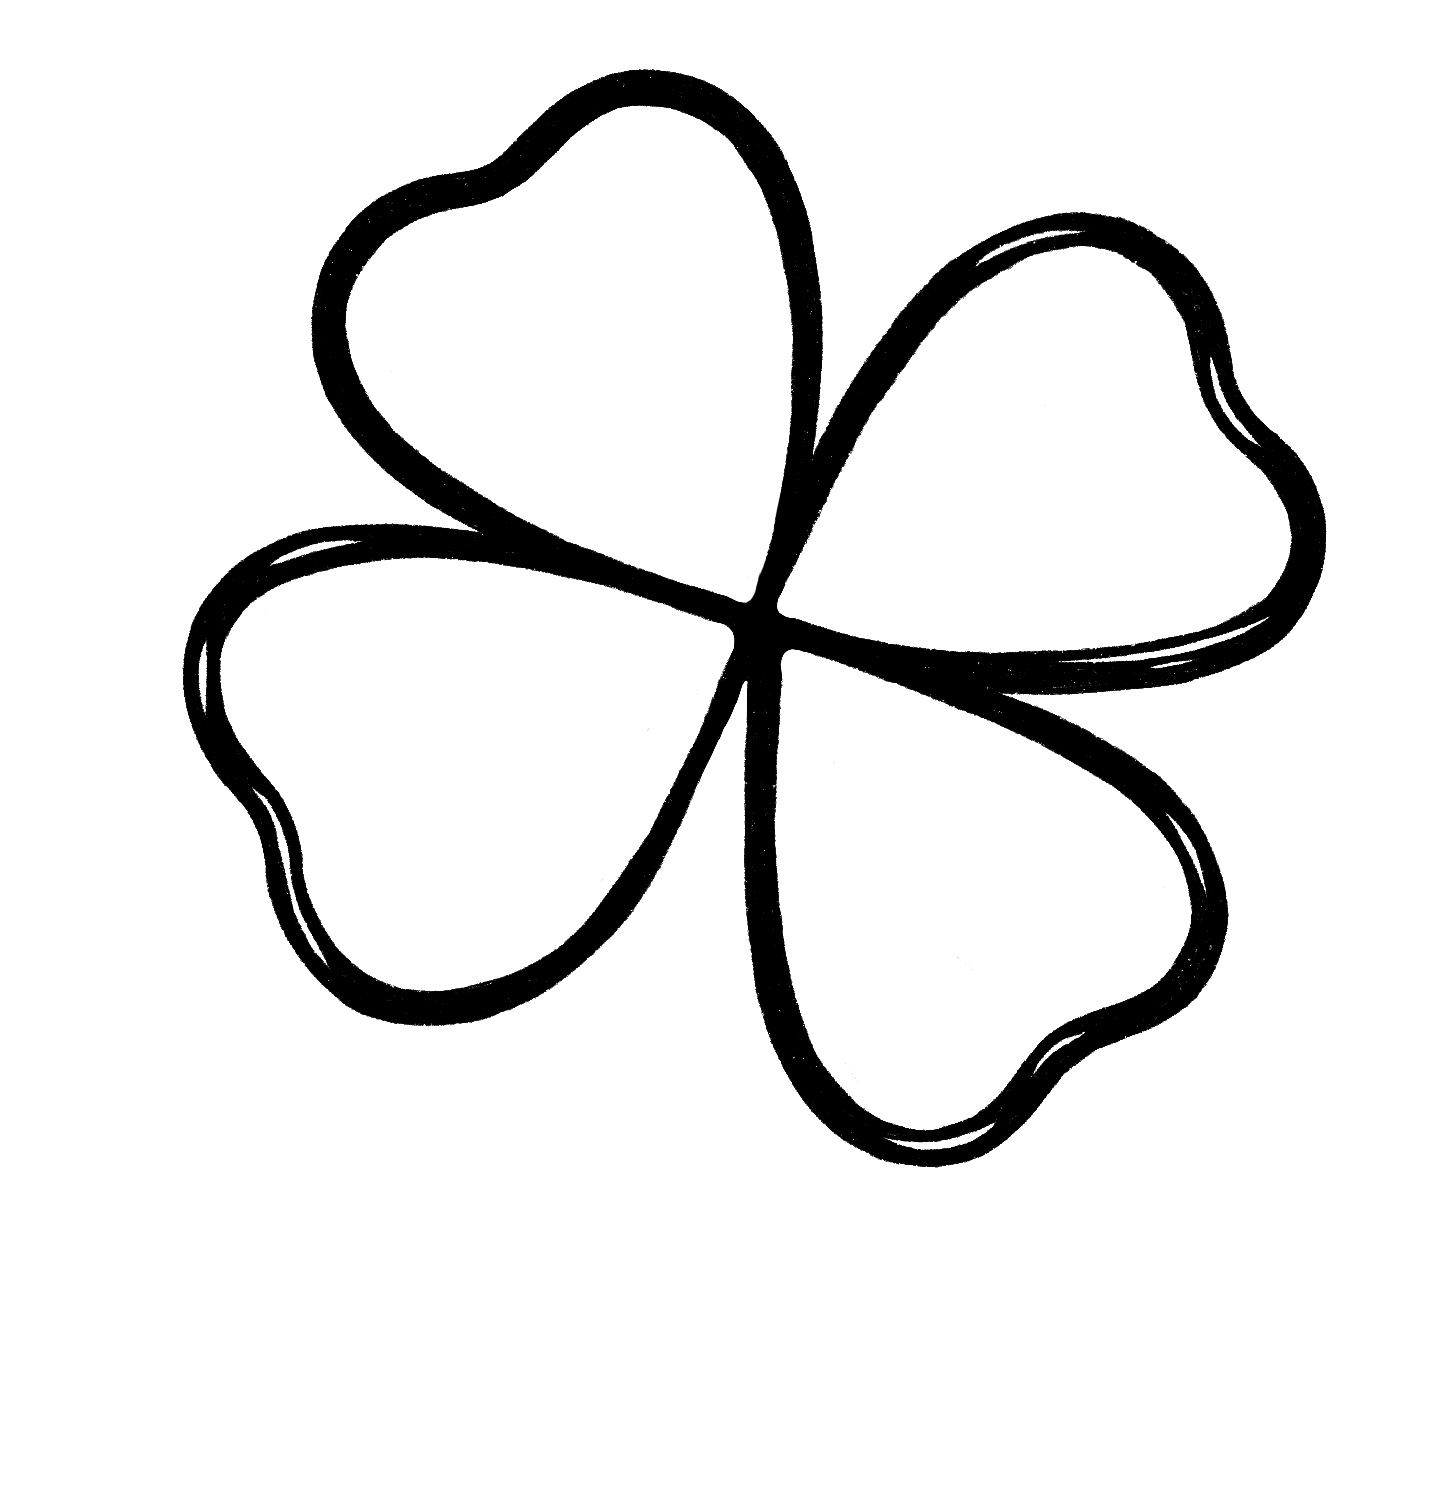
Each leaf is shaped like a heart, so we are going to draw four of these, with the points meeting at the center. Do the same on the next spine. Web step by step directions for a clover drawing. This is another easy step. Web 𝐃𝐨𝐧’𝐭 𝐟𝐨𝐫𝐠𝐞𝐭 𝐭𝐨 𝐬𝐮𝐛𝐬𝐜𝐫𝐢𝐛𝐞 𝐚𝐧𝐝 𝐥𝐢𝐤𝐞 𝐭𝐡𝐢𝐬 𝐯𝐢𝐝𝐞𝐨 𝐭𝐨 𝐣𝐨𝐢𝐧.
How to Draw a FourLeaf Clover Easy Drawing Tutorial For Kids
First sketch the side lines then the bottom edge with one short line. Do the same on the next spine. This how to draw a four leaf clover lesson is especially for young artists. Draw yourself a circle, however big you want to make it. We begin constructing the leaves of your clover drawing.

How to Draw a FourLeaf Clover Easy Drawing Tutorial For Kids
Using straight lines, intersecting at the straight angle, show the clove leaf veins growth direction. How to draw a four leaf clover: This one will be pointing to the bottom right of the clover and will start at the central point as usual. When drawing your stem, make it slightly thicker towards the end. We used green and blue construction.
How to Draw a Four Leaf Clover Step by Step Easy for Beginners/Kids
Next, draw two straight lines from the. How to draw a simple four leaf clover: This one will be pointing to the bottom right of the clover and will start at the central point as usual. Make the third leaf in the lower part. Draw slightly curved lines in the middle of the leaves.

simple drawing of four leaf clover Google Search Drawings
This can be done by drawing two intersecting. So grab your drawing materials and let’s get started! Web how to draw a four leaf cloversubscribe: To create the fourth leaf, draw an additional oval leaf that overlaps with the other leaves. Do the same on the next spine.

How to Draw a FourLeaf Clover Easy Drawing Tutorial For Kids
Web how to draw a four leaf cloversubscribe: Plus, it can be done in numerous ways with varying levels of difficulty. Also included is a downloadable version of this four leaf clover drawing lesson. Trying to learn to draw is much more fun when you have a easy to understand. Perfect for art teachers and homeschoolers looking to teach kids.
How to Draw a FourLeaf Clover Easy Drawing Tutorial For Kids
Kids or grown ups alike can follow these simple steps with this 4 leaf clover drawing guide! How to draw a four leaf clover: Plus, it can be done in numerous ways with varying levels of difficulty. To create the fourth leaf, draw an additional oval leaf that overlaps with the other leaves. If you have overlapping sketch lines, or.
How to Draw a Four Leaf Clover (Step by Step Pictures)
Web how to draw four leaf clover i easy=====in this video i will teach you how to draw a four leaf clover easy simple and very easy step by stepdo. The first step is to draw a heart. Add four curved spine lines as shown. This one will be pointing to the bottom right of the clover and will start.
Draw A Heart Around One Of The Spines.
Web with 6 easy steps to follow, children will enjoy making their own four leaf clover on paper. Plus, it can be done in numerous ways with varying levels of difficulty. Trying to learn to draw is much more fun when you have a easy to understand. How to draw a four leaf clover:
Add Four Curved Spine Lines As Shown.
In this video, we use markers. And the same on the next spine. Creating a stem on your clover drawing. Make the third leaf in the lower part.
First Sketch The Side Lines Then The Bottom Edge With One Short Line.
Do the same on the next spine. So grab your drawing materials and let’s get started! Web with this easy four leaf clover drawing ideas, you can learn how to draw a four leaf clover easily. Web step by step directions for a clover drawing.
🍀 Join Us And Learn How To Draw A Four Leaf Clover Easy.
Using straight lines, intersecting at the straight angle, show the clove leaf veins growth direction. When drawing your stem, make it slightly thicker towards the end. Draw a circle that will serve as your clover base and draw a line to show the direction of the stalk. If you have overlapping sketch lines, or just want to neaten up your lines, begin tracing one.