Steps To Draw A Nose
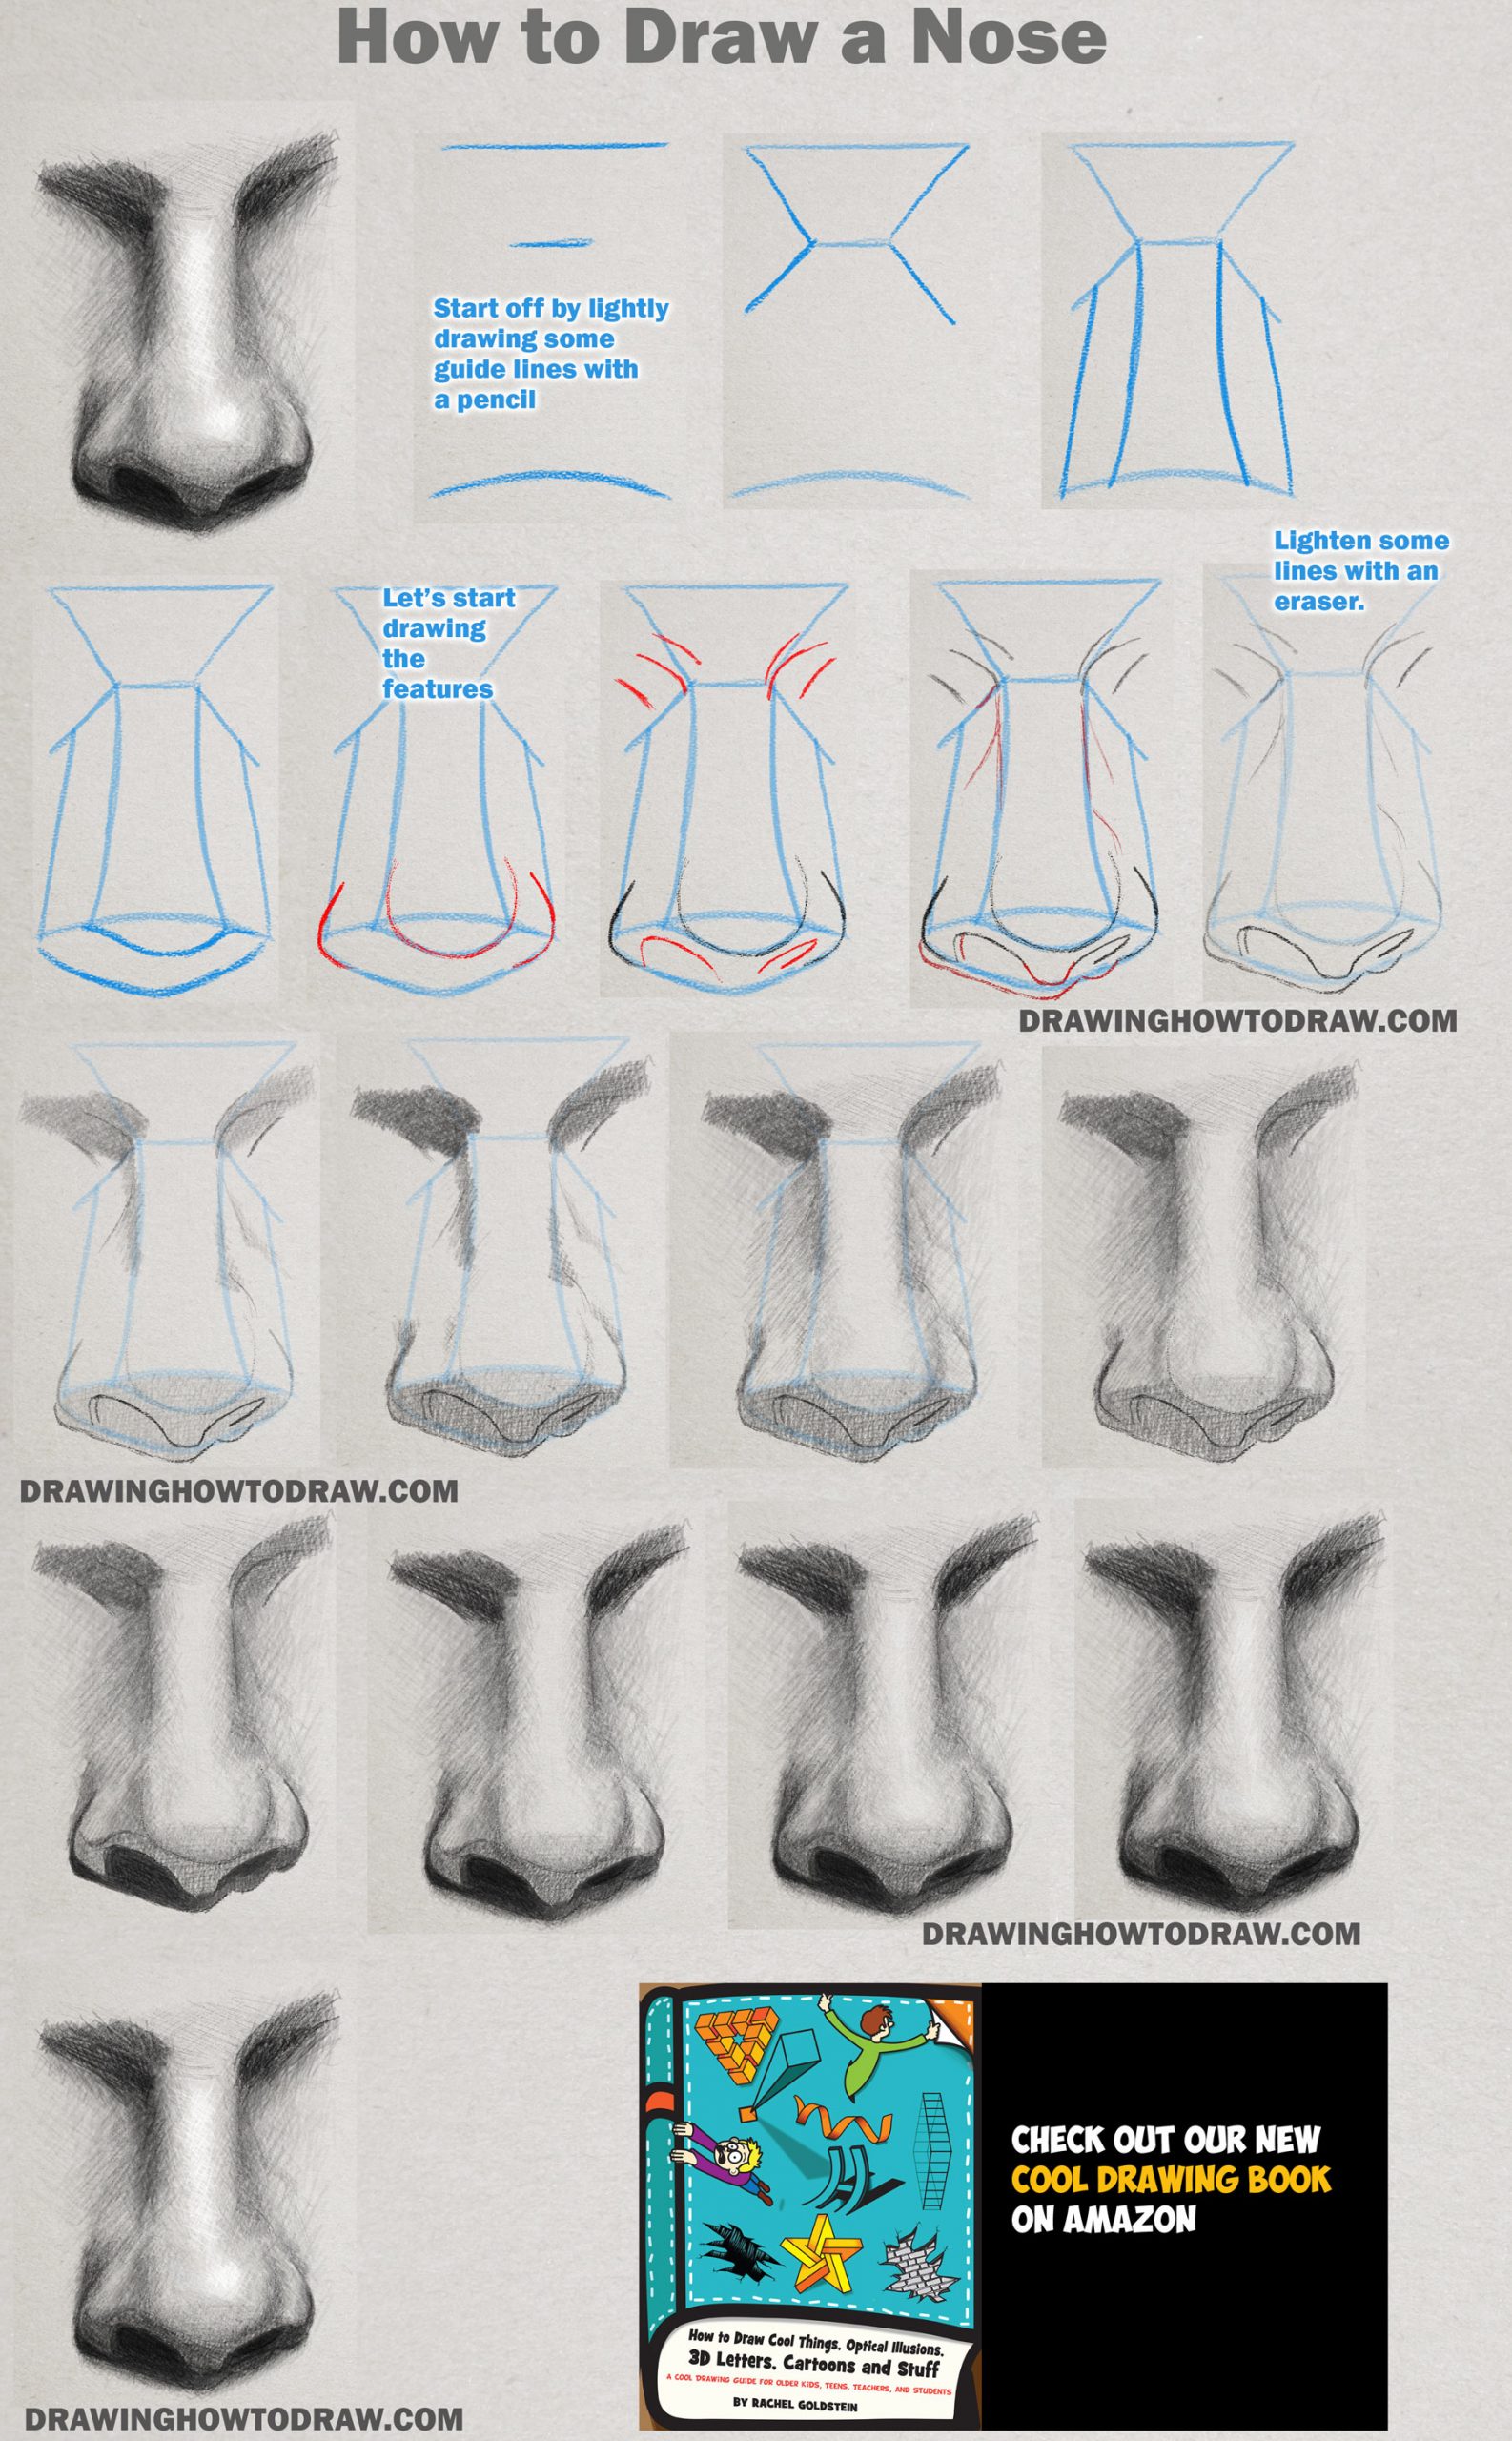
Steps To Draw A Nose - Erase the guide lines formed by the perpendicular lines. Draw the nose tip and wings. “when they start drawing, a lot of people put the nose too high,” he says. These will serve as the nose bridge. Second step is sketching, where we add organic lines and shapes. Web jannik sinner, world no 2. (1) first of all, we’ll need that same triangle between the eyes that we learned about in the how to draw eyes tutorial. To begin the first step in nose drawing, you should choose a soft pencil and use a ruler to draw a vertical line in the middle of your page. Web step 1 (optional): Draw the base and bridge:
The third step is blocking and shading two tonal values to identify the highlights and the shadows. Jonodryi really enjoyed making this video! Drawing the nose with pencil. Mapping out the particular nose we're drawing by finding its specific angles. To begin the first step in nose drawing, you should choose a soft pencil and use a ruler to draw a vertical line in the middle of your page. Web repeat the drawing on the opposite side. (2) next, we draw the cross of our pyramid. With a light pencil, preferably an h pencil, begin to draw the right nostril starting from the vertical line, its inner part should touch the vertical line. Wrap your line up towards the bridge of the nose and give the tip a unique shape. Making sure the nose sits in the lower half of the face, with.
The bear's facial features will small in proportion to his size. Draw a horizontal line at the bottom. Draw the nose’s tip by following the shape of the main circle. Since we’re drawing the nose side view, the shape we’re going to sketch with our 2h pencil is a triangle. To begin the first step in nose drawing, you should choose a soft pencil and use a ruler to draw a vertical line in the middle of your page. Second step is sketching, where we add organic lines and shapes. The highest point of the bridge of the nose does as well. In a simple way this tutorial takes a basic look at the nose. To begin, let’s take a look at the five main parts of the nose so that we know the basics before we start drawing: Connect the bottom of the nostrils lightly to the bottom tip of the circle.

How To Draw A Realistic Nose in 4 Simple Steps Udemy Blog
The bear's facial features will small in proportion to his size. (2) next, we draw the cross of our pyramid. (these likes will be useful if you want to draw this nose within the face tutorial) draw a straight vertical line. To begin the first step in nose drawing, you should choose a soft pencil and use a ruler to.
Nose Drawing — How To Draw A Nose Step By Step
The third step is blocking and shading two tonal values to identify the highlights and the shadows. (these likes will be useful if you want to draw this nose within the face tutorial) draw a straight vertical line. Search for “how to draw a nose step by step” on youtube or other video platforms to find a variety of tutorials.
How to Draw and Shade a Realistic Nose in Pencil or Graphite Easy Step
Web how to draw a nose from the side. Web add the ears, nose, eyes, and mouth. With a light pencil, preferably an h pencil, begin to draw the right nostril starting from the vertical line, its inner part should touch the vertical line. Take a close look at your reference image or the nose you're. Draw a third line,.
Easy Things to Draw Easy to Draw Nose Step by Step Anderson Theshe
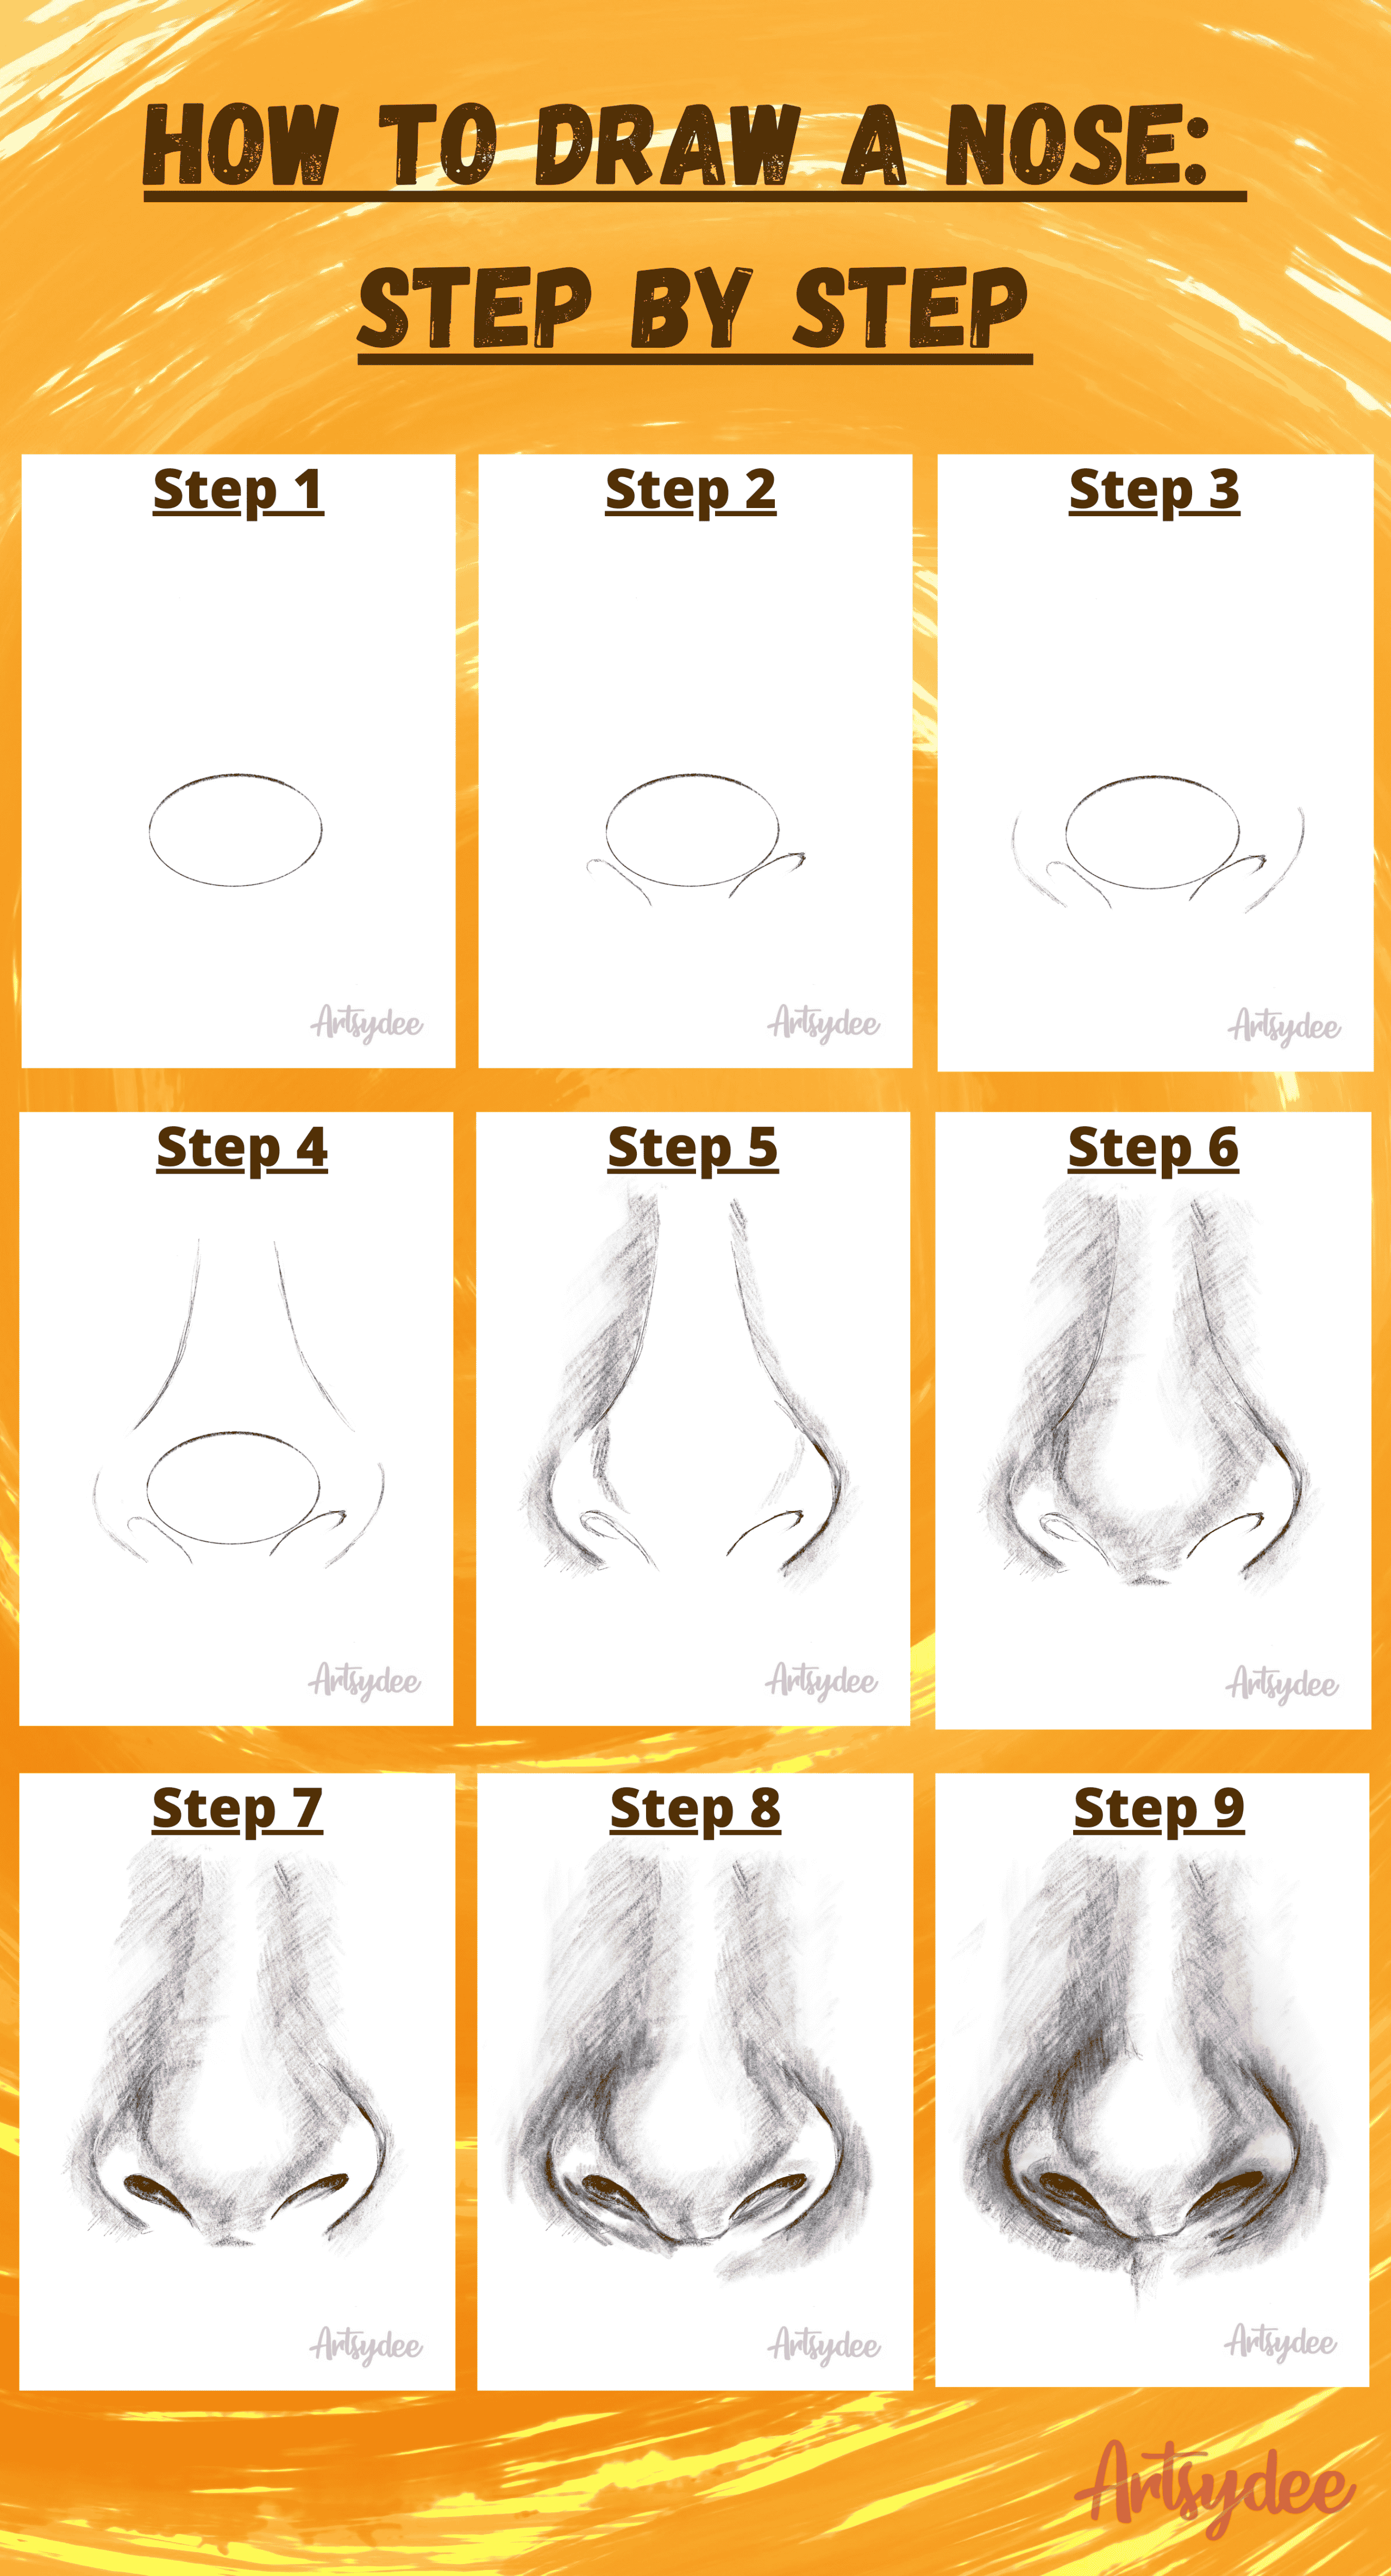
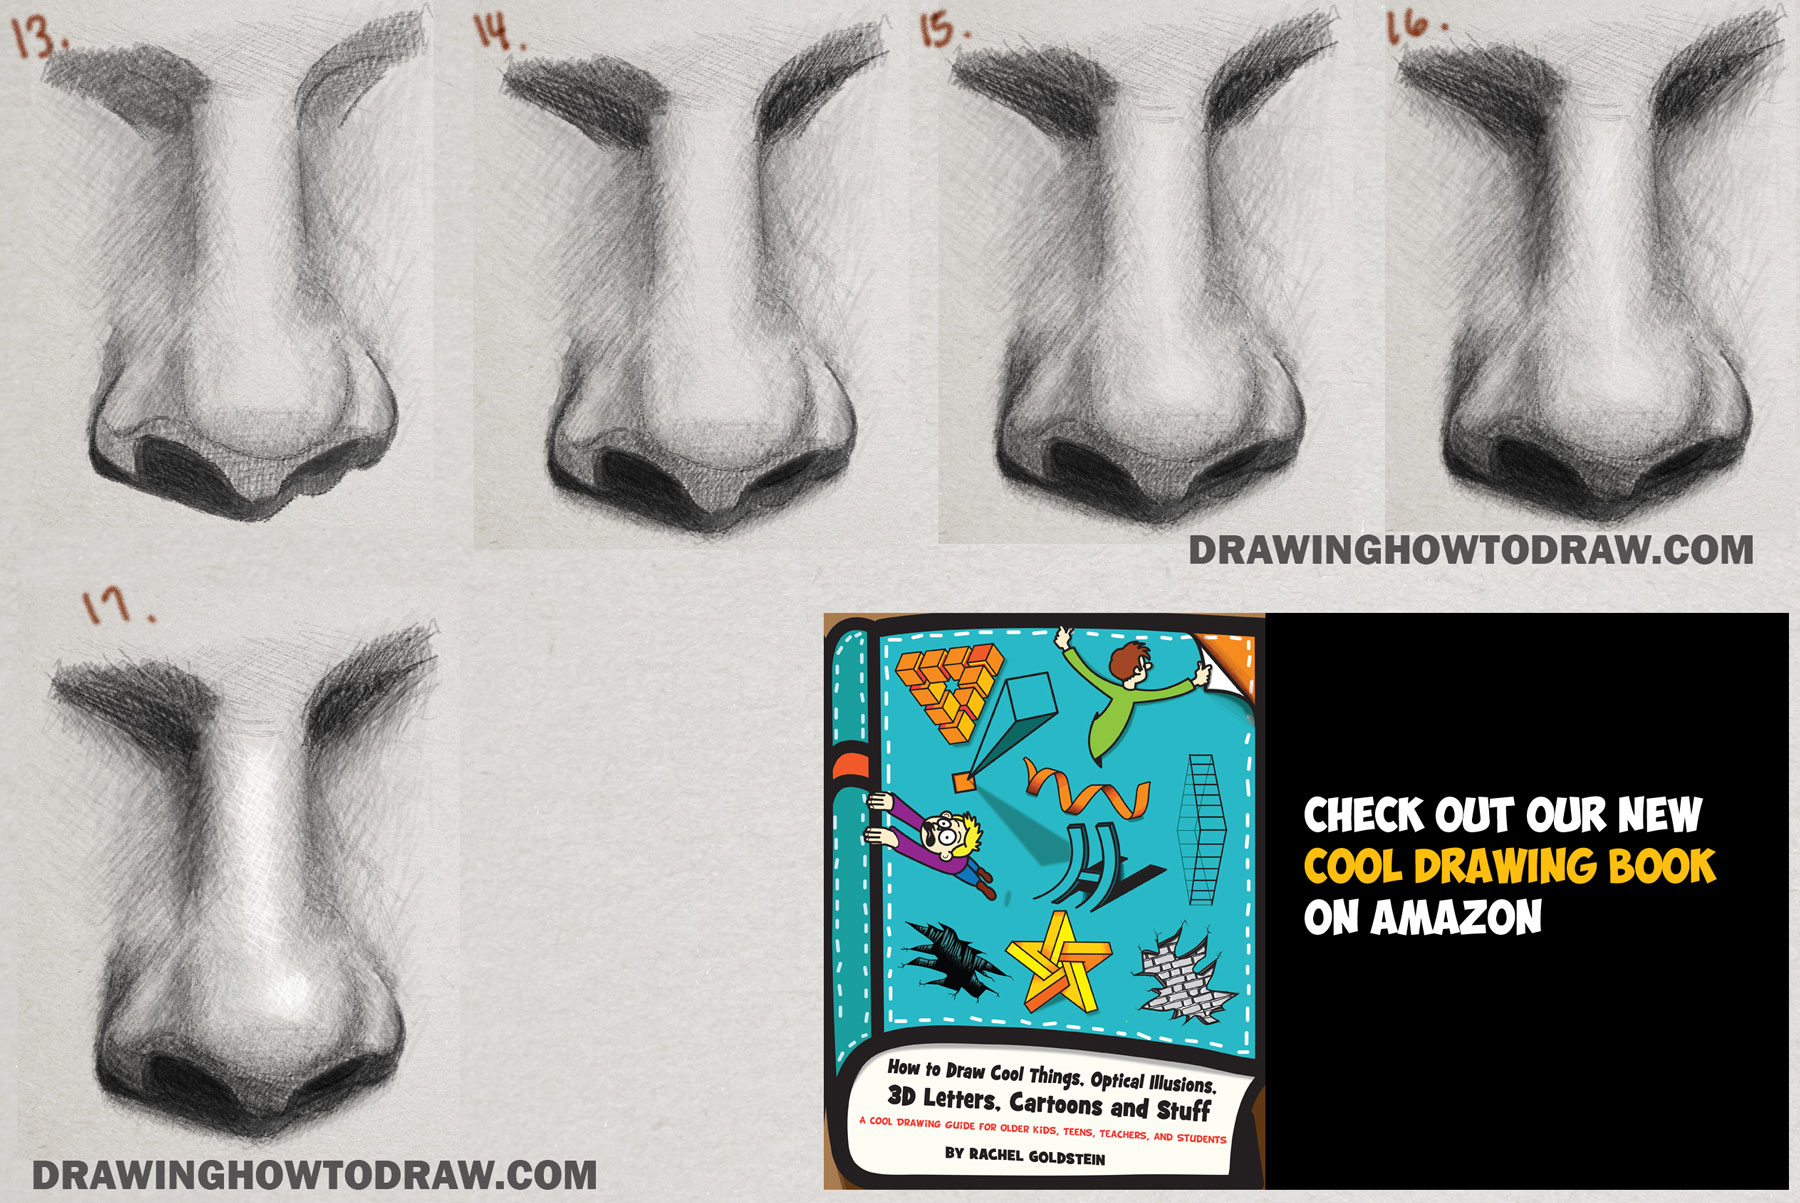
Finally, shade the opening of the nostrils. Jonodryi really enjoyed making this video! Since we’re drawing the nose side view, the shape we’re going to sketch with our 2h pencil is a triangle. With the shading in place, it's time to focus on the nose tip and wings. Web how to draw a nose from the side.
How to Draw and Shade a Realistic Nose in Pencil or Graphite Easy Step
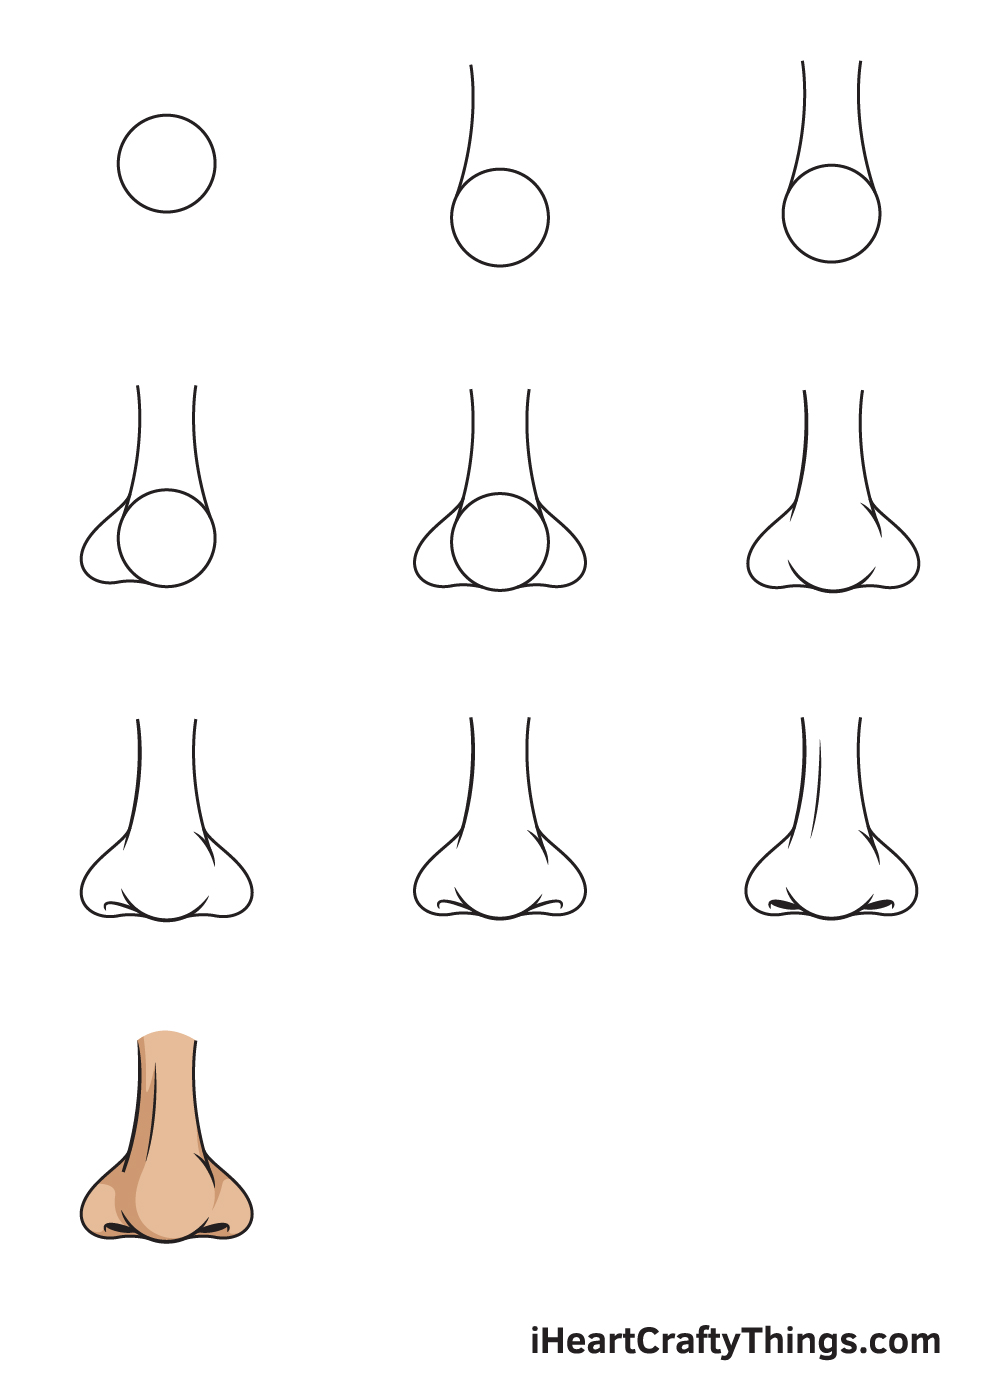
Connect the bottom of the nostrils lightly to the bottom tip of the circle. Draw the nose tip and wings. Wendy nelson :)🔔 subscribe for m. Web get access to the full class and all my art classes on skillshare! Web this tutorial gives you a basic look at the shapes and anatomy needed for drawing realistic noses.
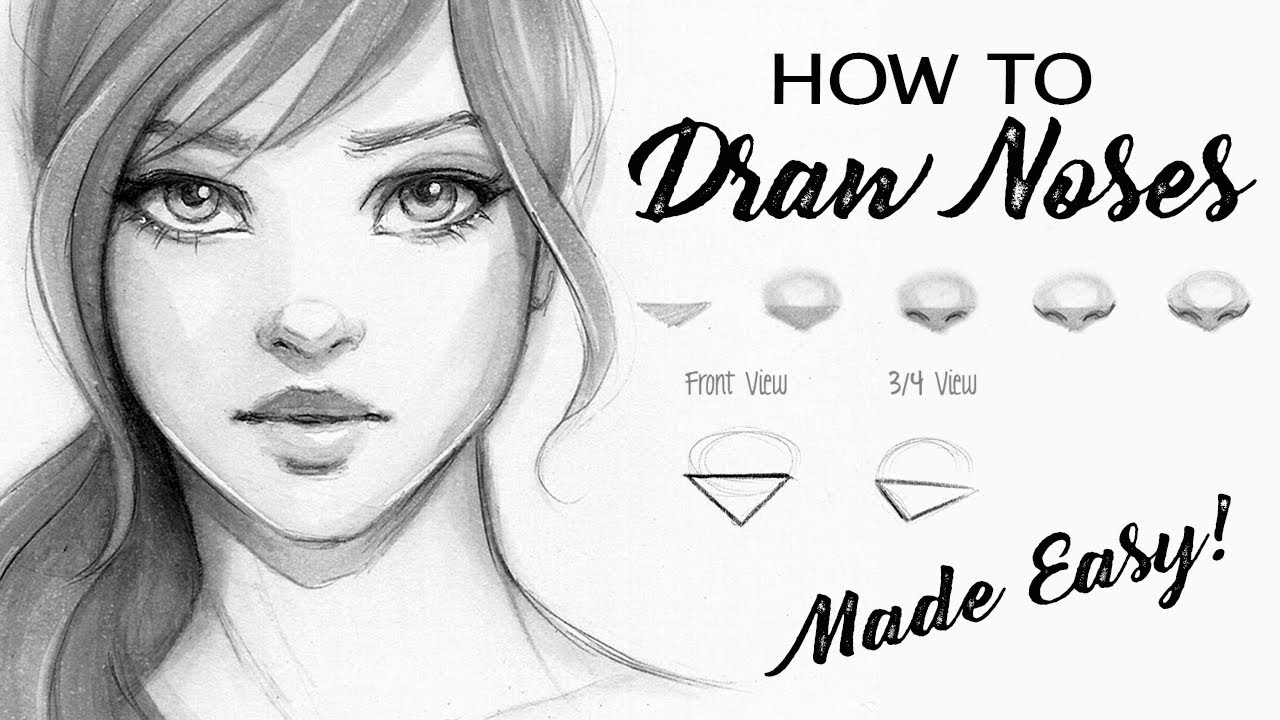
How to Draw a Nose Step by Step Tutorial! YouTube
Flank the circle with two lines, gently curving downwards; The bear's facial features will small in proportion to his size. The third step is blocking and shading two tonal values to identify the highlights and the shadows. Begin with a circle for the base of the nose. Search for “how to draw a nose step by step” on youtube or.
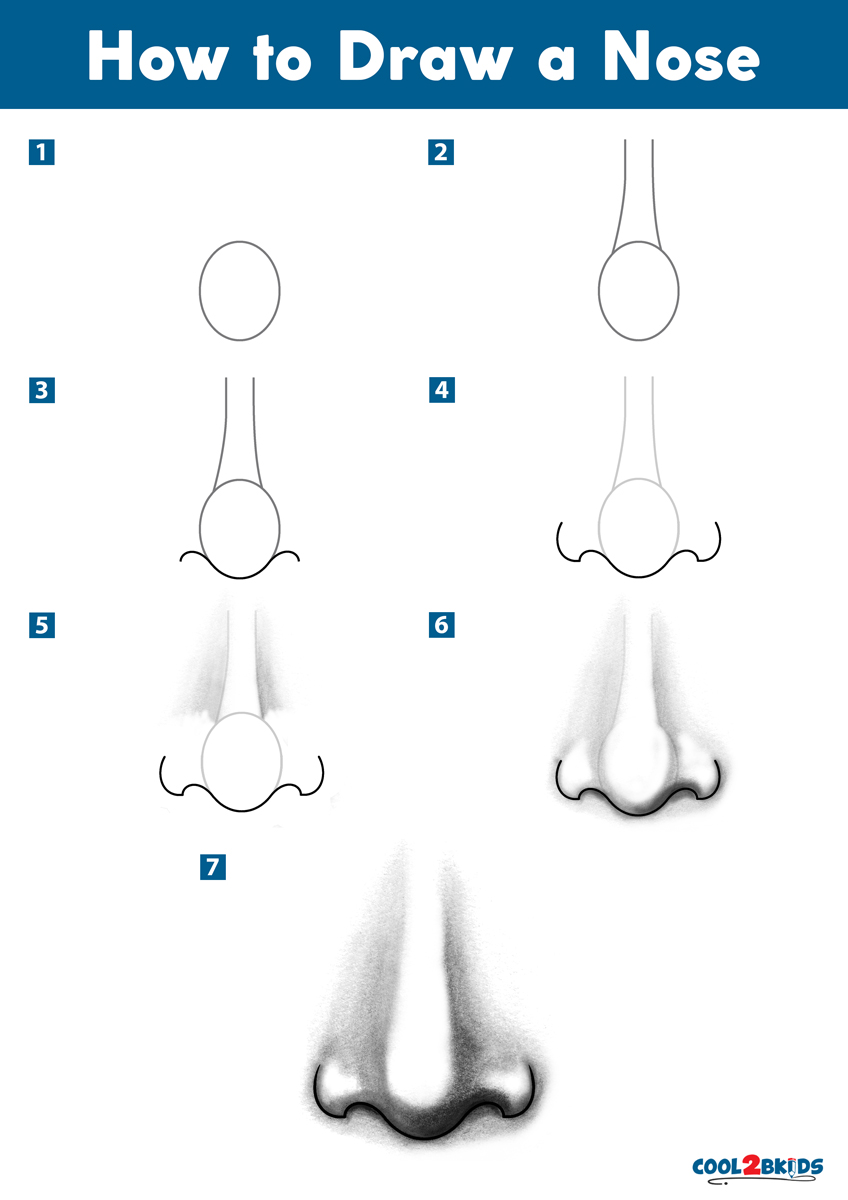
How to Draw a Nose Cool2bKids
Draw another vertical line parallel to the first. Measuring and creating your nose drawing’s grid lines. You can improve your drawing skills from he. The wings of the nose. Erase the guide lines formed by the perpendicular lines.

4 EASY STEPS TO DRAW NOSE FOR BEGINNERS SIMPLE NOSE SKETCH TUTORIAL
Web how to draw a nose from the side. Take a close look at your reference image or the nose you're. Take a look at the image below before following the steps so that everything fits on the bear. You can improve your drawing skills from he. Erase the guide lines formed by the perpendicular lines.

How to Draw a Nose 7 Simple Steps RapidFireArt
Draw a horizontal line at the bottom. Just below and to the sides of your circle, add the nostrils, ensuring they are proportional. Draw a third line, at the same distance and parallel to the second. These will serve as the nose bridge. Erase the guide lines formed by the perpendicular lines.
how to draw nose with pencil step by step for beginners drawing
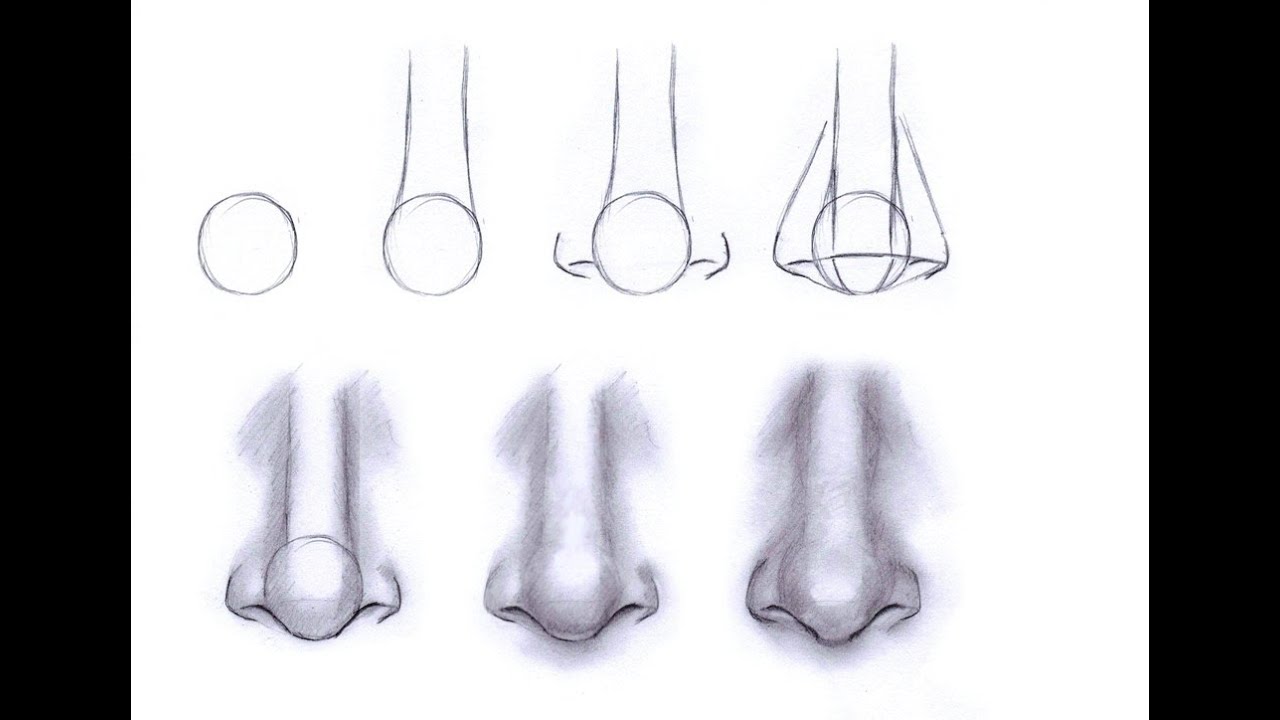
Web step 1 (optional): Just below and to the sides of your circle, add the nostrils, ensuring they are proportional. Sizes can vary depending on how you want the nose to look and feel free to add a rectangular structure to better understand each. (1) first of all, we’ll need that same triangle between the eyes that we learned about.
Connect That Line To The Top.
Follow these steps to draw the nose tip and wings: Draw the nose’s tip and bridge. In a simple way this tutorial takes a basic look at the nose. Wendy nelson :)🔔 subscribe for m.
Web To Easily Represent The Tip Of The Nose, Draw A Bigger Sphere In The Center, With Two Small Ones On The Sides.
Web 7 easy steps to draw a perfect nose step 1. Make sure to pause and rewind as needed to follow along at your own pace. Draw the nose tip and wings. Take a close look at your reference image or the nose you're.
Wrap Your Line Up Towards The Bridge Of The Nose And Give The Tip A Unique Shape.
The wings of the nose. Here’s a look at may 13, 2024 results for each game: Web here i’ll be using the headshapes from the previous tutorials, of course. Web add the ears, nose, eyes, and mouth.
Next, Draw A Horizontal Line Through The Bottom Of The Vertical Line.
This triangle marks the area between the eyebrows and the nose bone. Second step is sketching, where we add organic lines and shapes. Erase the guide lines formed by the perpendicular lines. Draw another vertical line parallel to the first.